


Important facts about (Guided) Surgery, in no particular order:
1. The only way to replicate the 3D design during surgery is to use a fully guided stent. If you use a pilot stent, or if you get to your final osteotomy, and decide to remove the stent and place the implant freehand, you may veer off track. Implant systems such as Nobel Active are designed with aggressive cutting ends so that you can do this on purpose. You can easily get off track placing these types of implants free-hand.
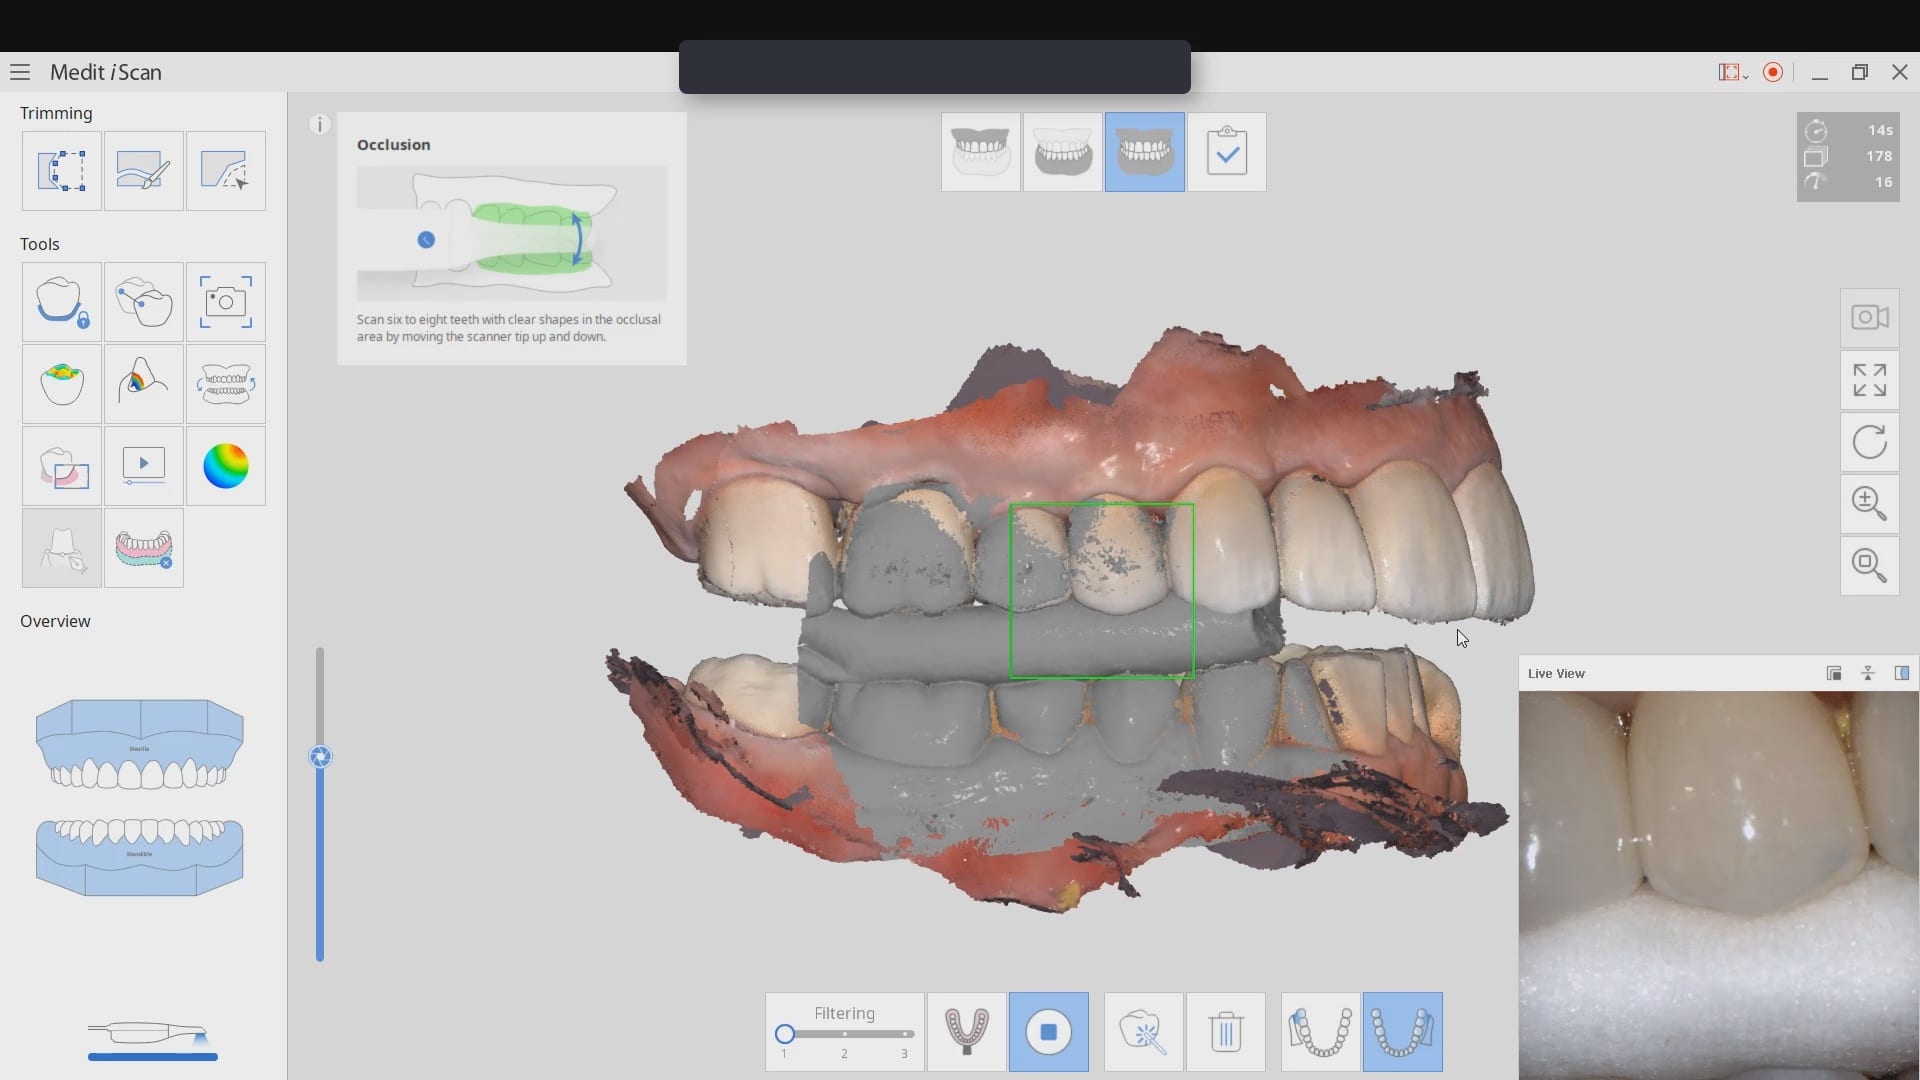
2. There is a very specific way you must scan patients that are edentulous vs. partially edentulous. You must also scan heavily restored dentition differently than patients that do not have any radio-opaque fillings. This is detailed for you in the Remote Designs and Stents Section of our site, on the top navigation bar. Heavily restored dentition requires a scan with an appliance, and we need at least four to five teeth without metal / opacity to fabricate an accurate cad/cam derived stent.
 3. You cannot simply scan an edentulous patient, or a partially edentulous patient that is due to become completely edentulous, without proper planning and scanning protocols, if you want to do these cases guided.
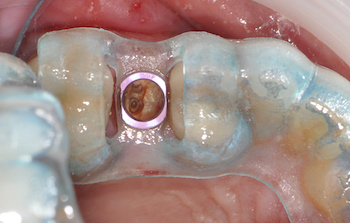
For instance, if you look at this case to the left, we have no reference frame with regards to where the final prosthesis will be in relation to the final vertical dimension or the correct occlusal scheme. Also. if you notice, the distal teeth are not a reliable source of anchorage for the stents, so accurate surgery may not be attained.
Depending on experience and training level, we must take all these into consideration before designing the case for dental implants. You should also have a very good grasp of the costs associated with these cases when presenting to patients, otherwise the lab bills can surpass the amount of time you spend on these cases and the costs you accrue in unnecessary parts that you order for no reason.
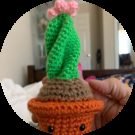
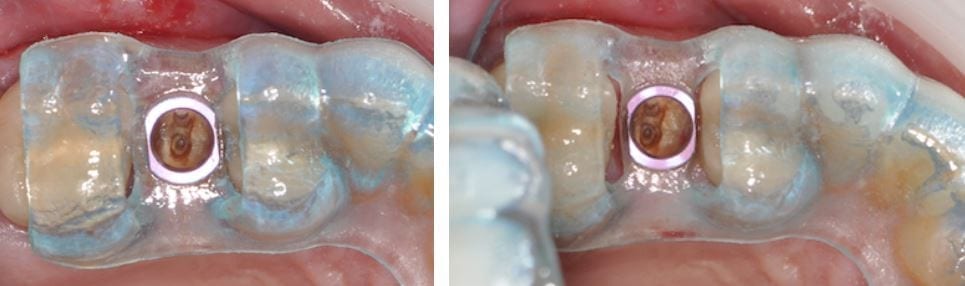
4. The placement of the rings within the stent are very common issues that you must pay attention to. This is generally not an issue with molars, but edentulous spaces forward from those zone may sometimes be narrower than the rings themselves. There are a lot of solutions to this and we make sure you are aware of them. The easiest solution is to adjust the rings and the acrylic to make sure it is completely seated and not binding anywhere. But doing this can some times weaken the support and lead to stent fractures or displacement of the rings
5. ALWAYS plan with access during surgery in mind. A lot of systems cost well over 10,000$ and are clearly not designed by a clinician. it is imparrative to keep in mind that a little homework will save you a lot of grief and trouble. We are
[videopress GQLlnUww w=”1200″ hd=”true”]here to assist you with this important decision making process
6. Never assume that a graft has healed properly. It may look great on an x-ray or a CT scan, but until you flap the area and visualize it, you really won’t know. This is a sample case with an immediate post op x-ray on the left, and a one week post op where the patient had an infection and swelling from the graft breaking apart.


7.  Many people believe that guided surgery means that you have “tissue punch”. Although this is less traumatic to the patient, it can sometimes lead to issues that can cause the implant to fail. If the tissue does not completely heal over the healing abutments or cover screws, a peri-coronitis type of phenomon can occur.
Think of it as an operculum that gets infected.This can lead to undesired bone loss around the top of the implant. If intervened early enough, the area can be debrided or cleaned with a soft tissue laser and a tall collar can keep the tissue away. A tall collar on the other hand, if placed too soon, may have its owns consequences. The patient can inadvertantly bite into an abutment which can lead to failure. Most clinicians prefer to flap the area, place the fixture and a cover screw, then close the flap
8. The ring in the sleeve MAY pop out during surgery. Make sure to properly protect the patient’s airway at all times during surgery. If the rings comes out, simply re-inserted into the stent and proceed with surgery. A lot of people actually prefer to be able to easily remove the ring, sterilize it, and use it for other matters
9. When scanning a patient for implant reasons, make sure opposing dentistion are not touching each other in tooth borne cases. It is very difficult to design a case when the teeth are overlapping. For orthodontic scans, make sure the patient is biting all the way
10. The carrier for the implant sometimes mechanicallt locks to the internal of a fixture. When trying to disassemle the complex, you may inadvertantly spin the implant counterclockwise, losing your primary stability. There are east remedies for this if you anticipate it well.
[videopress rIP2PDGa w=”1200″ hd=”true”]11. There are a few reasons why your implant may not reach its final postion when using guided surgery. Assuming all the proper protocols were followed, the two main likley reasons are that you may have not confirmed that you fully drilled to depth and did not bottom out the drills. The other reason may be becuase your carrier bumped into bone and did not allow you to seat all the way. Most carriers are wider than the implant or the ostetomy placed.
12. Make sure you double check the plan and consider confirming the exact drills that are to be used with your assitant. When multiple implants are involved, consider placing the one with that is going to be placed deeper or use the longest drill in the equation. Once that is done, place the drill as far away from your reach so that you do not inadvertantly use it for the next osteotomy
13. Most guided cases are short in duration. Consider using anesthetic without epinephrine; blood flow is good for the wound! When using a blade to make an incision avoid placing it on the crest of the ridge so you don’t have to manage two flaps, and when you seat the stent, make sure you don’t crush the tissue and occlude blood flow. The following information was submitted by a colleague, Dr. James Tom
Using local anesthesia for CT guided implant surgery- Dr. James Tom (Clinical Associate Professor, Director CHAMP+ Anesthesiology, Dental Anesthesiology Service, Ostrow School of Dentistry)
“Using local anesthesia for CT guided implant surgery Practitioners wanting to preserve blood flow to the surgical implant site and provide a short duration of local anesthesia are practically limited to two commercially available “plain” (non-epiephrine containing) dental anesthetics. Of the two available in the United States, prilocaine 4% solution (Citanest Plain – Dentsply) or mepivicaine plain (Polocaine – Dentsply, Carbocaine – Cook-Waite, or Scandonest – Septodont) generally provide anywhere from 20-25 minutes of pulpal anesthesia, respectively, or between 105 and 90 minutes of soft-tissue anesthesia. When these two anesthetic solutions are employed in infiltration techniques as described by Heller and Shankland in 2001 (Heller AA & Shankland WE. 2001 . Alternative to the Mandibular Block Anesthesia When Placing Mandibular Implants Posterior to the Mental Foramen. Journal of Implantology. 127-133), the incidence of inferior alveolar paresthesia can be reduced. Leaving out the commonly used vasoconstrictor epinephrine will also encourage the vasodilative properties of amide local anesthetics.”
14. you will likely need drill extenders to keep from bumping into stents in certain situations
[videopress 1cLsZEcy w=”1200″ hd=”true”]