


Download the OBJ files and import them into smile design software and do a virtual wax up for a real case


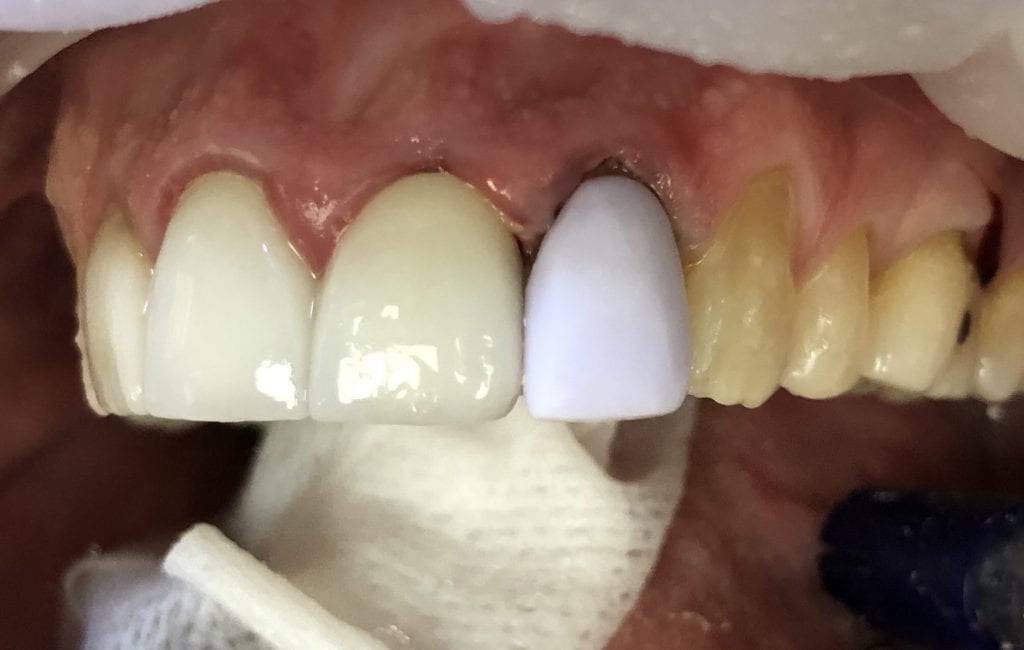
Digital Dental Impressions with Intra-Oral and Desktop Scanners
Download the OBJ files and import them into smile design software and do a virtual wax up for a real case


Here are fundamental principles every dentist should understand about intra-oral scanners, how we can introduce errors, how to manage them, follow proper scan strategies, maintain accuracy across the arch and lots of other nuggets
Every ios hates moving parts (tongue and cheek)
Every ios hates dark areas like the oropharynx, black triangles, etc…
Every ios hates liquids (blood on the margins)
Every ios can “get off track” and form double images
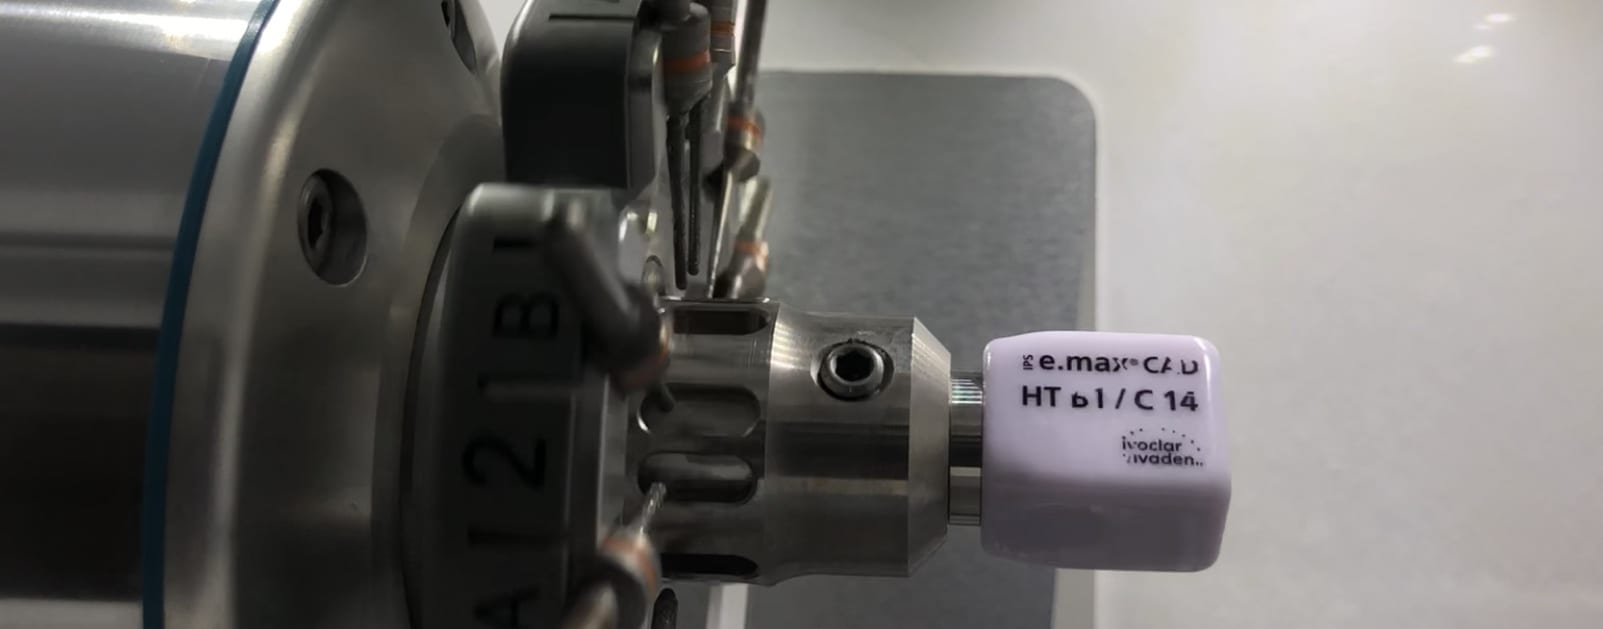
Every ios struggles with highly reflective surfaces like emax, zirconia, and shinny metal.
The principles shown in the video address every one of these factors and how you can control them and get accurate arch scans in just a minute with the medit i500
I have tried virtually every ios out there and they all struggle with my mouth full of emax. the focal length of the medit from -1.5 mm to 17 mm is the largest variation on the market, and the way the medit handles highly reflective surfaces also outperforms every other ios.
In January, it will be in turbo boost mode when new software is released.

Full arch scan, metal abutment, ceramics, lots of reflective surfaces all captured in under 90 seconds with no powder. just have to hit the metal at different angles and focal lengths, retract the lips and tongue and dry and you will fly with your ios
[videopress iGPf740m permalink=”false” hd=”true” loop=”true” autoplay=”true”]

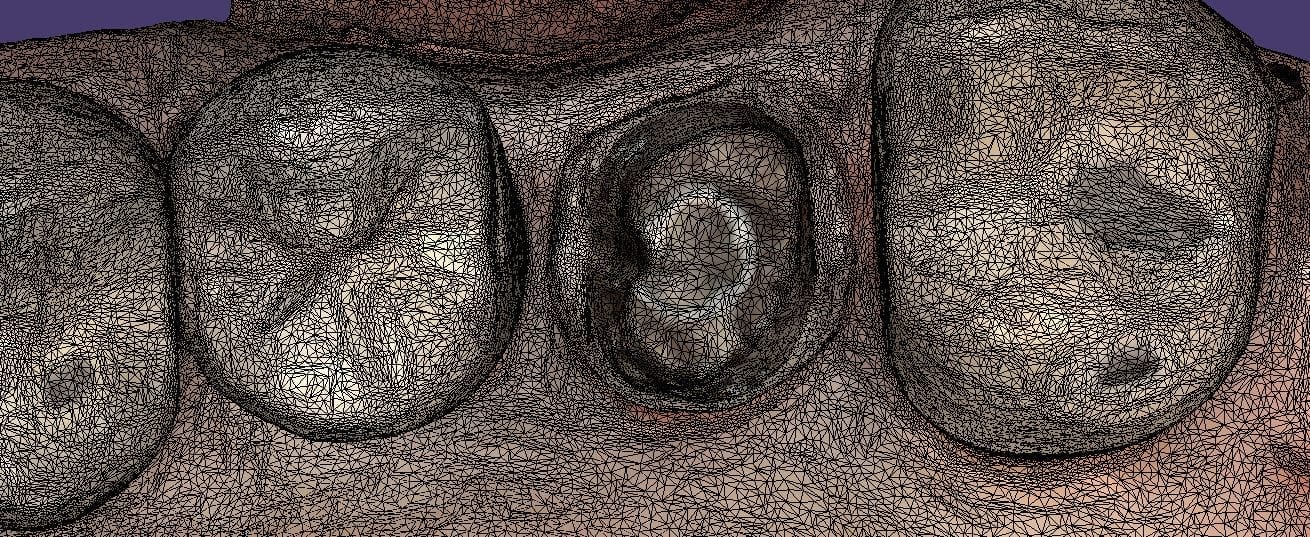
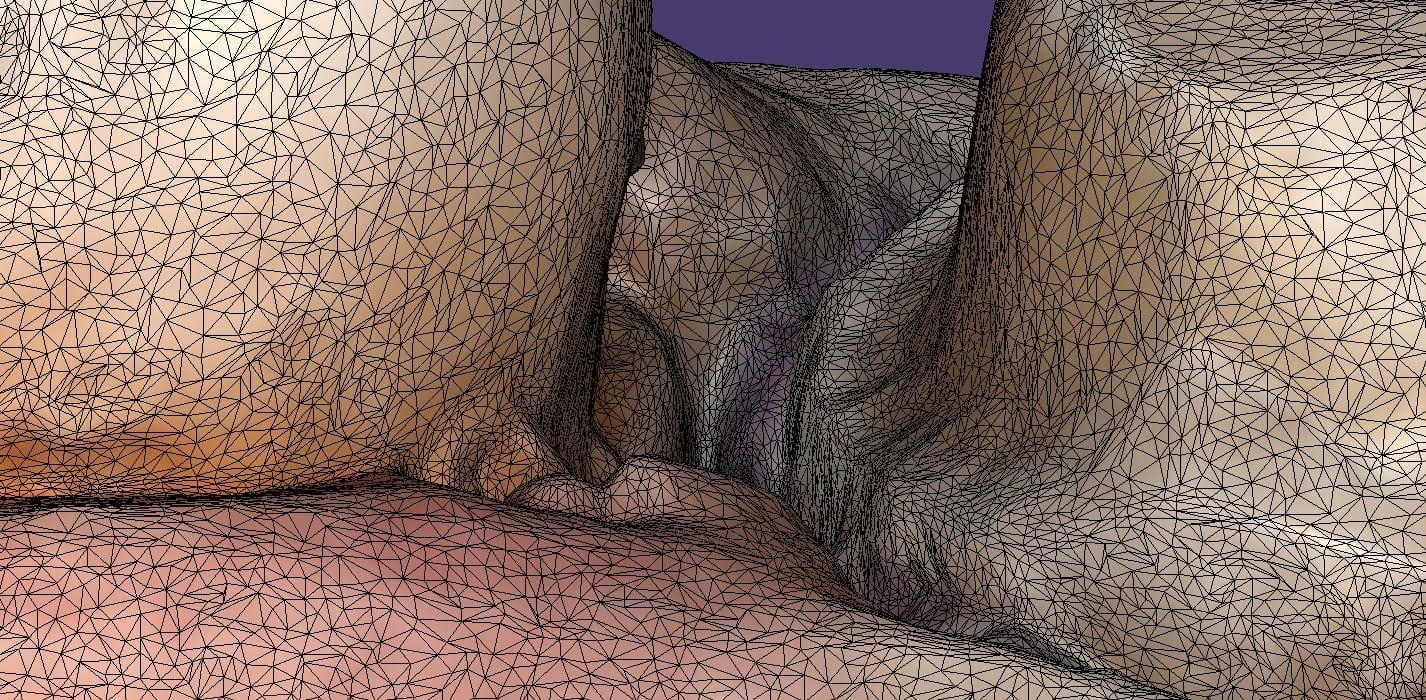
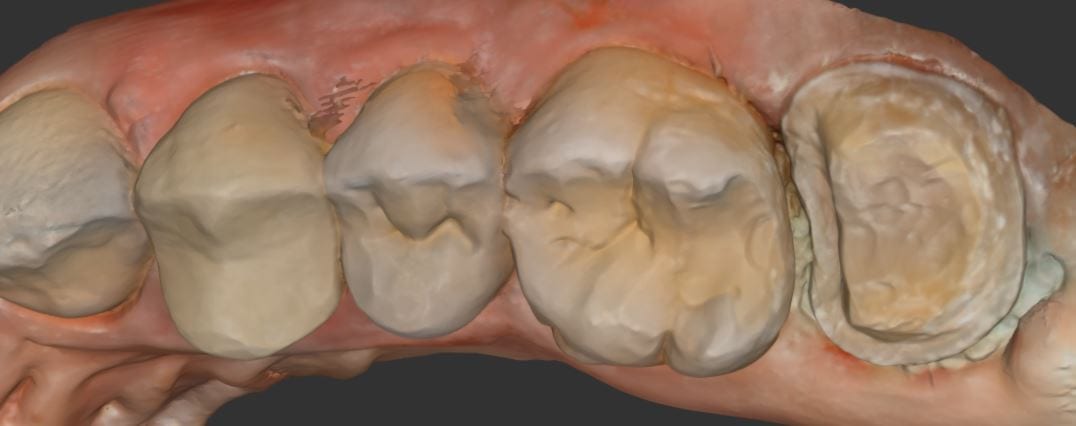
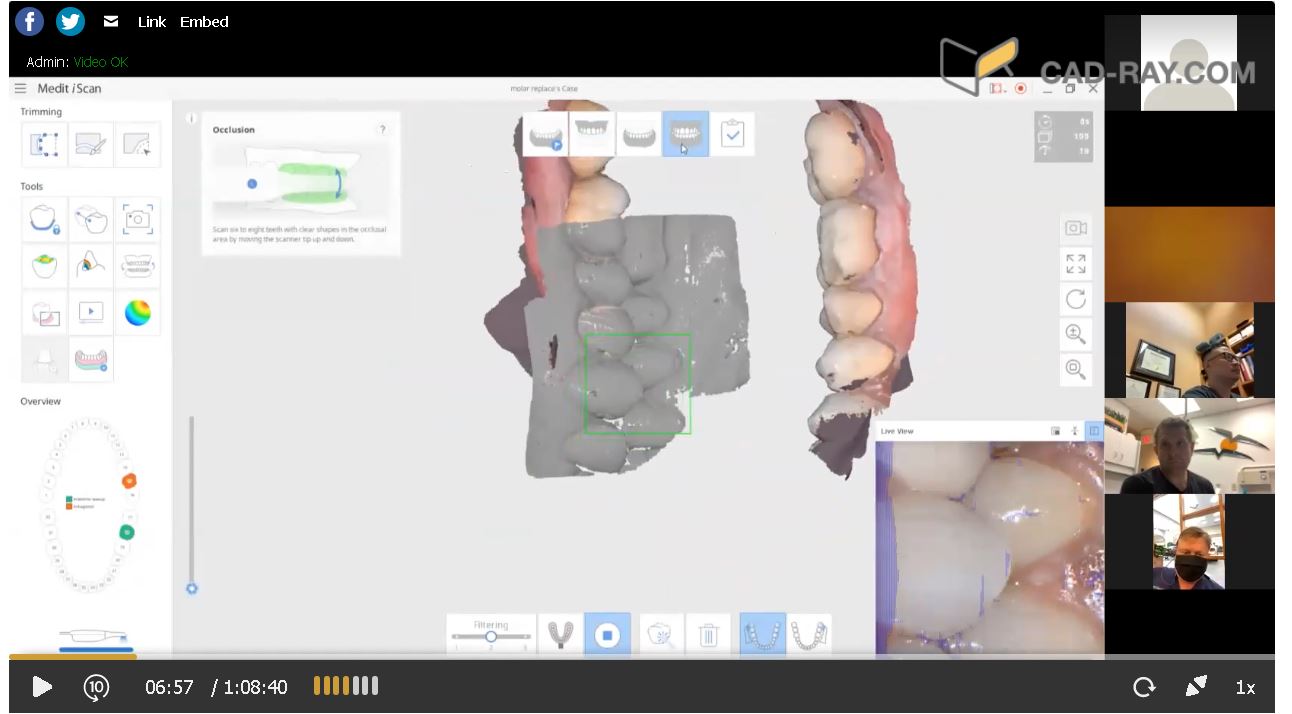
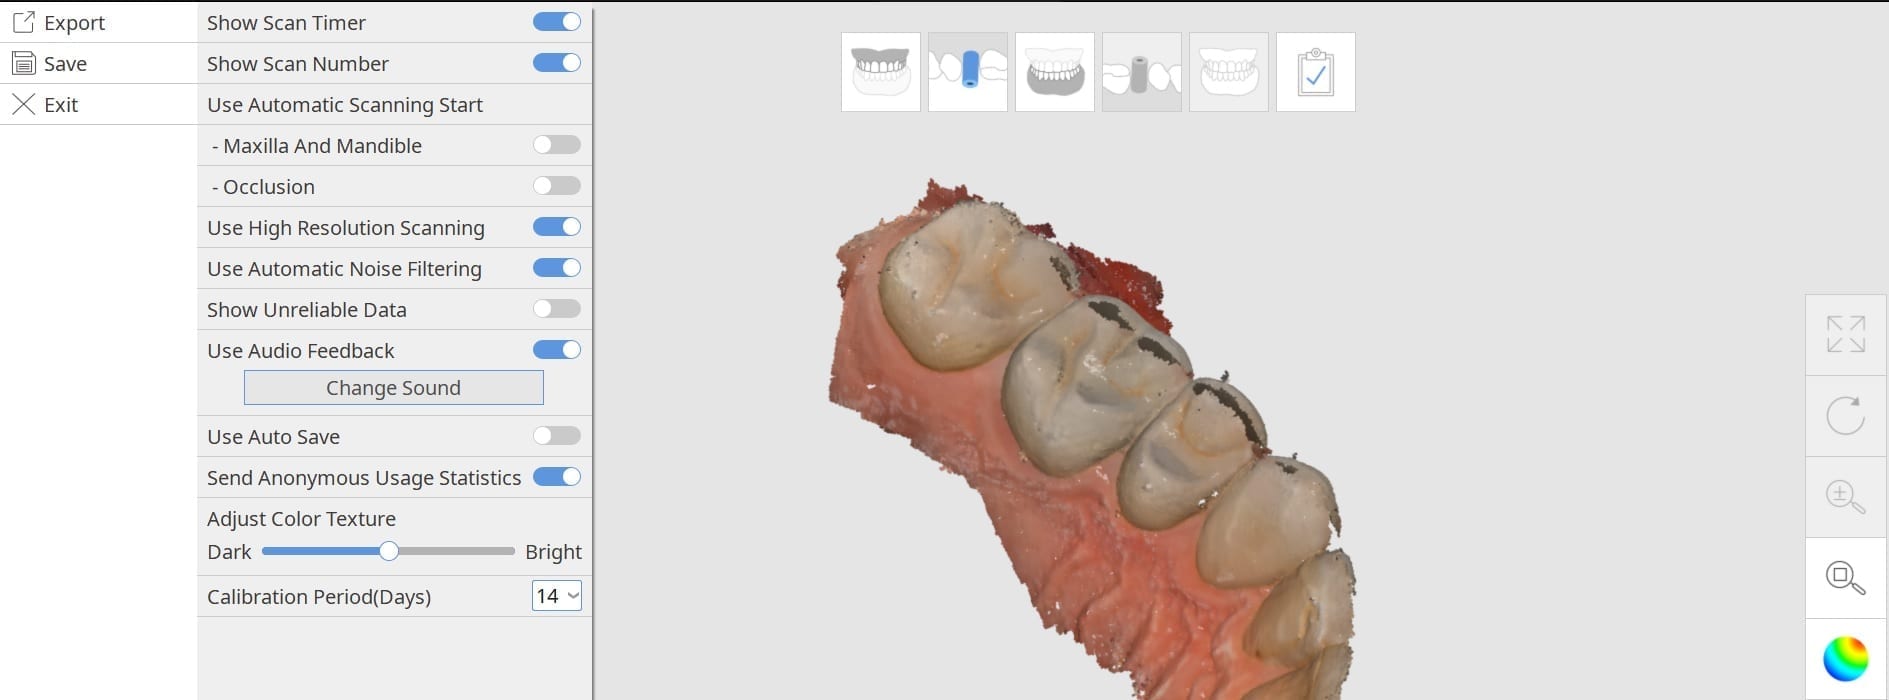
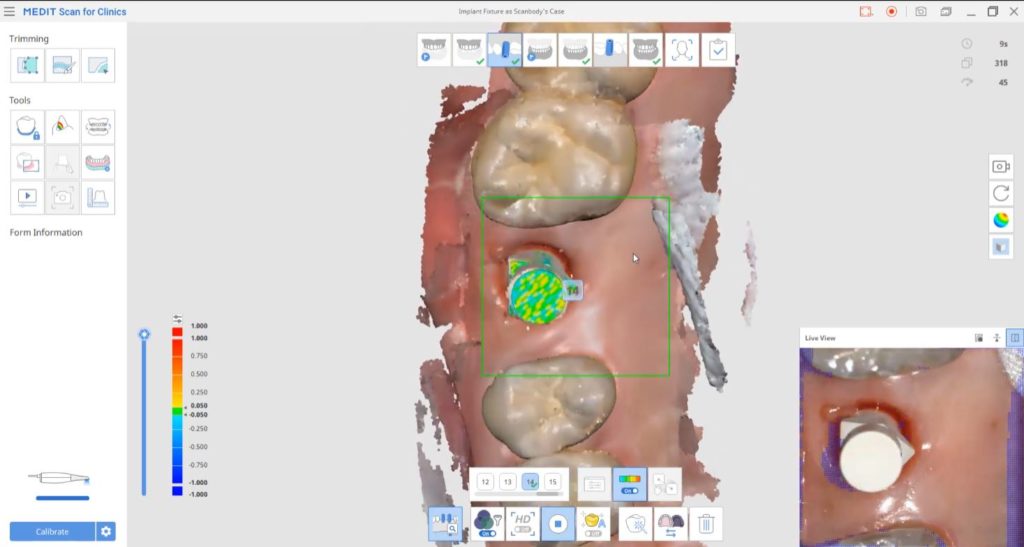
A repetitive theme that is a common issue with all intra-oral scanners is the inadvertant capture of data that does not belong to the model you are building. The software and camera are smart enough to ignore the tongue and the lip, but if they show up repeatedly in an area you are scanning, they ultimately get incorporated in the equation.
In this image, you can see how the tongue is capture on the occlusal surface of the second molar. The trouble is that the ios does not recognize the difference between soft tissue and hard tissue (yet) and once it is part of the model and you go back to the area you want to scan, the software is actually looking for that (now) displaced data. Since it is not present, the camera cannot initiate the capture of new data and the user gets frustrated with the red box instead of the green box.
Retract the lips and the tongue and you can easily capture an arch in 60 seconds.
[videopress xKKTwxem permalink=”false” hd=”true” loop=”true” autoplay=”true”]

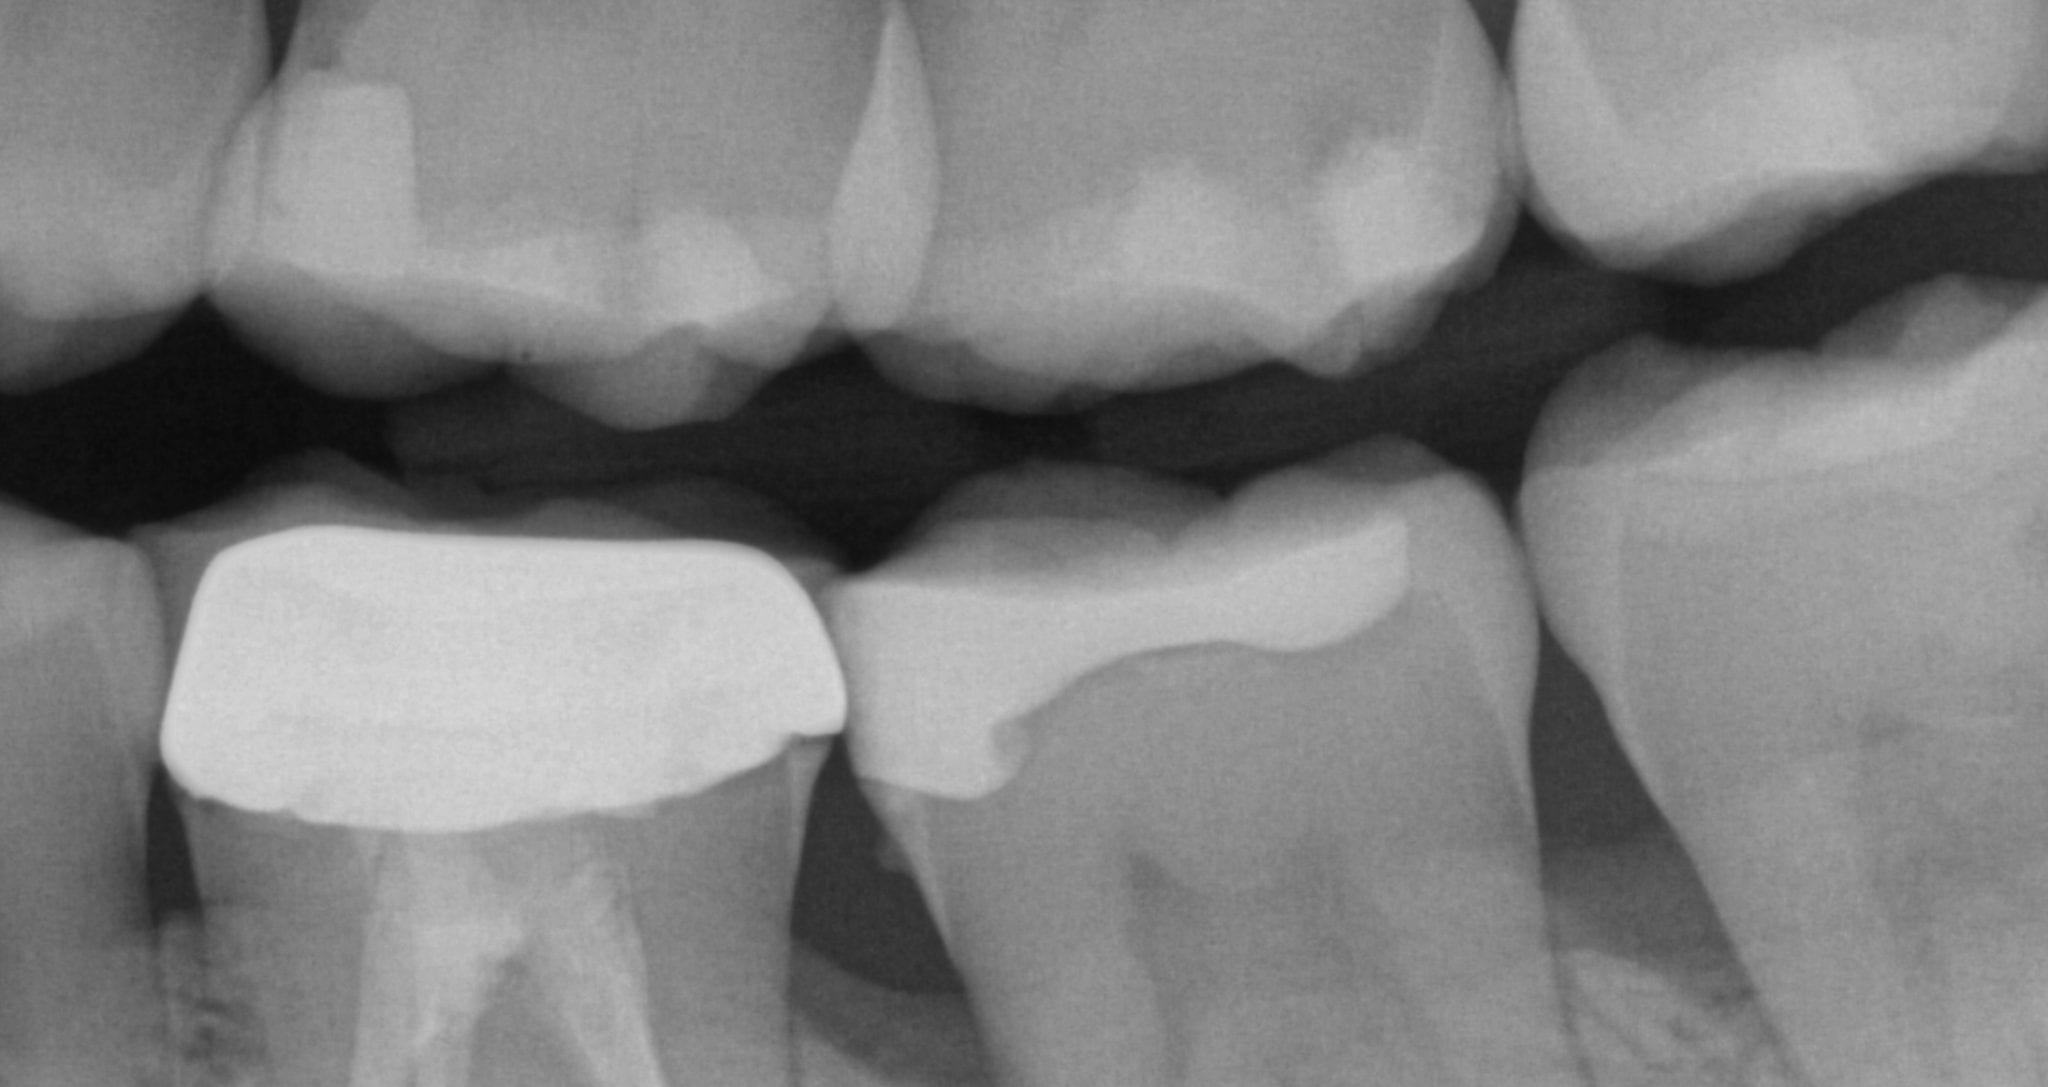
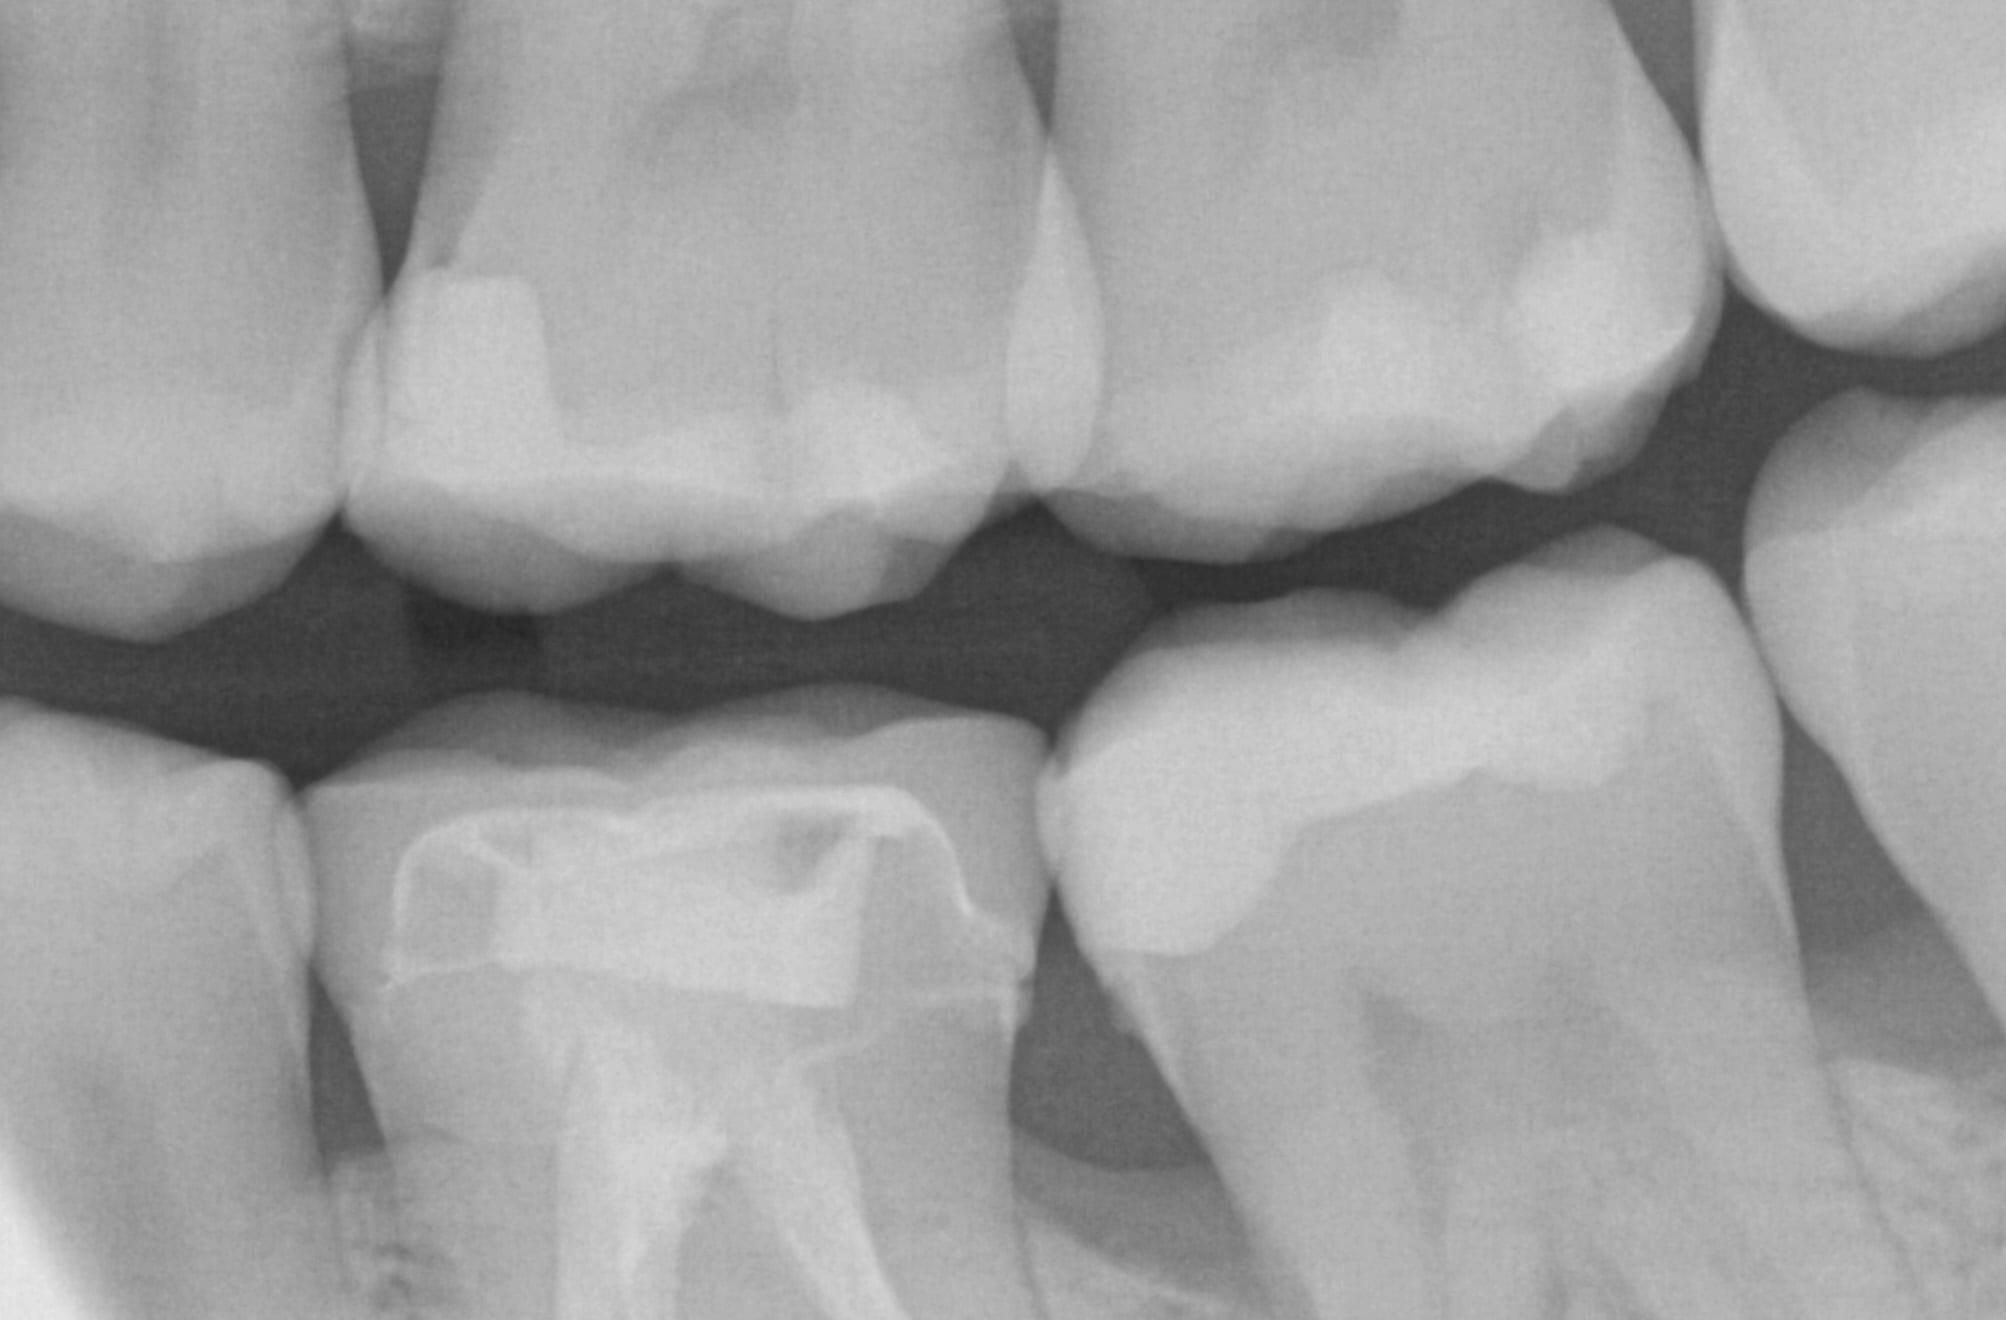
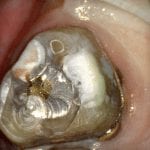
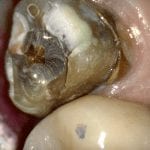
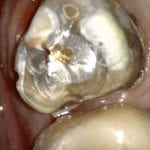
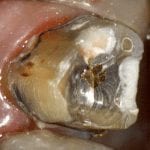
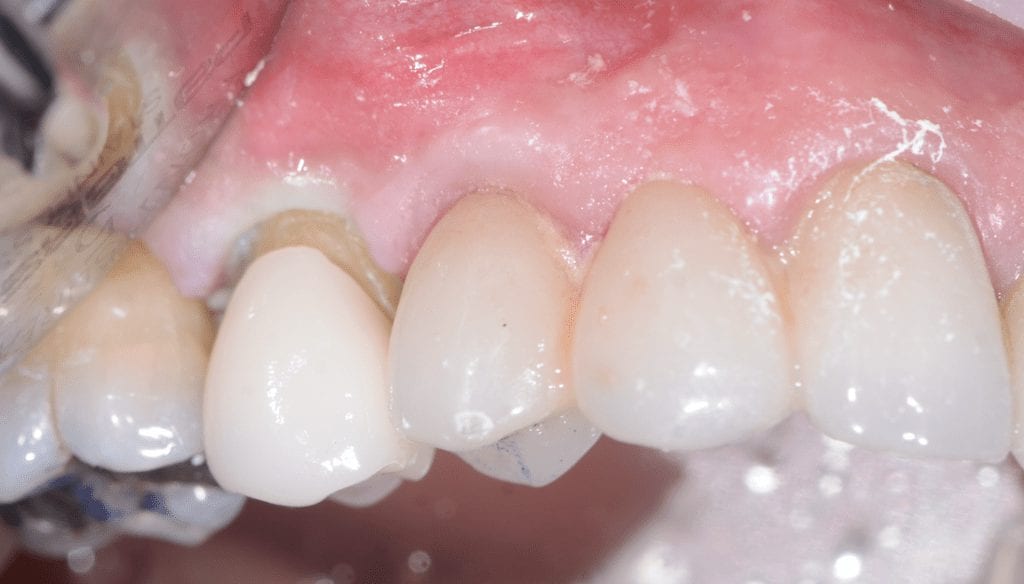
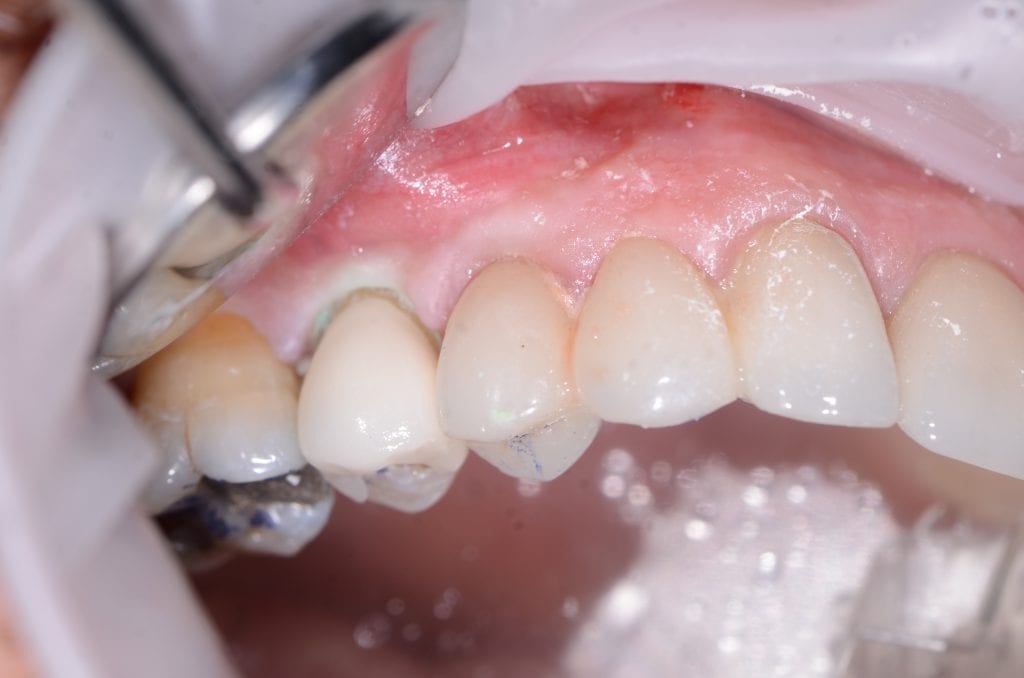
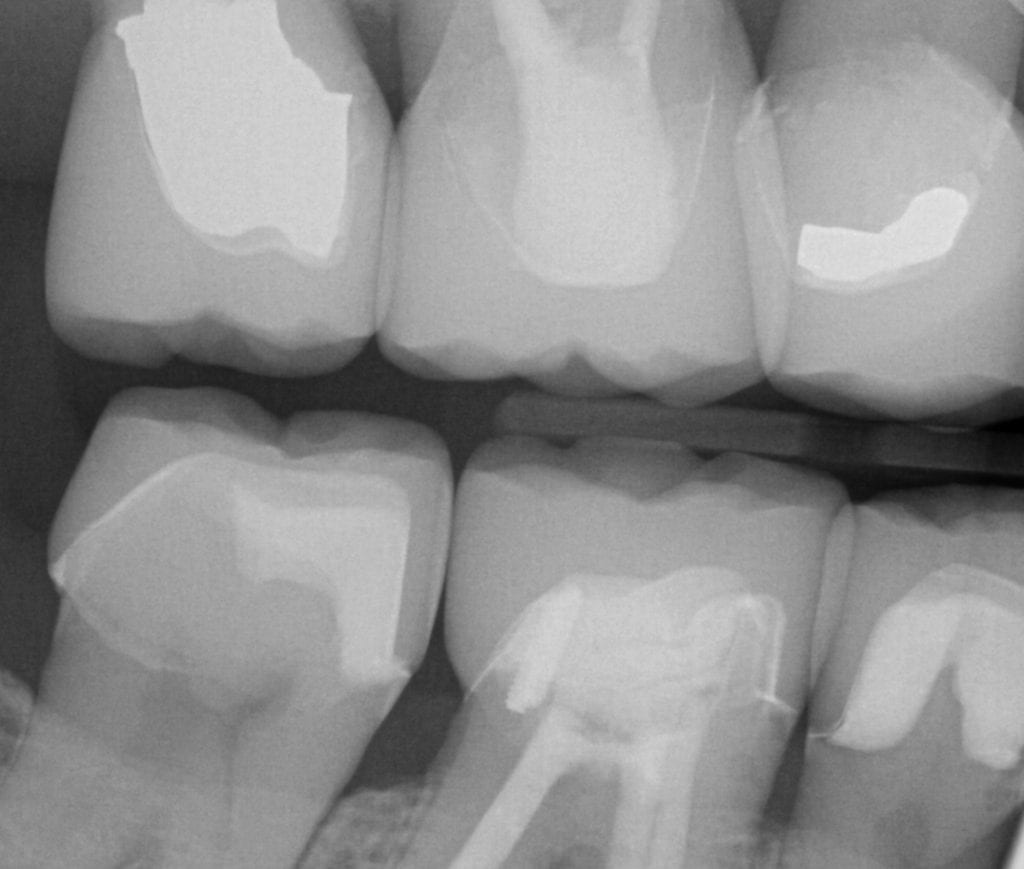
This is a first molar crown that was replaced with an in-office milled eMax restoration. The adjacent second molar had recurrent decay under the existing class 2 restoration. That was removed and replaced and pre-existing crown was also removed.
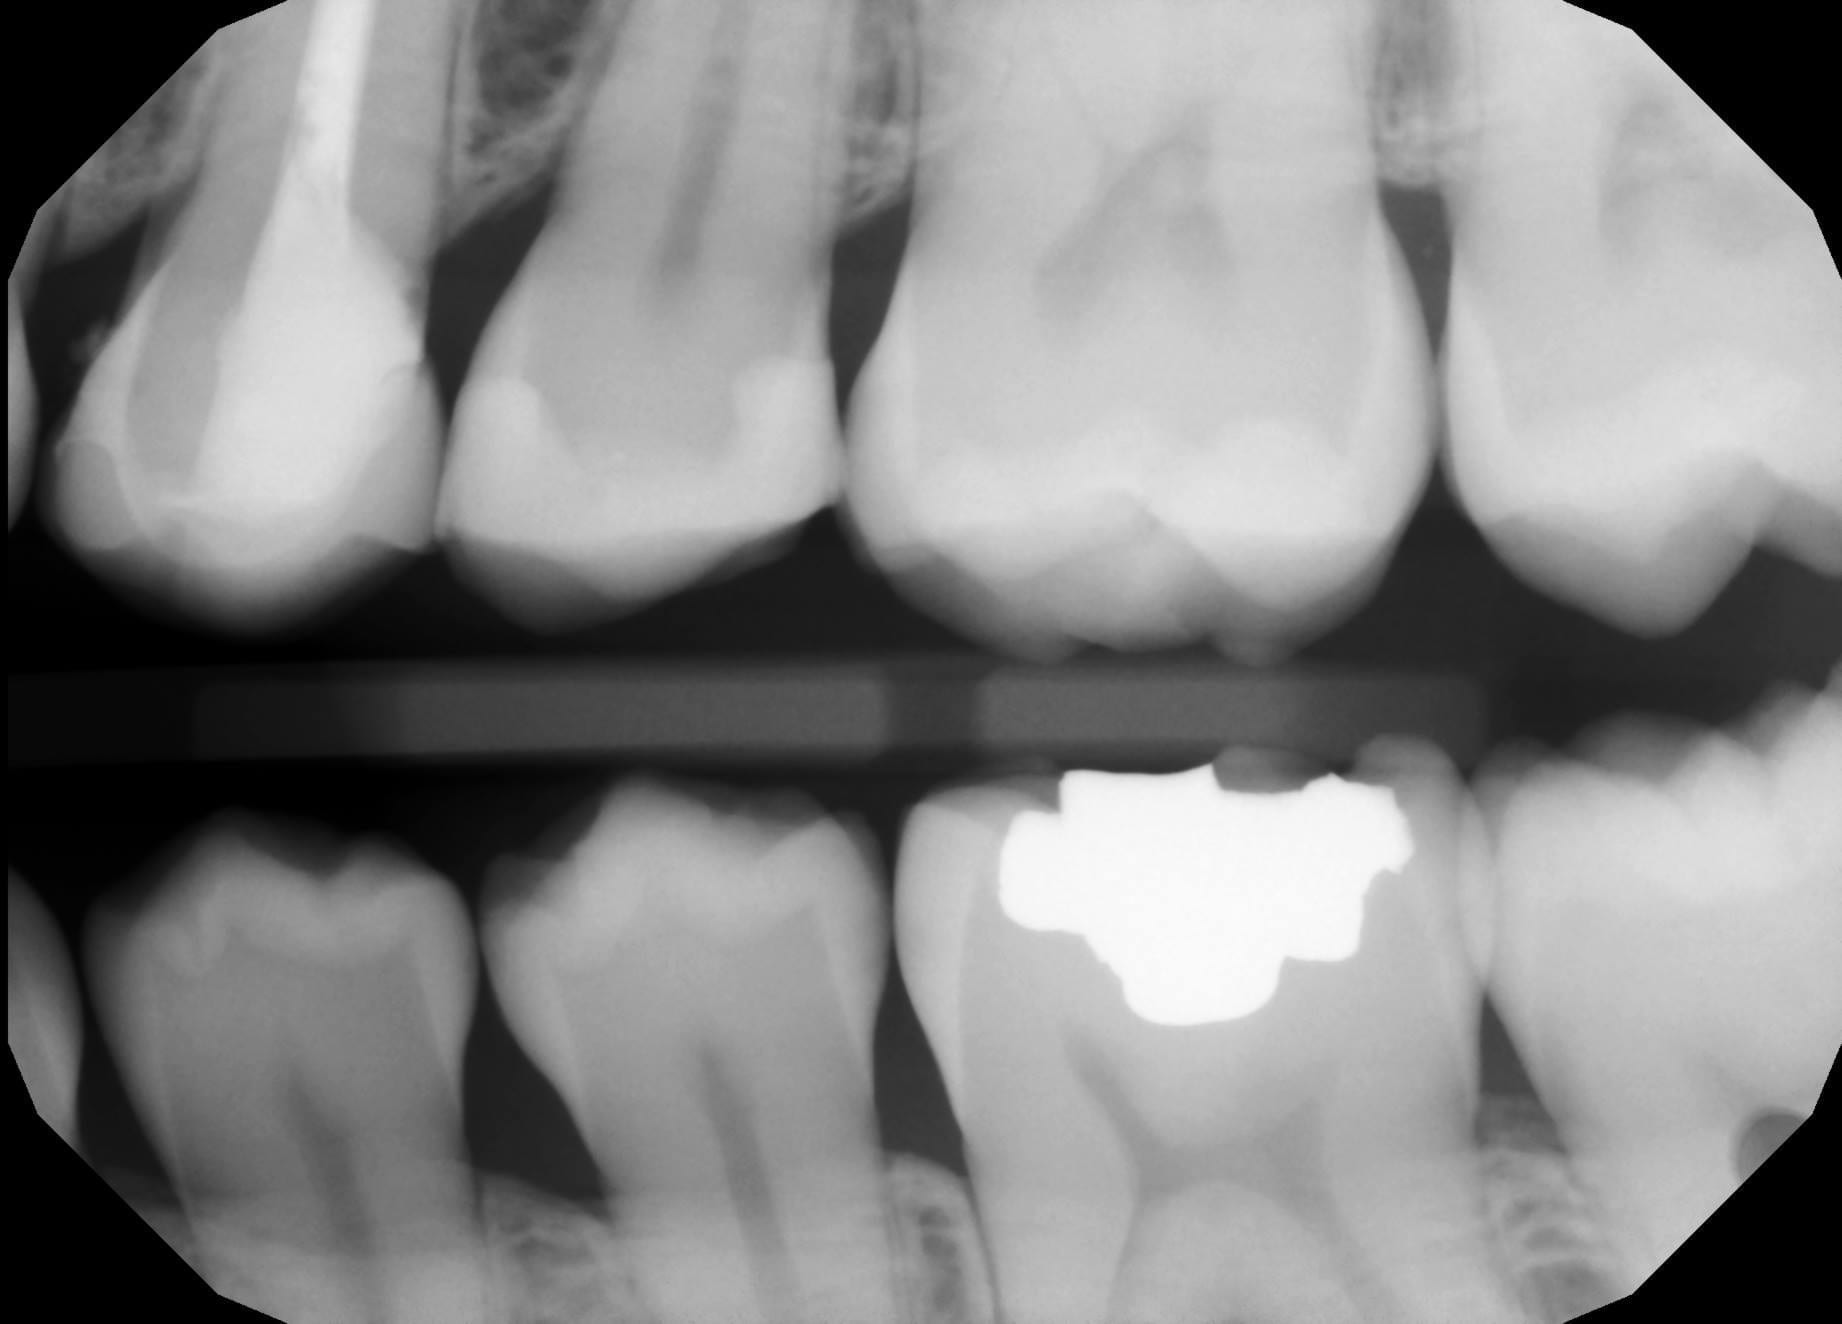
The preparation was refined and the recurrent decay was removed. Once hemostasis was achieved and the tissue was retracted the area was scanned with the medit i500. The crown was designed to full contour and milled chairside. After it was chrystalized, it was bonded into place with Nx3 resin cement. The excess was removed and an immediate post-op bitewing was taken to verify that no excess cement was left behind.
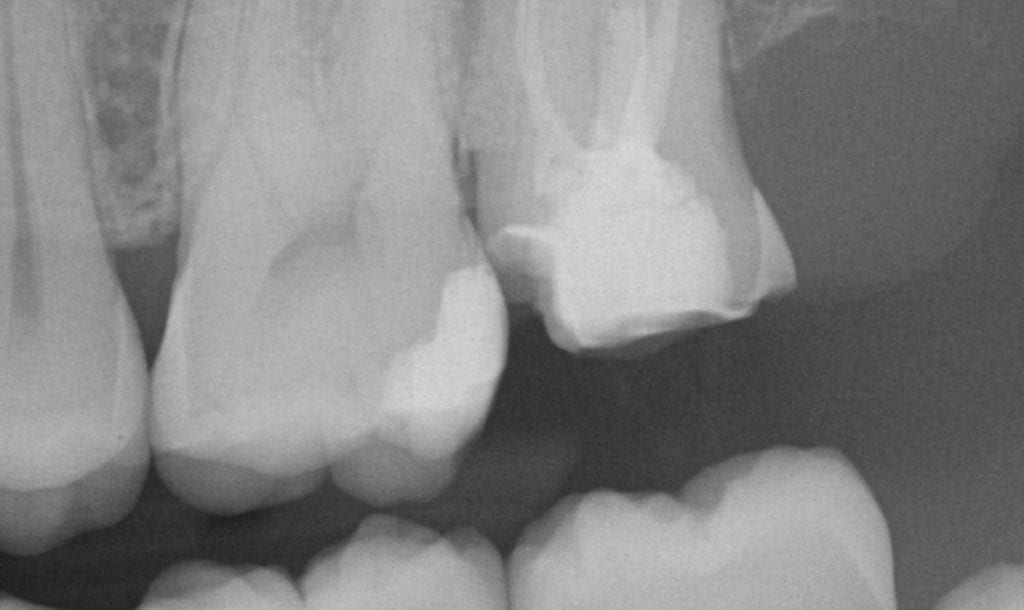
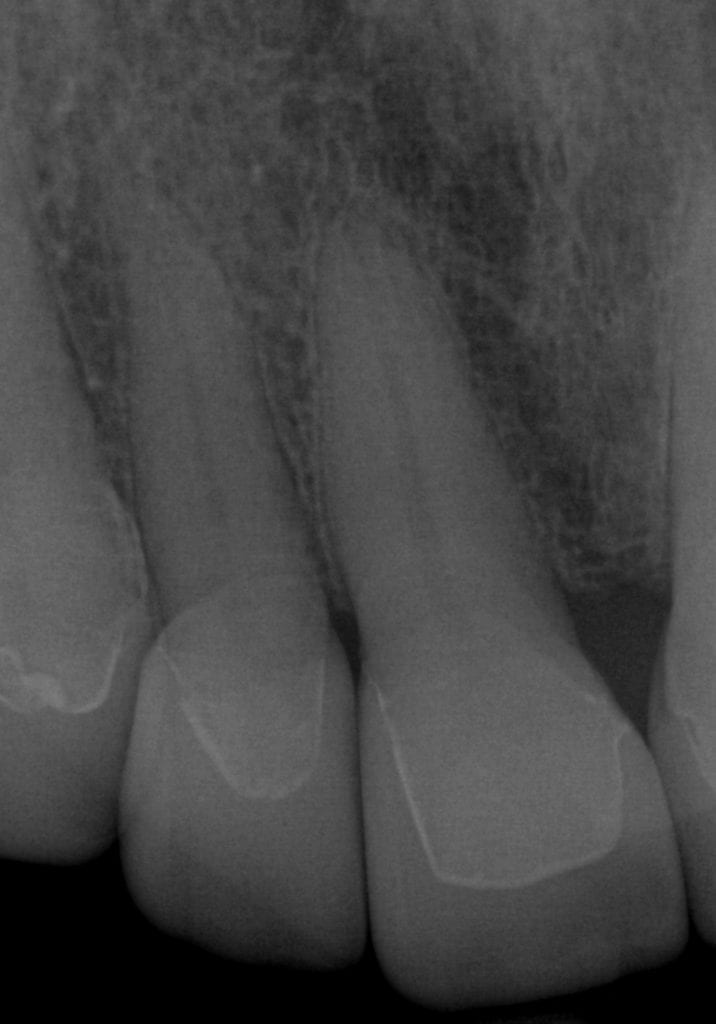
Pre-Op
This video shows the design of a crown after the impression was taken where vivid colors of the retraction cord, the sulcus, the preparation, and the details of the adjacent tooth can be visualized.
[videopress 25yUA1tp permalink=”false” hd=”true”]
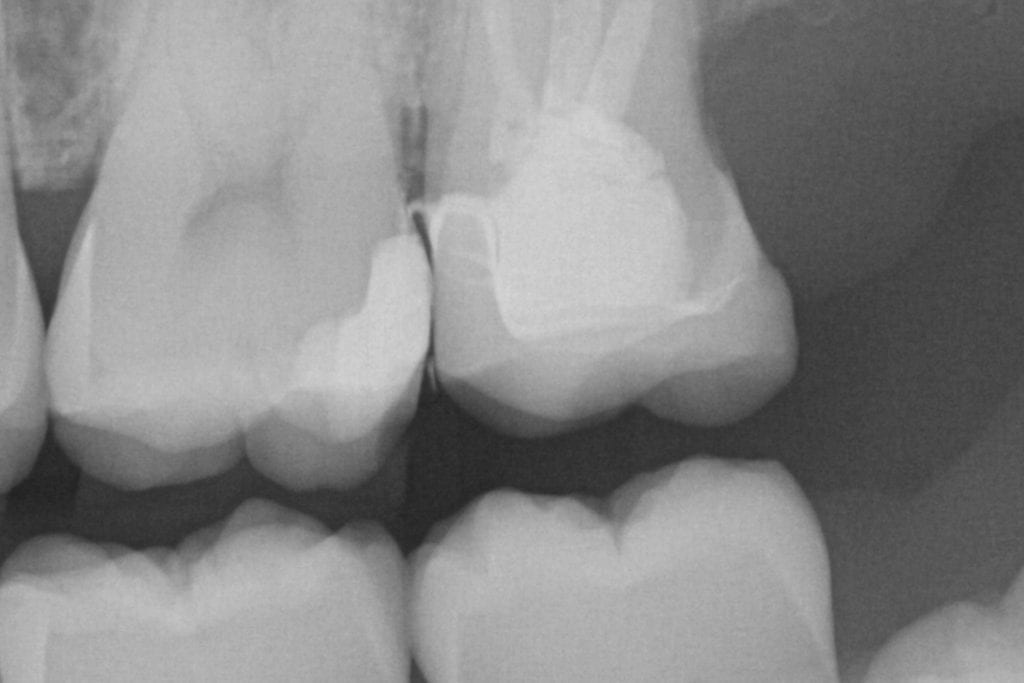
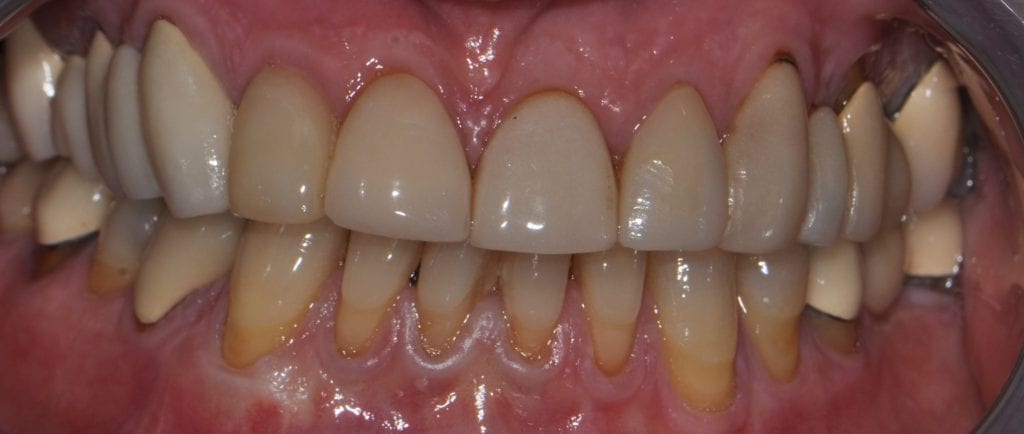
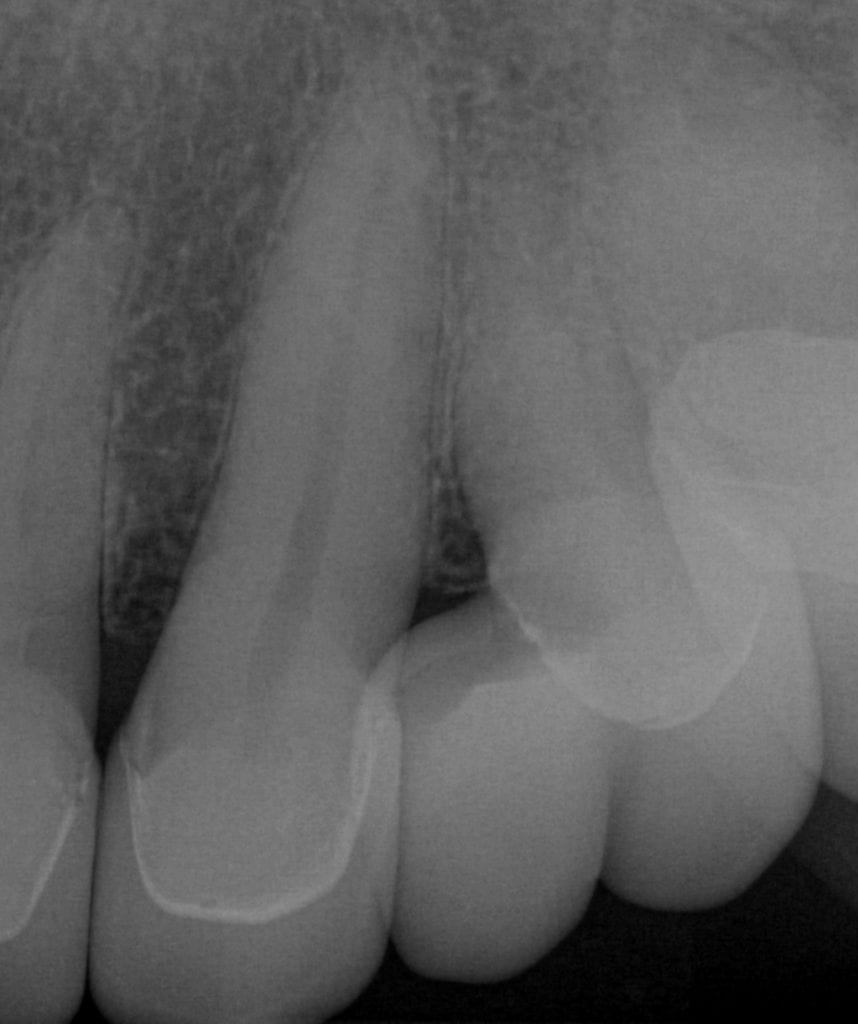
Immediate Post-Op
Download the case files in OBJ Format


All times are Pacific Standard Time
Monday 7 Am, 9:15AM, 11:30 AM
Tuesday 1 PM and 2PM
Weds 10 AM
Thursday 11 AM, 2:30 PM
To sign up, please email support@cad-ray.com so we can send you the registration link

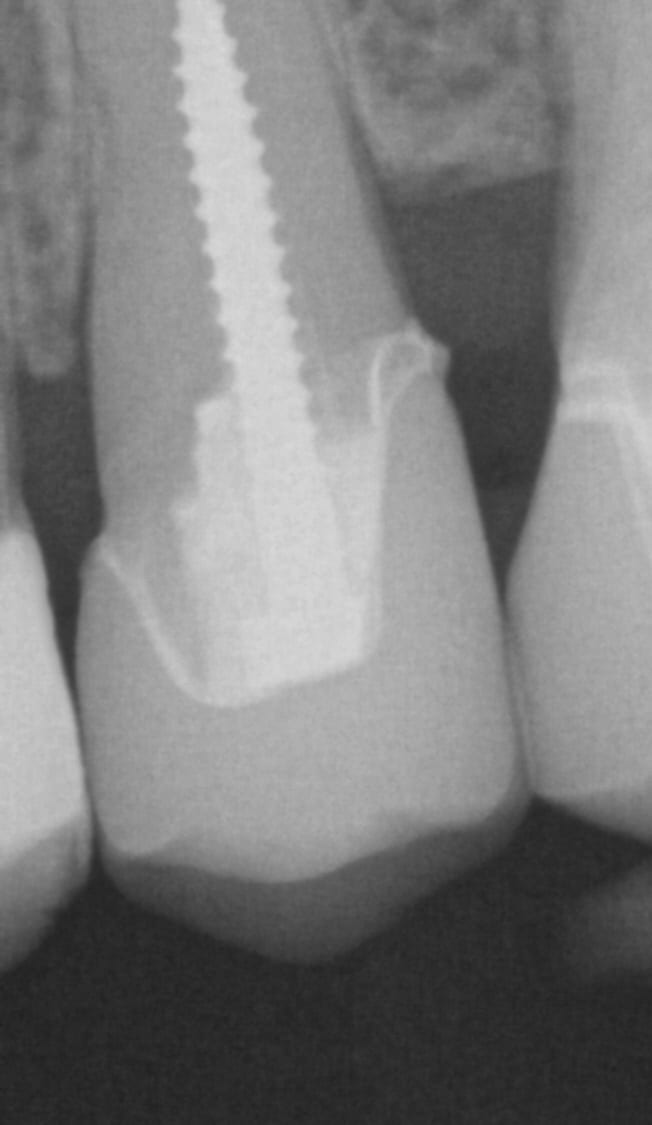
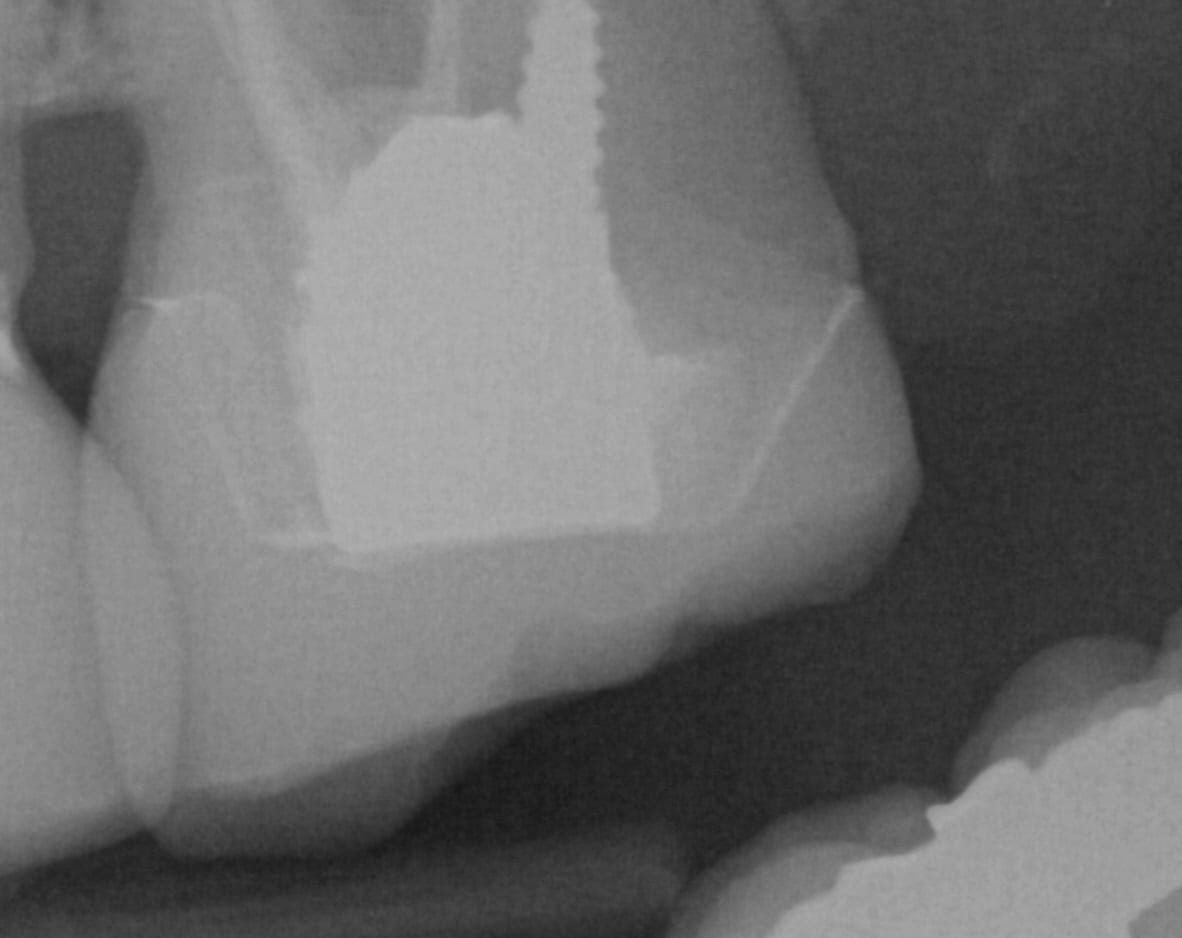
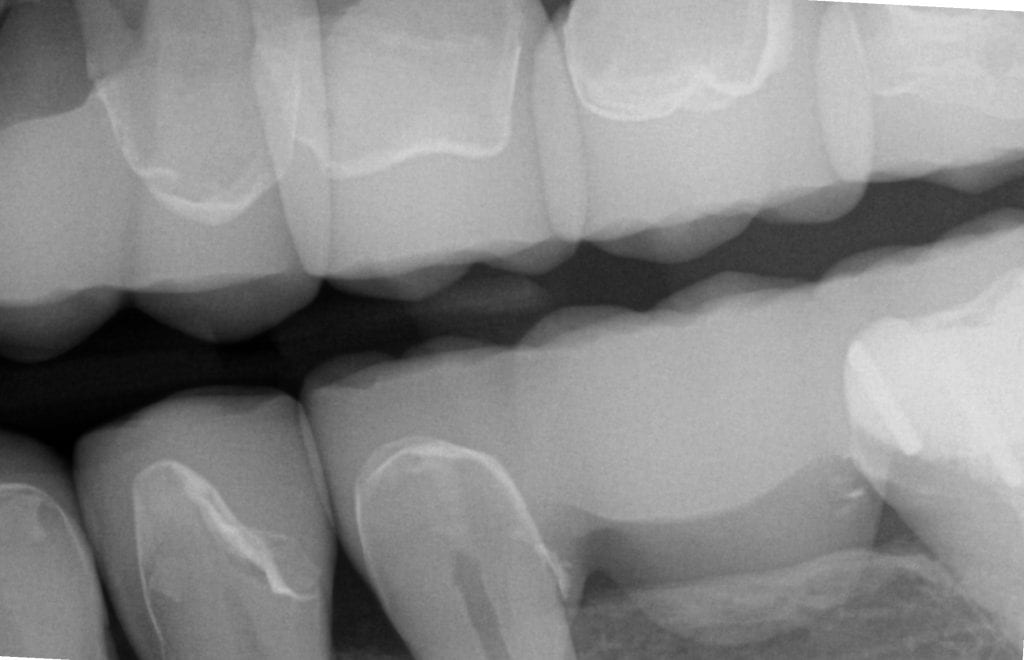
It i sometimes confusing to some doctors when looking at bitewings shot at specific angles that make the margin look like it has filled in with resin, or the the margin is “raised” with composite material. When looking at a sloping margin, where you have a deep chamfer or finish line, instead of a shoulder margin, when you take a bitewing immediate post-op X-ray, the flow of the margin line is superimposed on itself due to the two dimensional image.
Clinically, if you look at the margin design, you will appreciate the anatomy of the prep and how that can lead to this effect.


This is a lesson in chairside efficiency for all CAD/CAM users. Traditionally, you would be forced to prep two teeth and impress them both at same time, but with digital dentistry, you can break the case up and do it in segments, as if they are two separate patients involved.
In this particular case, the restorations were designed, milled, and seated in a single appointment. To speed things along, only the second premolar was addressed; it was prepared, imaged, designed and milled. While milling, the second molar was prepared.
After the tryin, they were chrystalized and seated at the same time. Leveraging preparation time with mill time of multiple units can greatly increase efficiency at chairside. See the following videos to pick up on all the details of the case.
CASE SET UP FOR PREMOLAR SCAN IN MEDIT
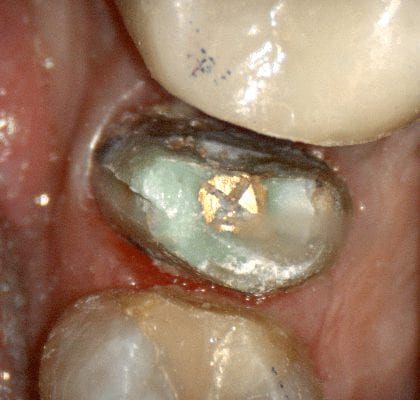
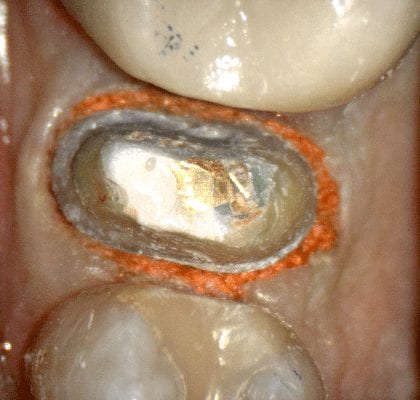
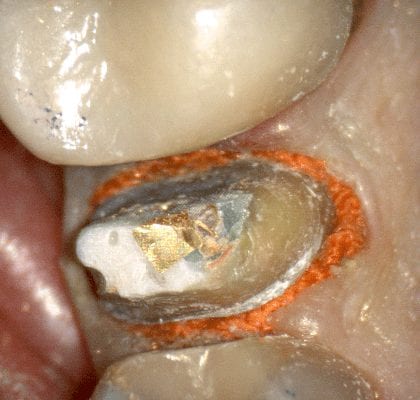
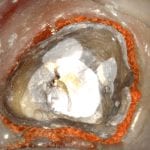
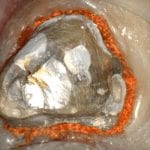
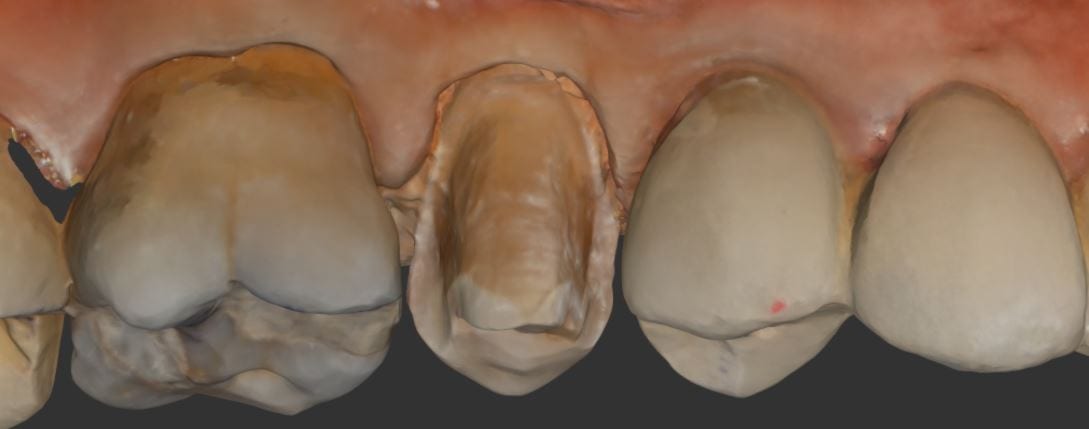
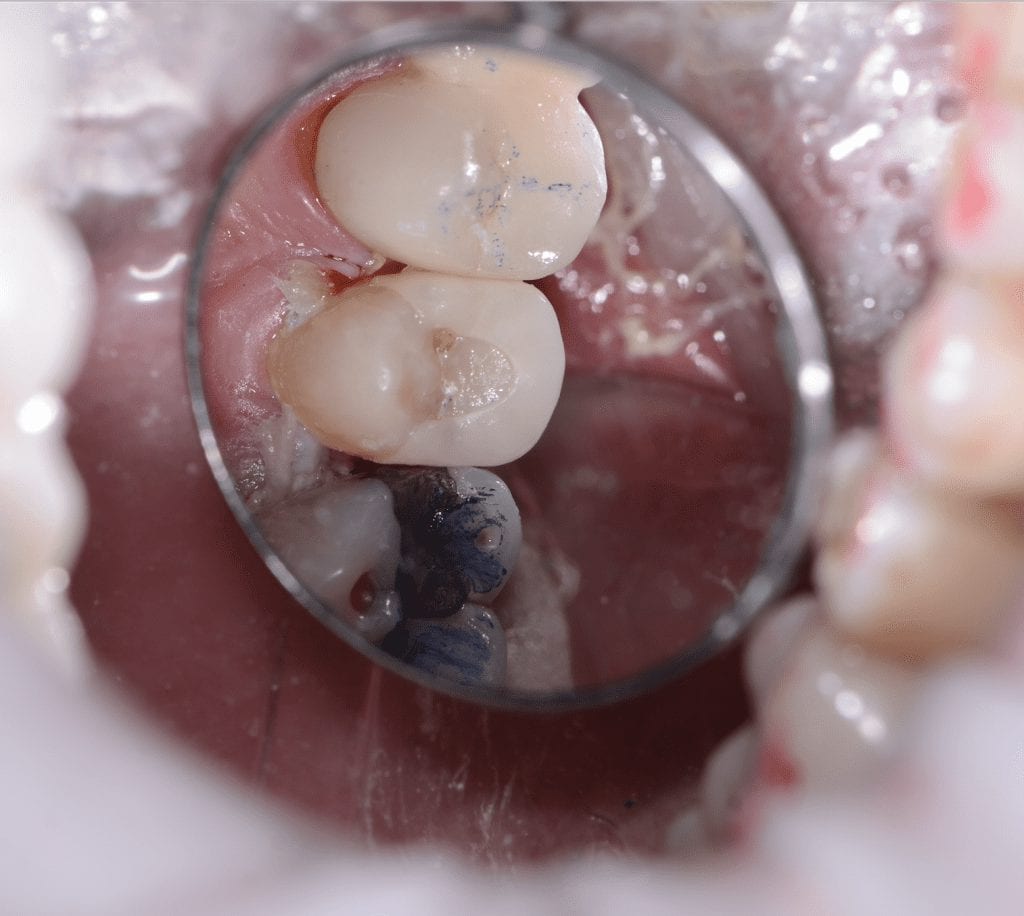
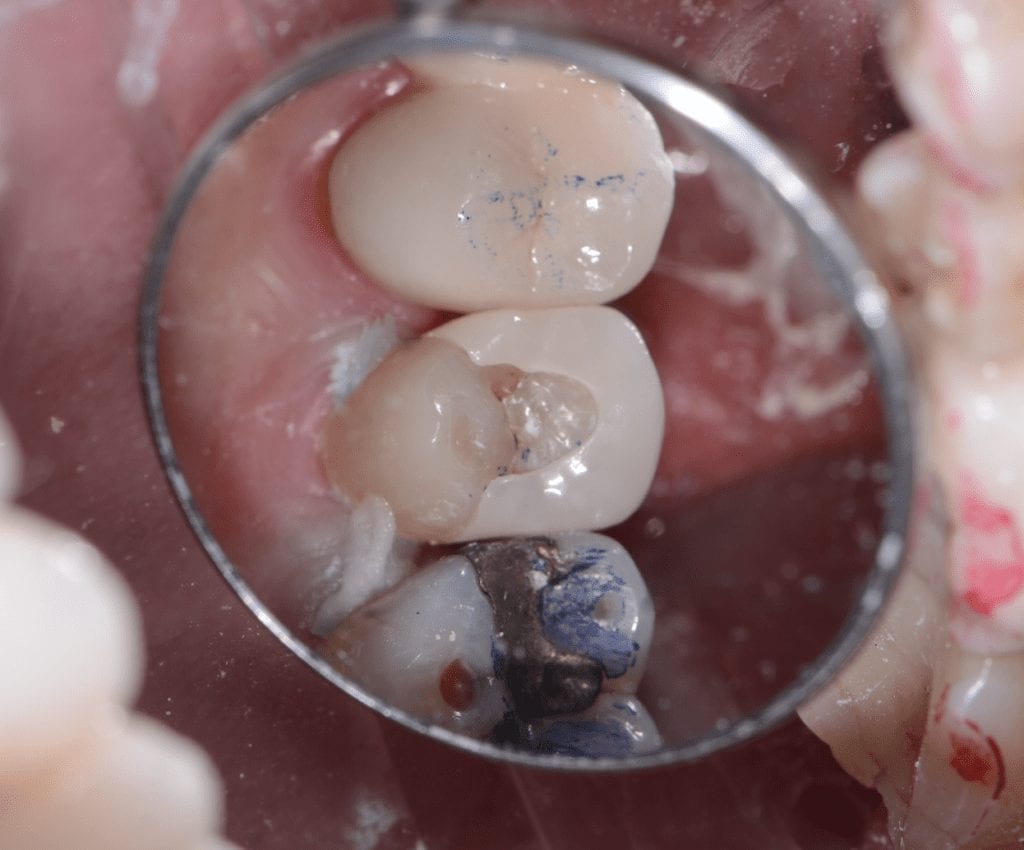
REMAINING TOOTH STRUCTURE AFTER REMOVAL OF PREVIOUS RESTORATION AND PREPARATION REFINEMENT

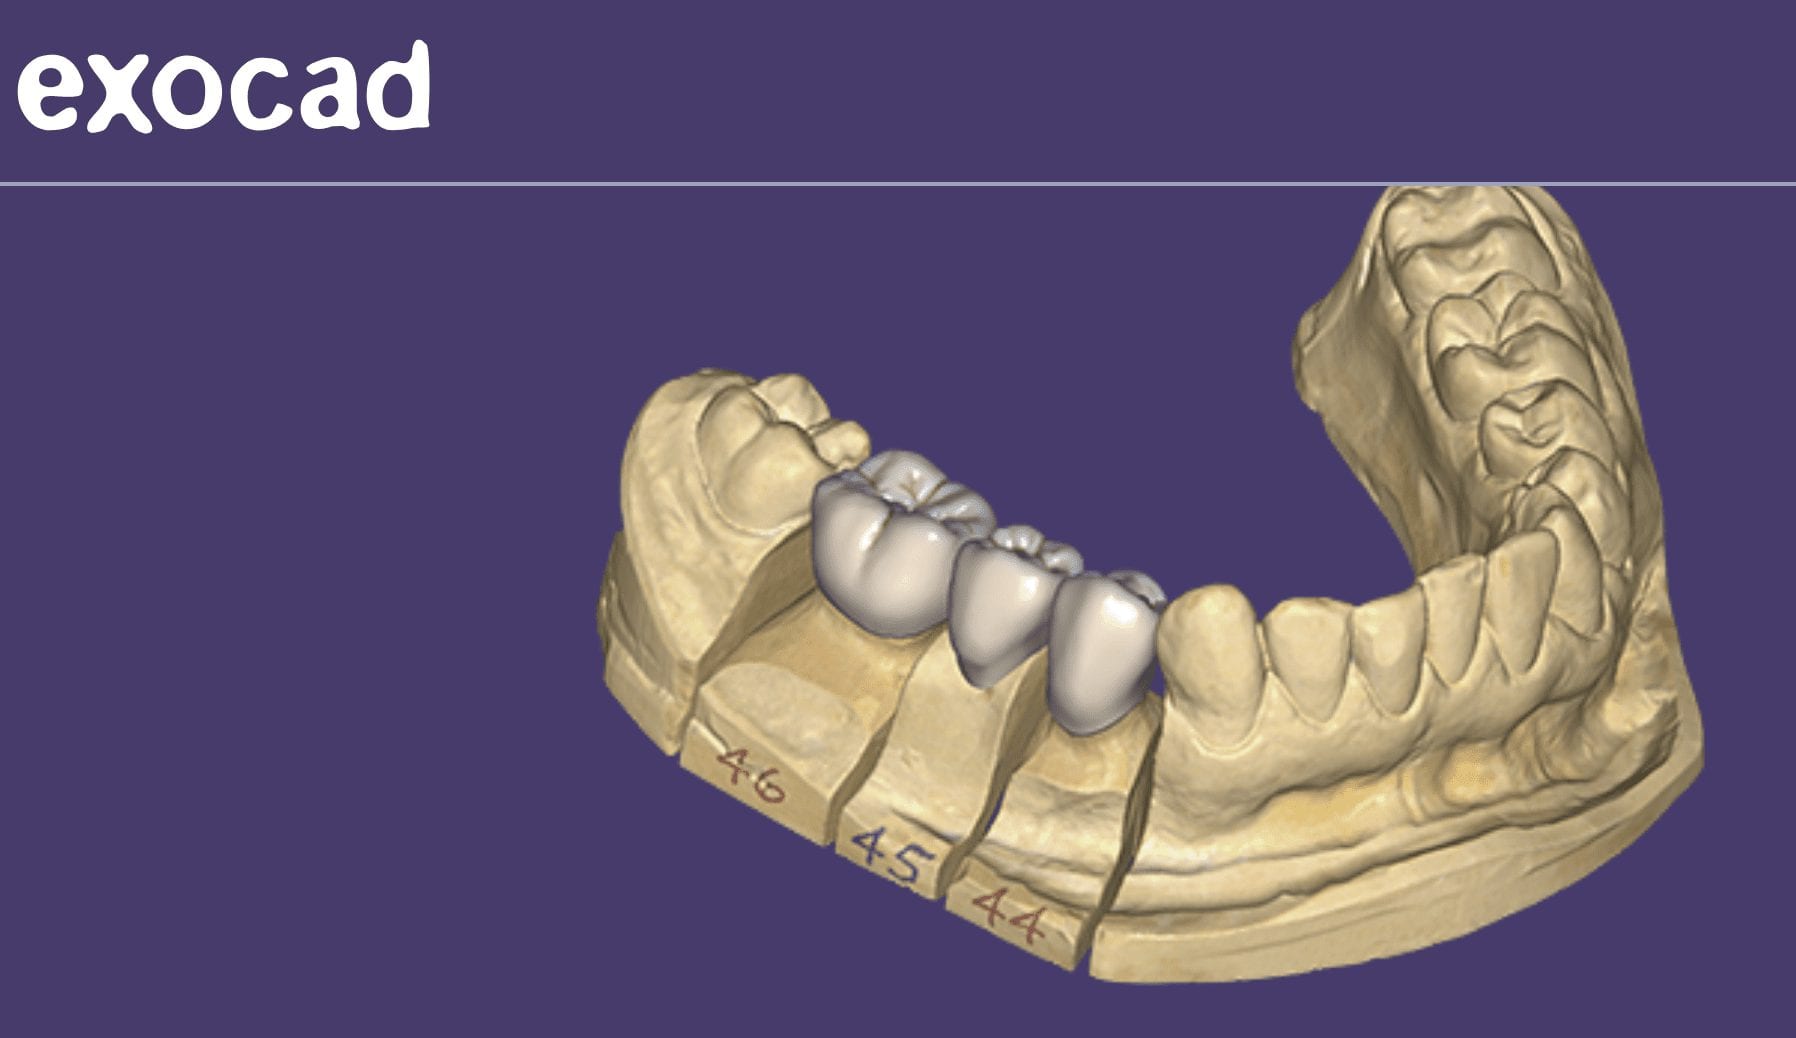
PREMOLAR DESIGN IN EXOCAD
REMAINING TOOTH STRUCTURE AFTER PREVIOUS CROWN REMOVED AND THE PREPARATION REFINEMENT
CASE SET UP FOR MOLAR IN MEDIT
MOLAR DESIGN IN EXOCAD
TRY-IN OF EMAX PREMOLAR
[videopress MTQFpe1W]
TRY-IN OF EMAX MOLAR
[videopress wAMZhynC]
SEAT OF PREMOLAR AND MOLAR EMAX CROWNS
[videopress j0dIUGzW]
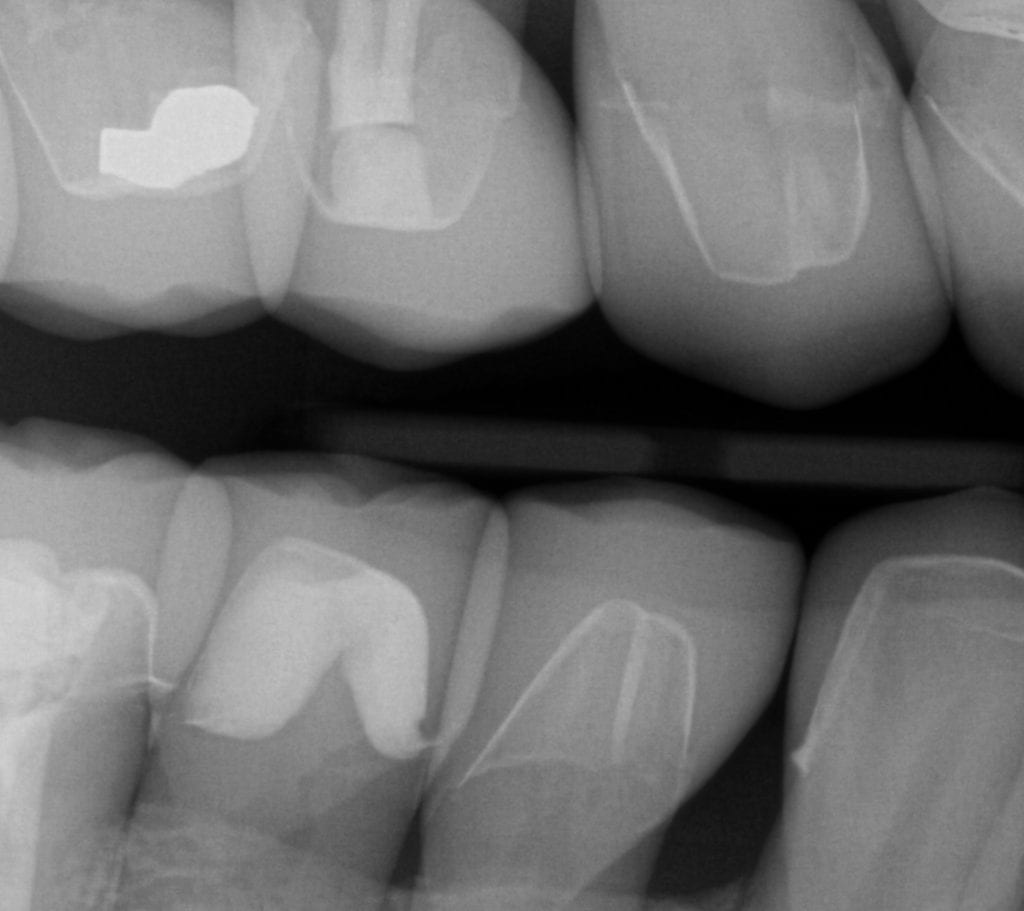
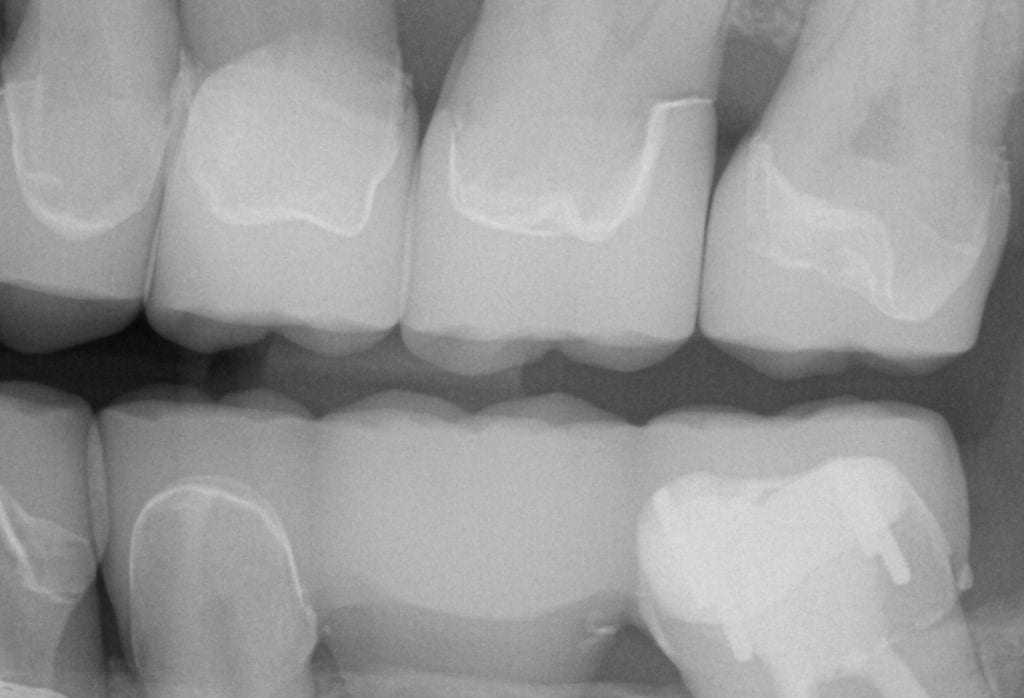
IMMEDIATE POST OP X-RAYS


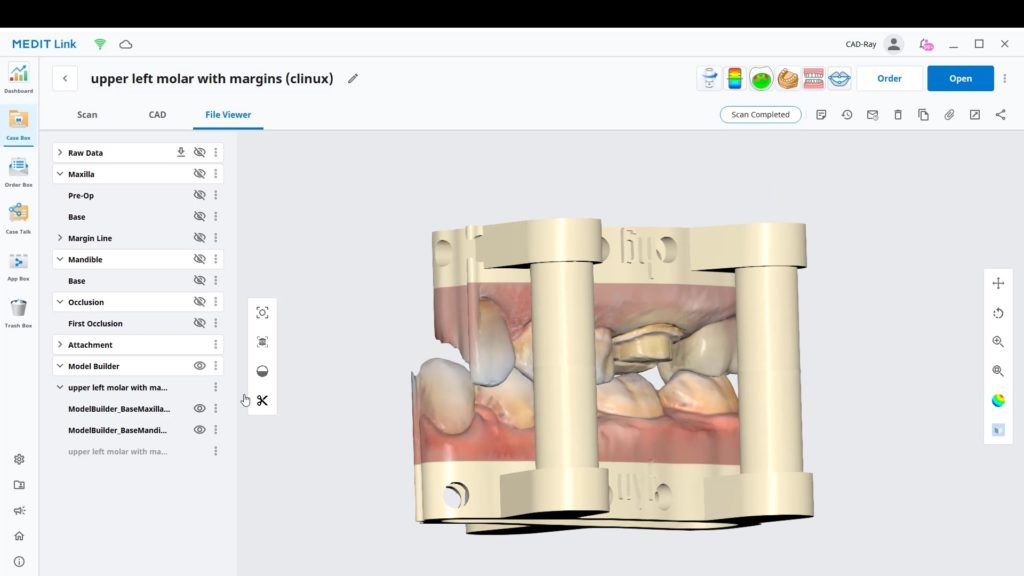
One of the greatest advantages of digital impressions is the ability to copy a pre-existing condition. This has a lot of benefits, one of which is that the patient will not notice a difference in the new restoration vs. the old one. For this to happen with the medit i500, you need an extra image catalog box. Rumor is that this will be available in the near future. Since we only have the upper and lower jaws, and the buccal bite to imagine into (and scanbody catalog boxes), what you can simply do is treat the case as if they are two separate patients.
Create a new patient, and scan the preop condition and save the case. Once processed, you can export the case file in OBJ, PLY, or STL format.
[videopress heGwDF6u permalink=”false” hd=”true” loop=”true” autoplay=”true”]
You can then launch a second case, where you take the opposing, the prepared arch, and the buccal bite images. You can download the Korolation OBJ case files and design along. Just remember, in exocad, the upper and lower arches from “patient #2″ will automatically articulate with each other, but you will have to manual import the preop scan and merge the prepped model and the pre-op models.
[videopress RkqfM9CJ permalink=”false” hd=”true”]
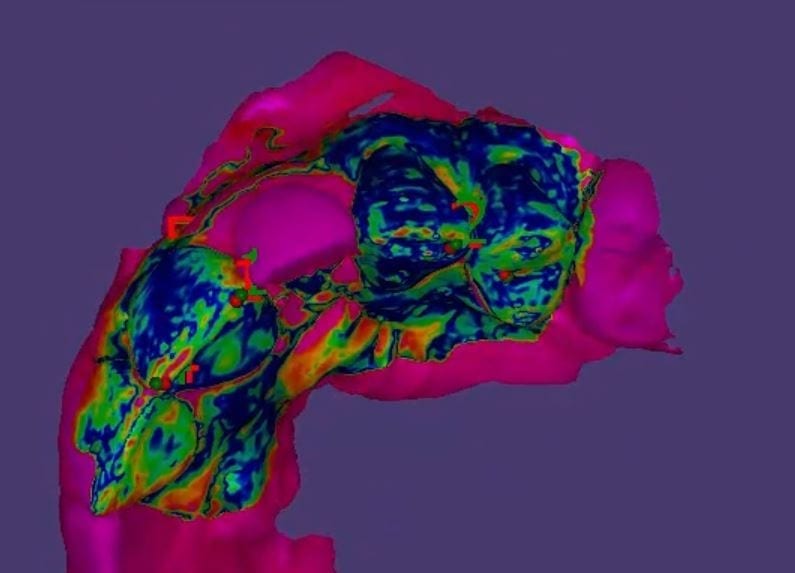
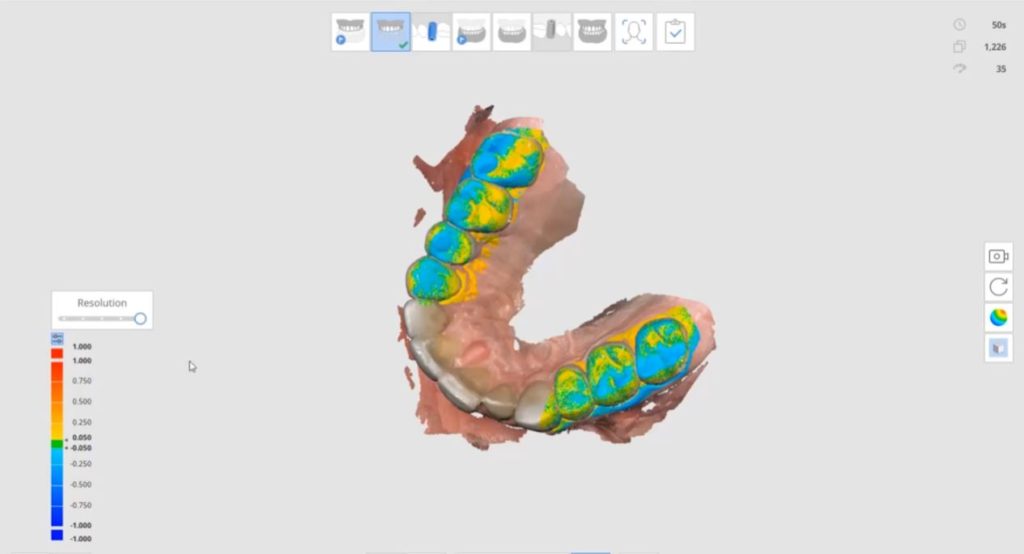
Once you import in the pre-op condition, you can manually relate the models to each other by identifying common landmarks between the two models. After you perform alignment, you can then click on “Best fit matching”. The color scheme in exocad is a great guide in letting you know how well you have articulated the models together.
[videopress U5aJCxQ3]
The more blue you see in the Korolated models, the more reliable your stitch is and you can be assured of greater accuracy in your final restoration.
[videopress 8DuVvk0x permalink=”false” hd=”true” loop=”true” autoplay=”true”]
[videopress Tu1I4kmK permalink=”false” hd=”true” loop=”true” autoplay=”true”]


We had a great booth and lots of activity at the ADA meeting and will be in New York for the Greater New York convention

Happy Hump Day! We might be in your area! It’s going to be a crazy month! Here’s the 411! WE ARE SHOWING THE WORLD HOW MUCH WE LOVE DIGITAL DENTISTRY! C2 will be traveling to Utah this weekend for a show on Saturday….
North Carolina & South Carolina Sunday & Monday!
Send us a PM if would like a demo! #mediti500 #c2style #welovedigitaldentistry
Grady Dix Armen Mirzayan Frank Weinstein Carol BarberLambPosted by Carrie Mcnabb Johnson on Wednesday, October 10, 2018

This a very common question we get at CAD-Ray.com and it reflects on how little dentists understand about digital impressions and CAD/CAM in general.
It reminds me of a dental conference I want to, fresh out of school, placing orders for our start-up practice. As we went to the X-Ray equipment section, one of the first things the representative said to us was that their machines are “Digital Ready”! We all had good laugh explaining to the rep that the machine had nothing to do with digital X-Rays, the sensors did!
We feel the same way with digital impressions and CAD/CAM platforms when people talk about integration and making sure one “product talks to the another ” and how it all needs to be developed by the same single manufacturer. It’s loaded with a lot of inaccuracies and misrepresentations.
The reality is that every system has its flaws and can have just as much trouble talking to a machine manufactured by the same company! As dentists, we are much smarter with our decision processes now, but it is still a buyer-be-ware landscape.
Here are some basics you should appreciate before committing to a high ticket item. It’s imperative to understand that imaging has little to no impact on milling. These are completely independent processes- let us explain:
You can image (take an intra-oral scan) with system A. Then you can take the data from system A and take it to CAD software of system B. A lot can go wrong here at this step alone. Simple examples include;
Keep in mind that this can even happen if you stay within a “System A” or “complete system”. Luckily a lot of this is ironed out already with legacy and legitimate products and competent practitioners. Now comes the design step. You have a few choices; exocad and 3shape being the leaders. If exocad does the margin placement and the final restoration from start to finish, a lot of errors are eliminated.
After the design process, comes the nesting and manufacturing. At this step, the milling machine has NO idea what iOS you have used. It’s just data for a restoration that it needs to process. Ar this most vulnerable step, we need to make sure the CAM software for a particular machine can interpret the design software that did the nesting. A lot happens here;
[videopress yOHyMMVp permalink=”false” hd=”true” loop=”true” autoplay=”true”]
Then comes the consideration for your milling needs.
The trickiest part of all this is the last step. Making sure the mill has the right cam to talk to design software. This can be a nightmare if you don’t do your homework.
So, with the Medit iOS you can mill to any machine. You can even take it to cerec inlab software and Jump through a lot of hoops to mill with CEREC chair side milling machine. Not worth the headache!
The CEREC chairside mill remains the fastest carver of emax restorations, but it can come at a cost – you need to bulk out the margins so they don’t break off at mill.

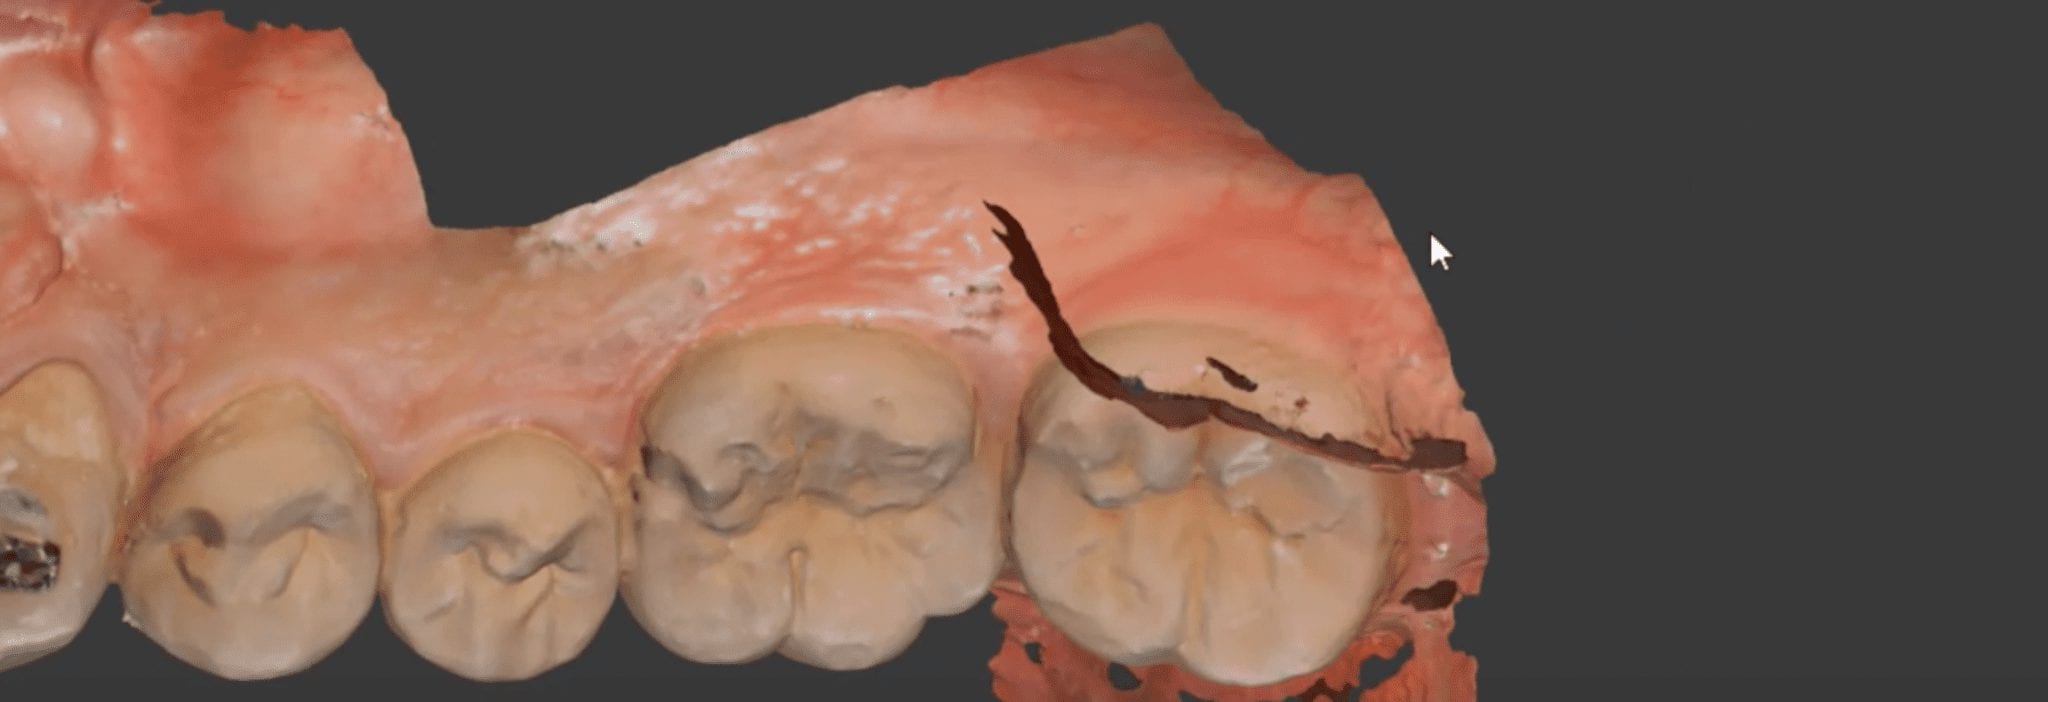
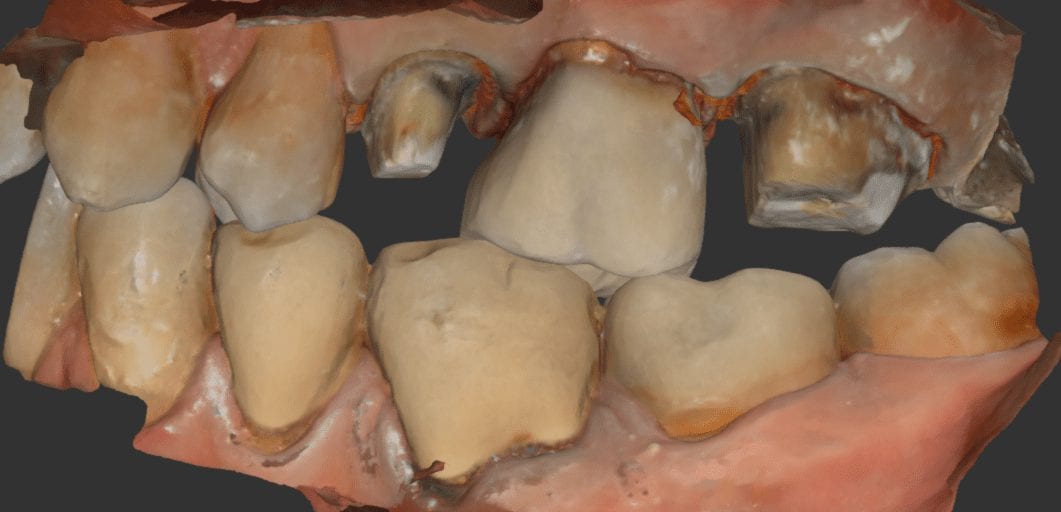
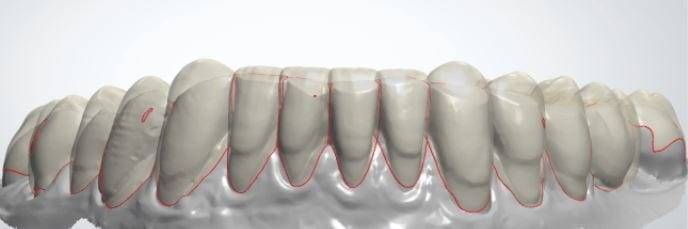
It was a long struggle to find margins with the Omnicam and after 4 years it was sold. The margin definition and resolution never reached an acceptable level. After seeing margins from high resolution scans by the Medit and defining them in exocad, it completely validated that we shouldn’t settle for anything less than the highest standard. This is an scan performed on a upper second molar with tough access, replacing a failing crown.
Download STL
Download OBJ
Download PLY
LAST X-RAY IS IMMEDIATE POST OP- EXCESS CEMENT WAS REMOVED AFTER FILM CHECK


This article demonstrate how a case be set up while the patient is being anesthetized. While waiting for it to take effect, your team can scan the opposing arch, the arch to be prepared, and even the buccal bite. You can see how that is set up in first video. Notice how we crop out the tooth to be prepared so that the software doesn’t get confused between the preop and prep stages.
[videopress ZvGLVAM6 permalink=”false” hd=”true”]
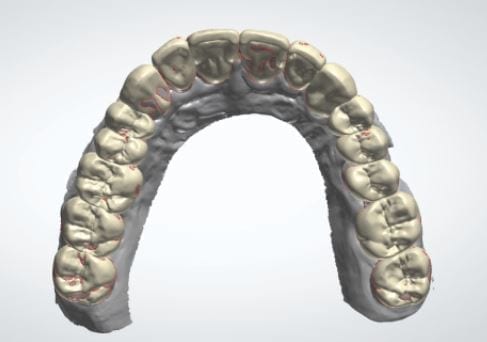
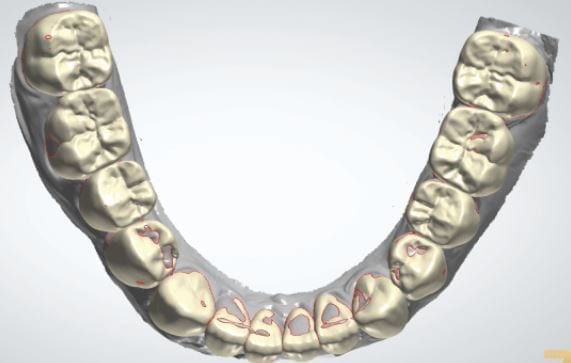
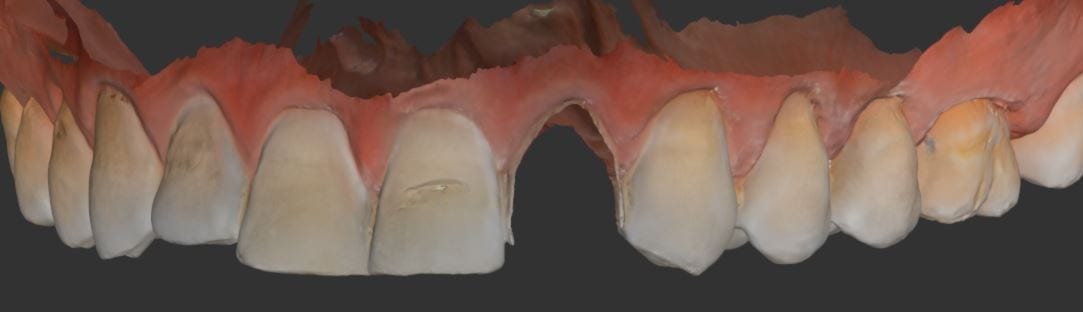
Once the tooth is prepared, the premolar is imaged back into the arch form in high resolution mode. This mode comes in handy for picking up the enamel that is exposed at the cavosurface margins. Some intra-oral imaging systems struggle with picking up the detail in these situations.
You can see how clearly discernible the margins are in this preview. Feel free to download the case data at the end of the article. Please note that areas that are not critical for the restoration design were essentially ignore as they play no significant role in the desired outcome.
Download STL
Download OBJ
Download PLY

To see this case presented in webinar fashion click on the image and enter the members area for much greater detail and information
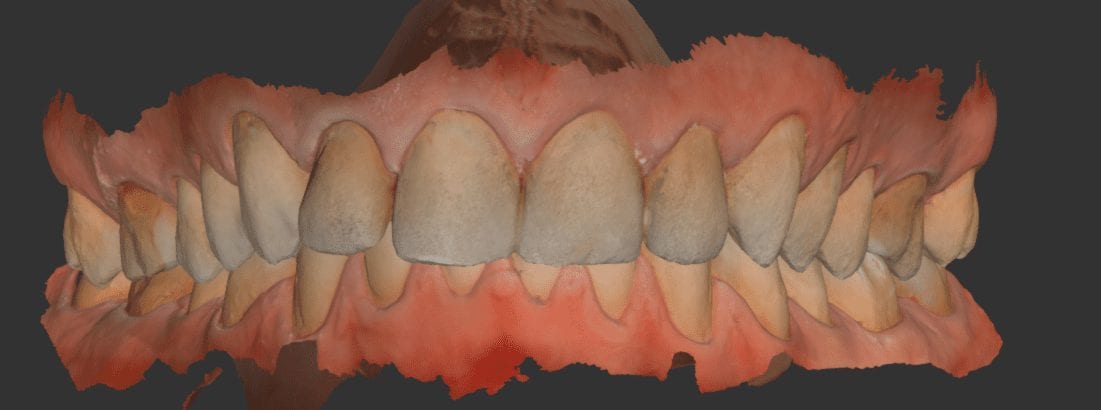
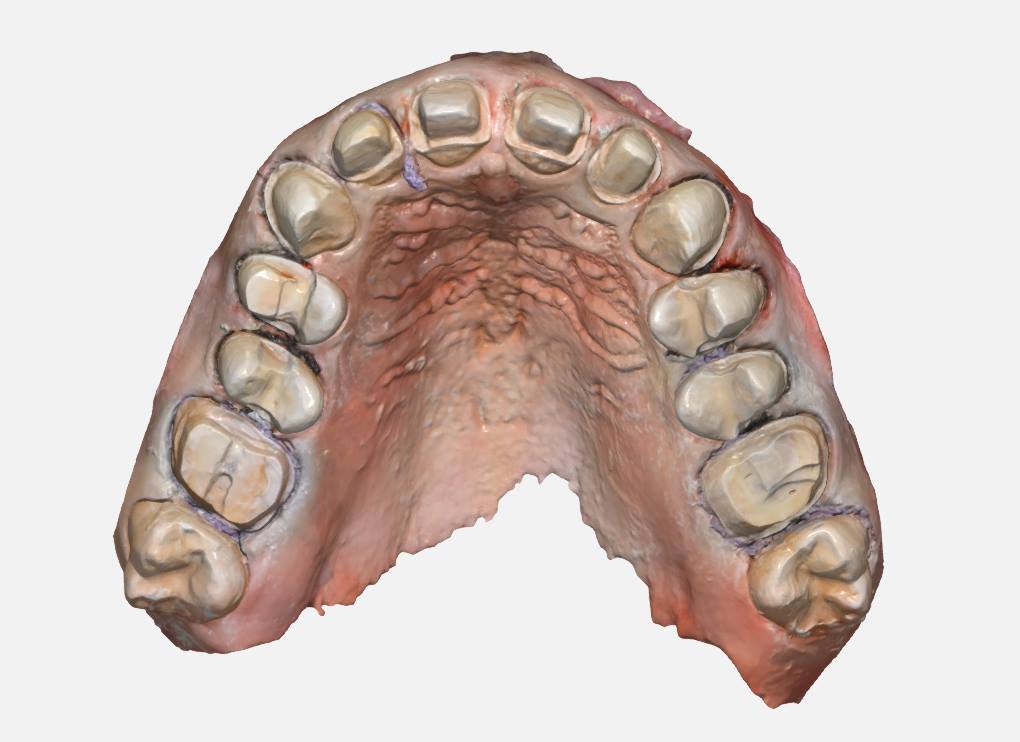
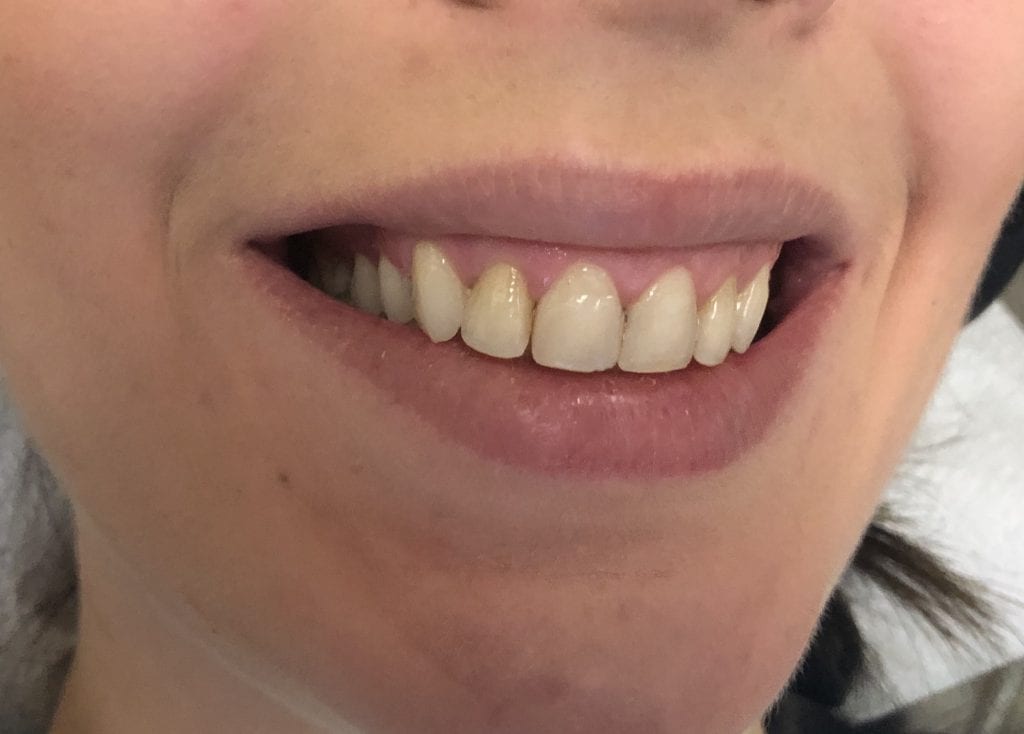
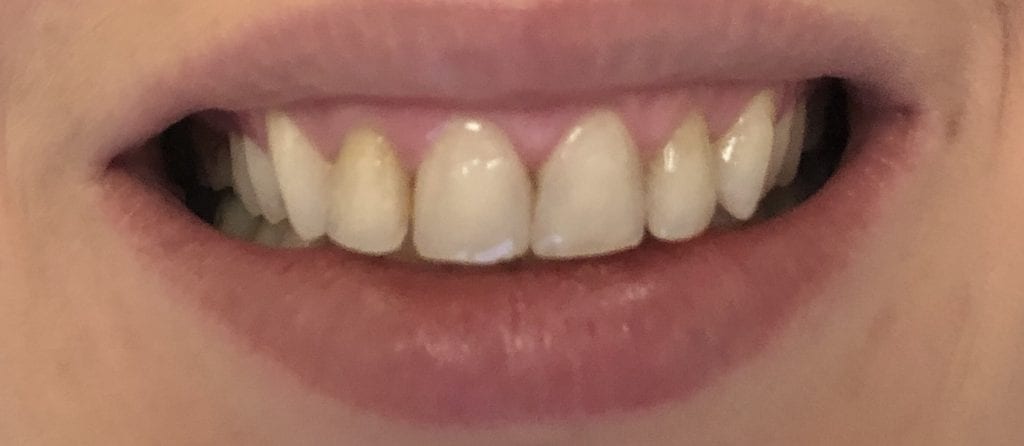
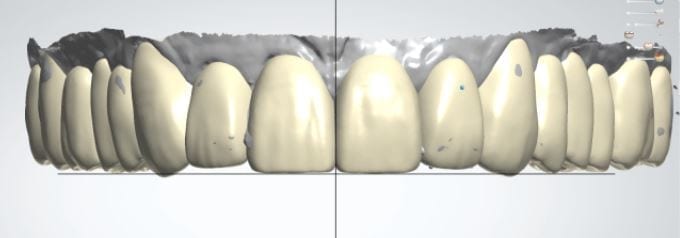
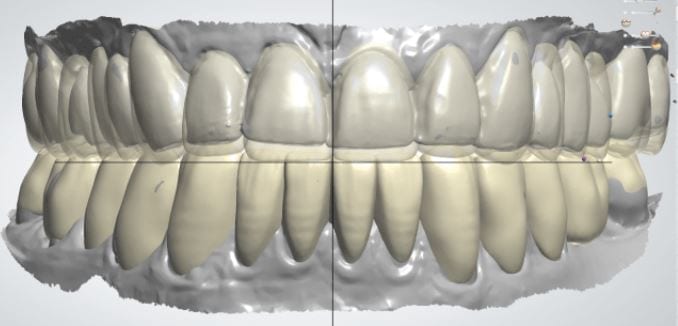
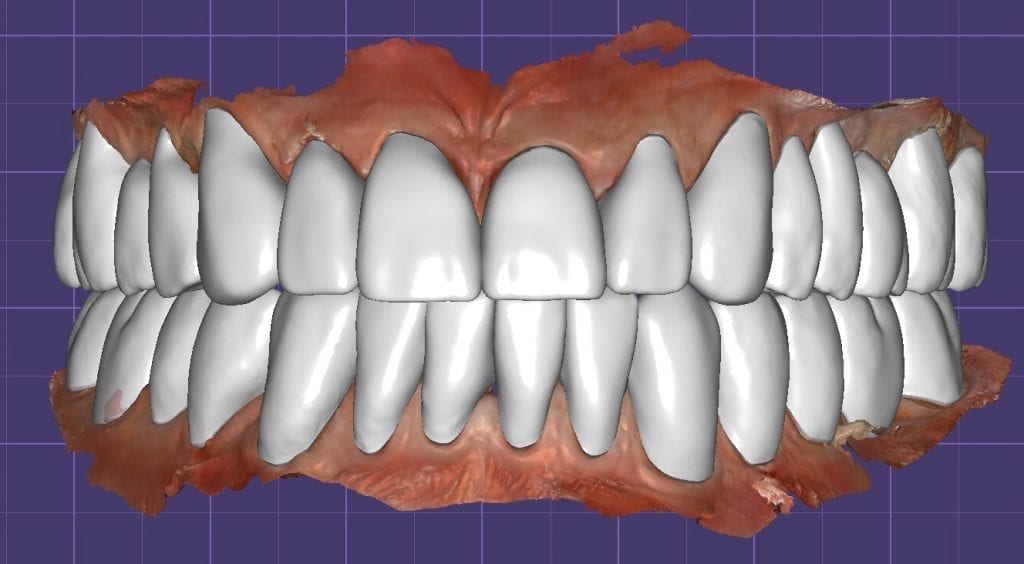
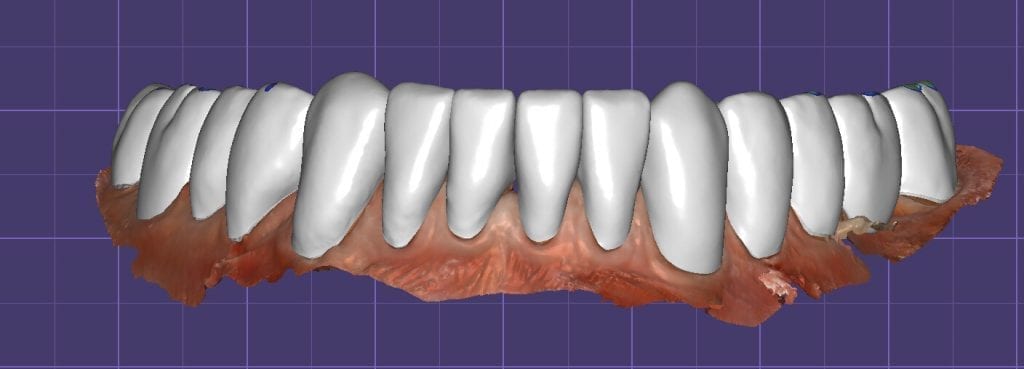
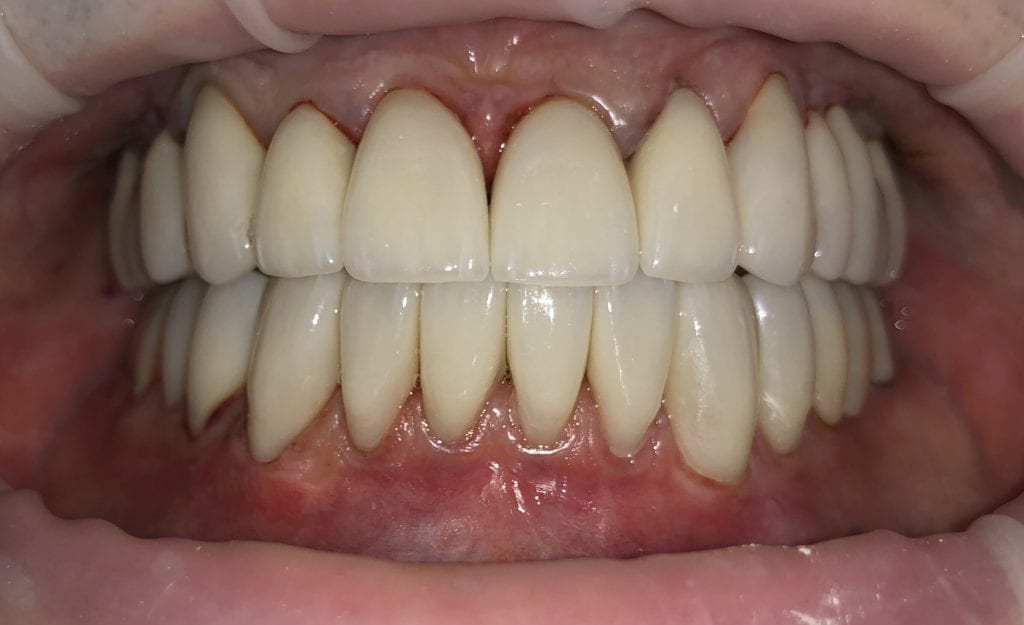
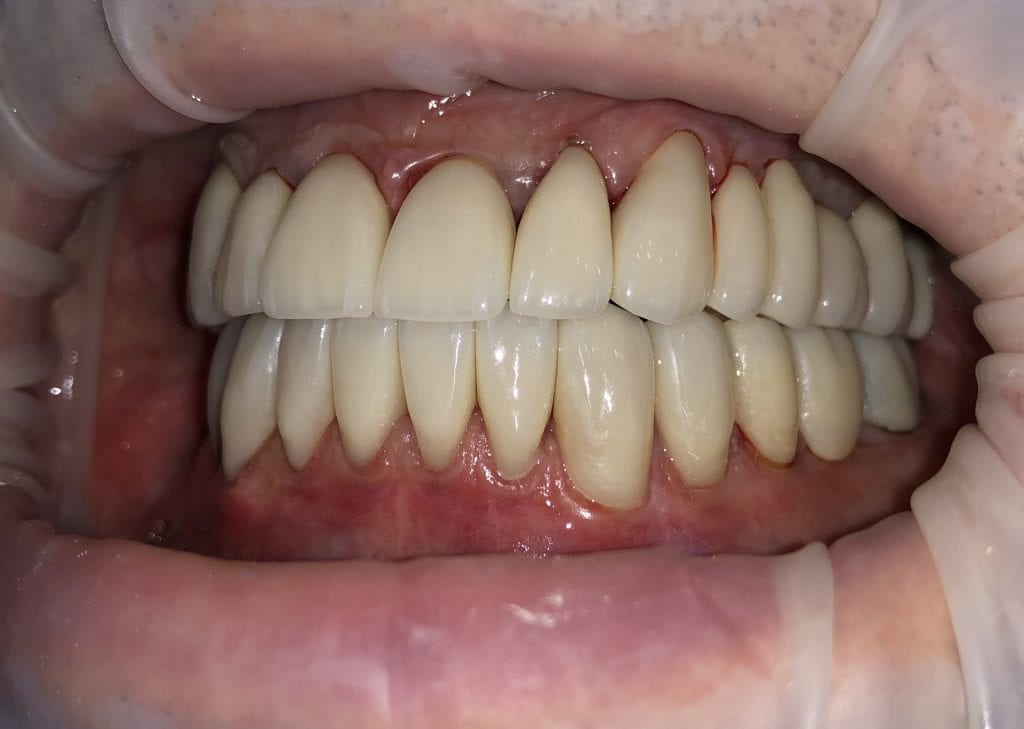
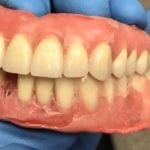
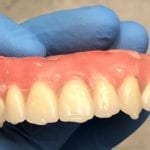
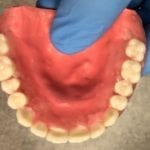
Pre-existing restorations that warranted replacement with an increase in vertical dimension.
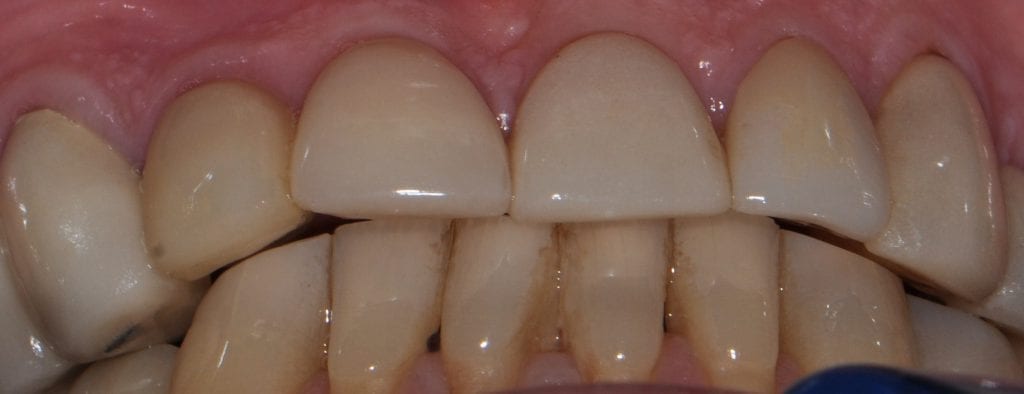
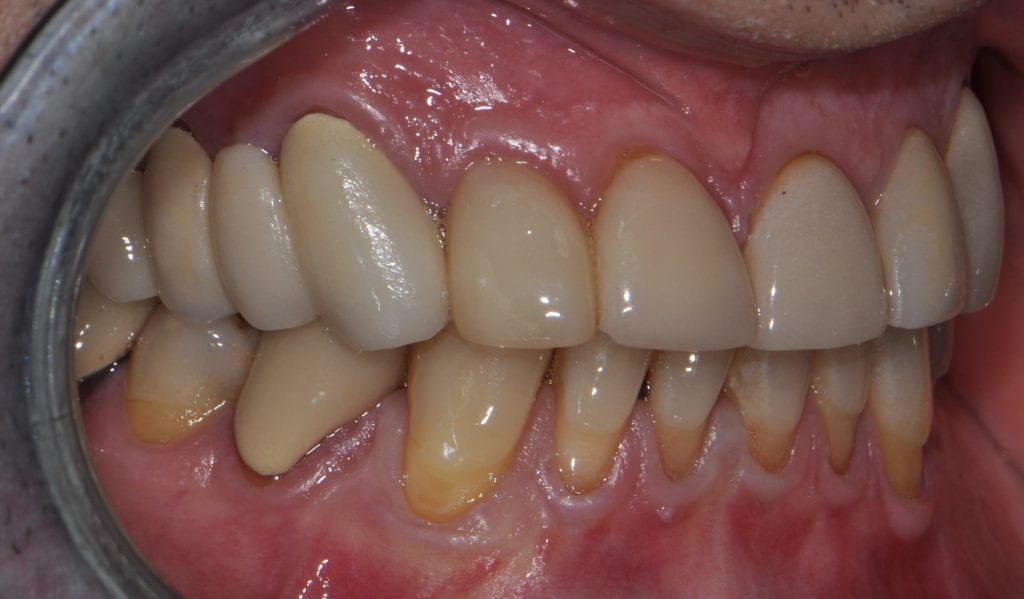
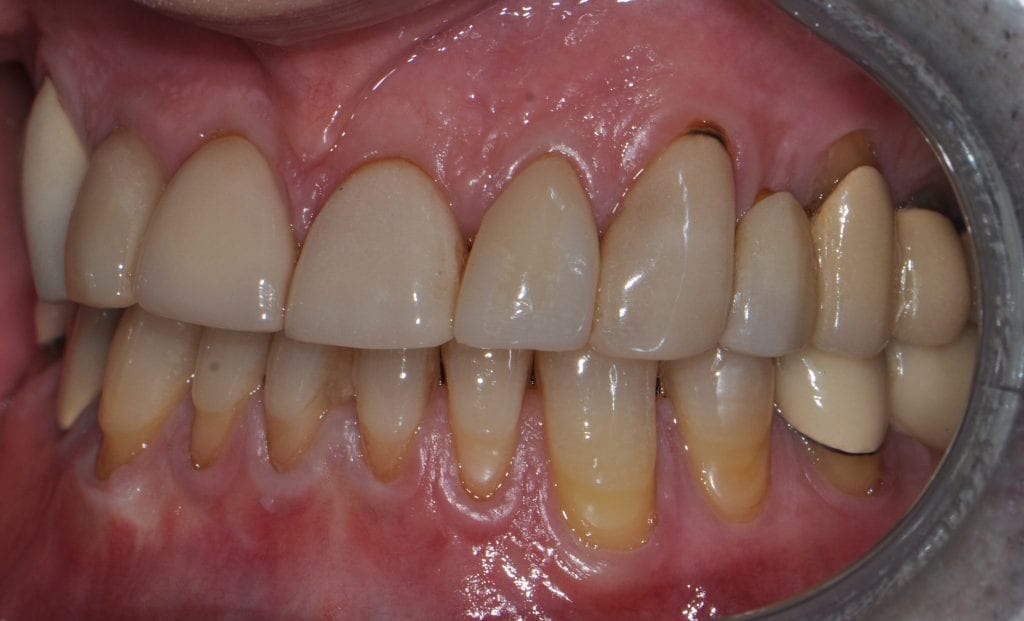
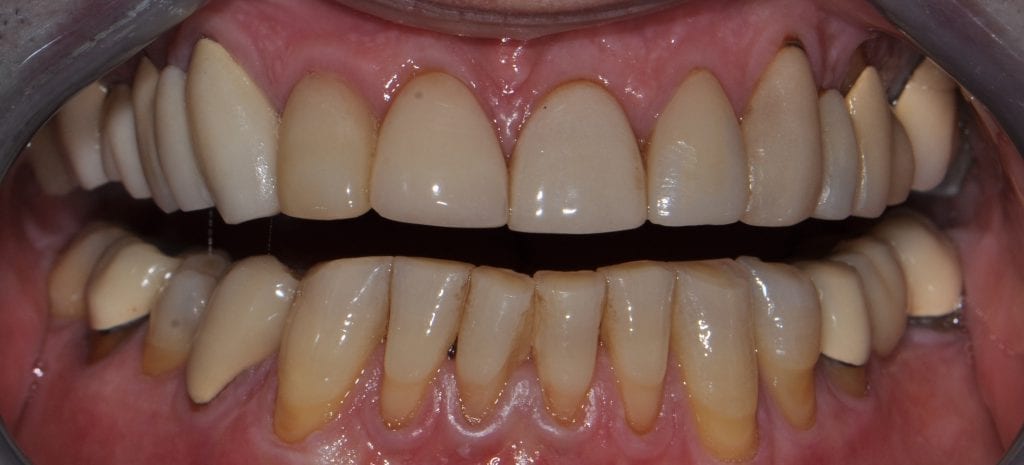
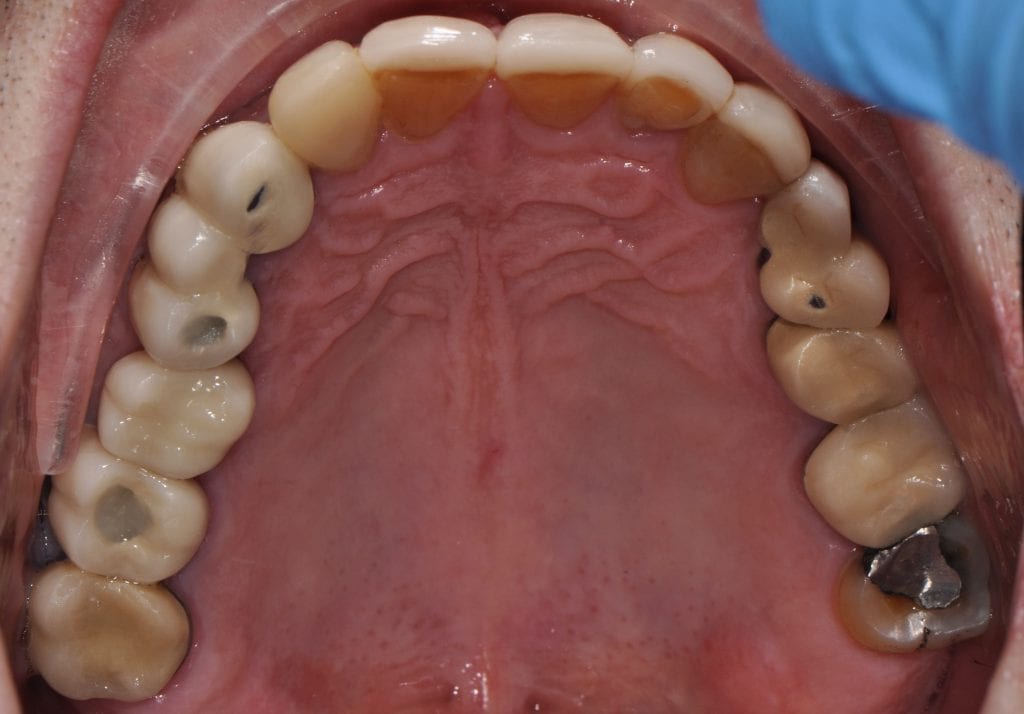
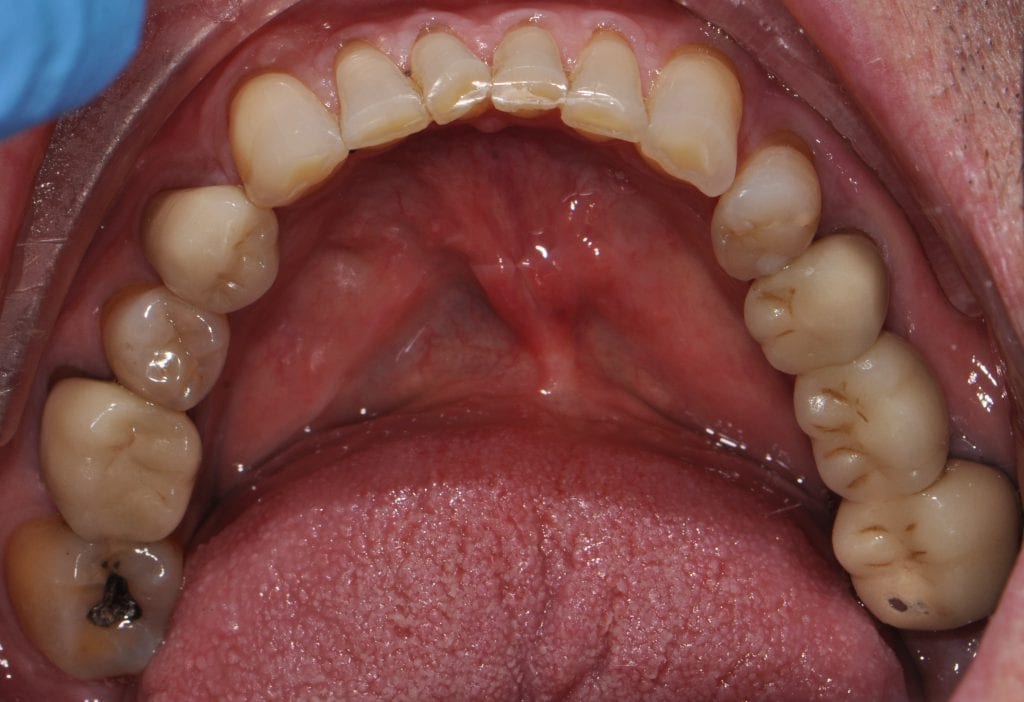
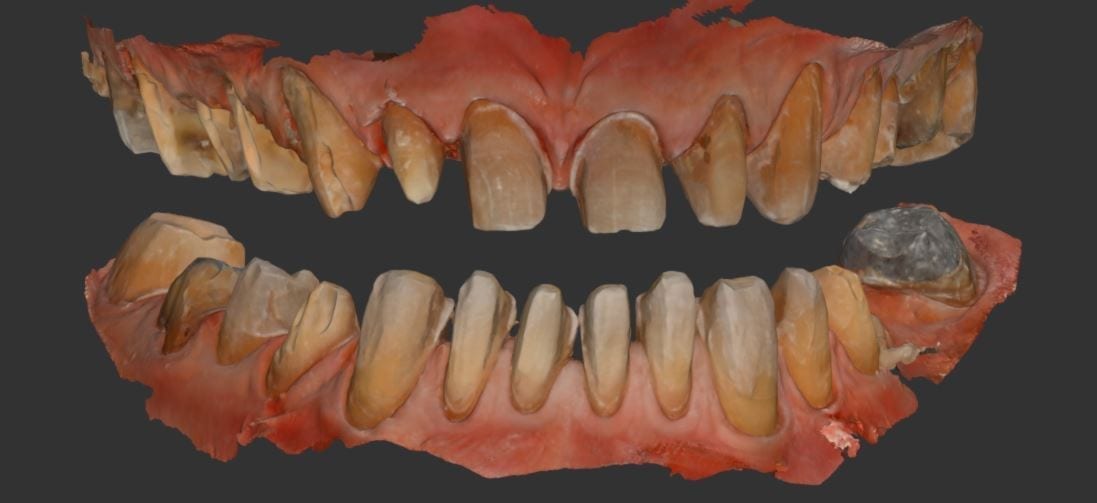
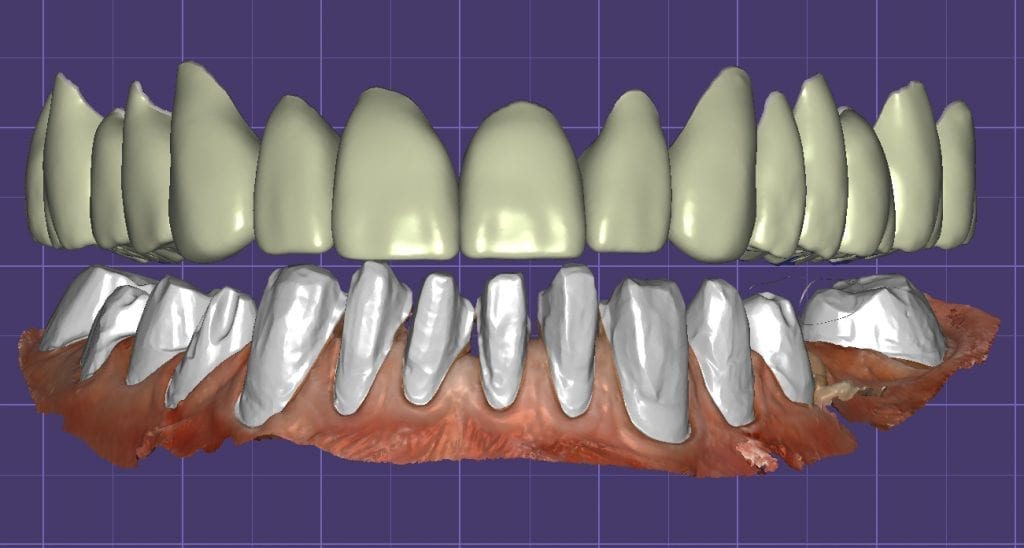
Pre-existing restorations that warranted replacement with an increase in vertical dimension. The upper and lower arch were captured with the medit I500 and articulated together with enough clearance to accommodate new restorations and to restore the patient to an ideal tooth position.
This video shows how the vertical dimension was captured with cotton rolls blocking out the tongue and the dark oro-pharynx, which usually spell trouble for an IOS
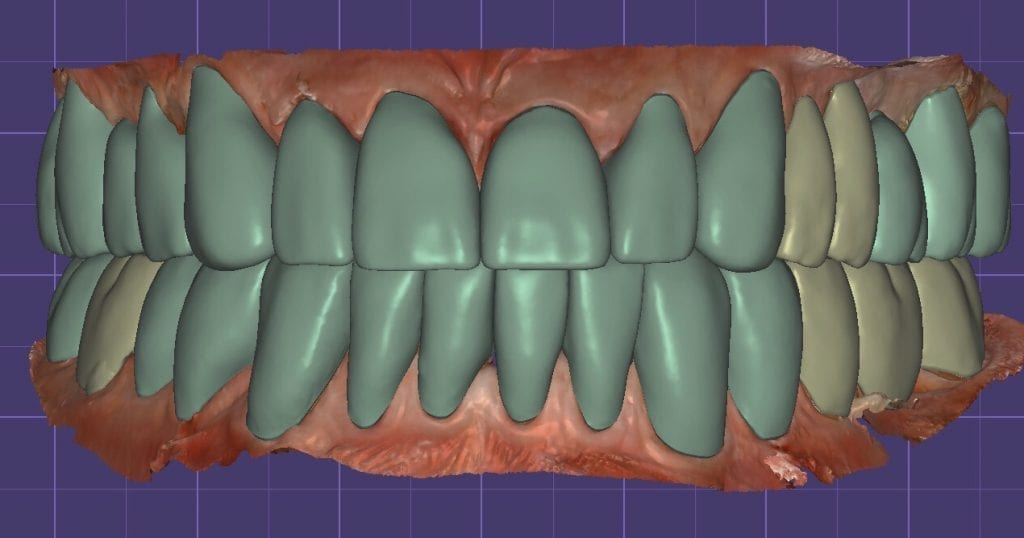
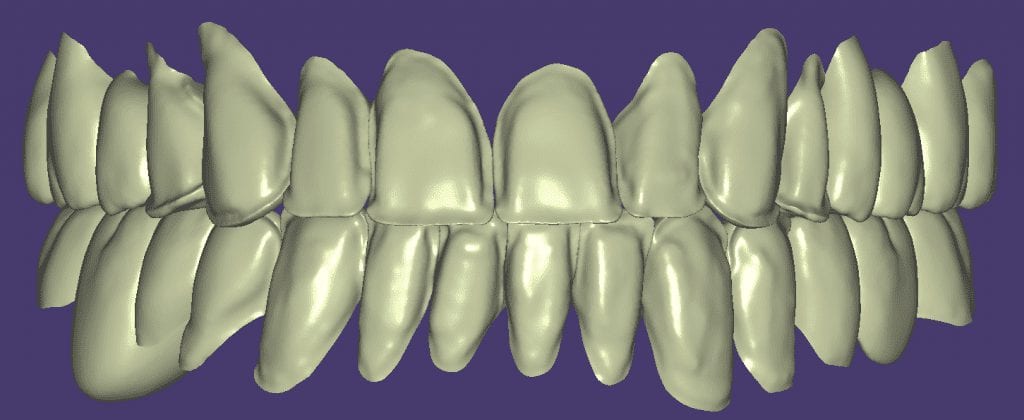
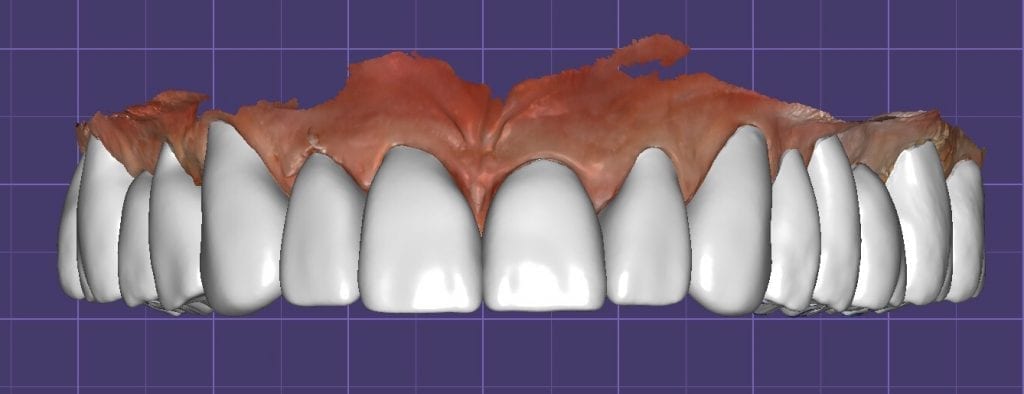
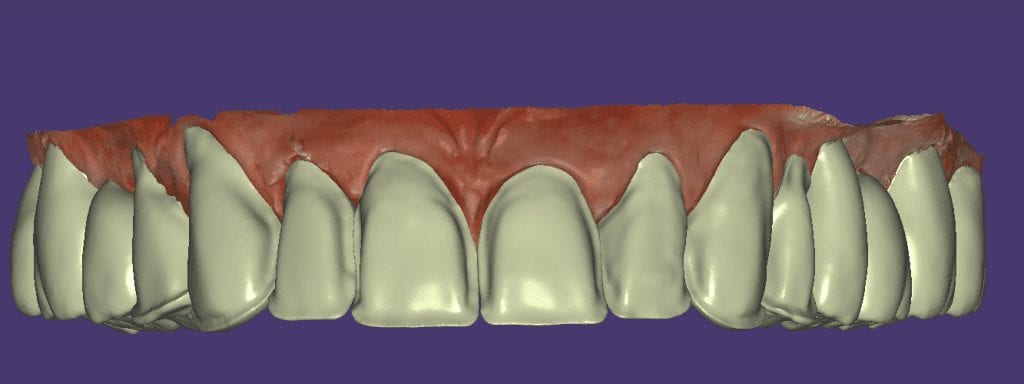
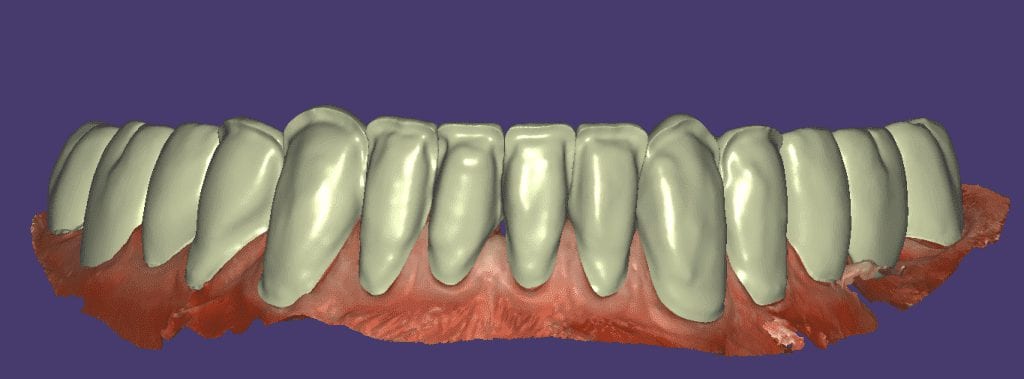
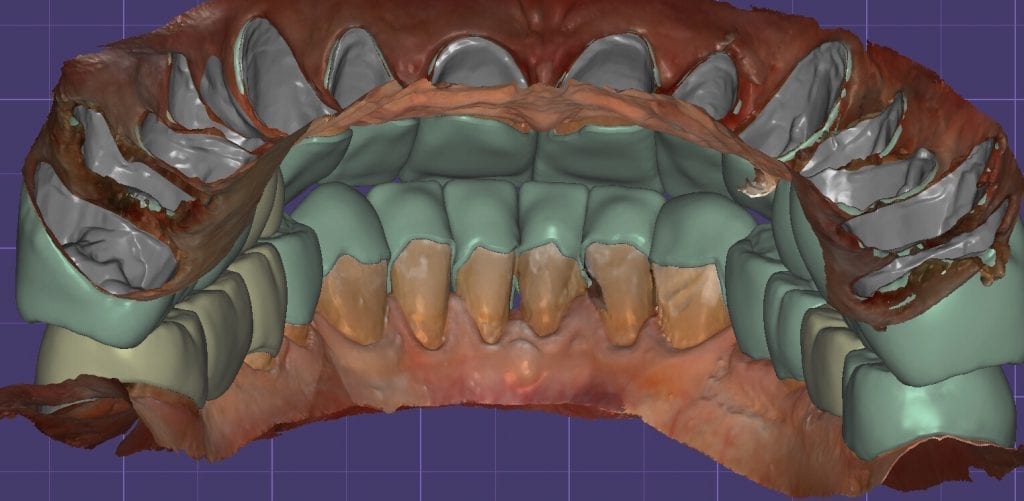
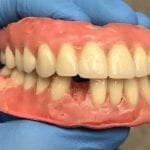
The digital models were then imported into a third party software where a library of tooth morphologies are available for the clinician to choose from.
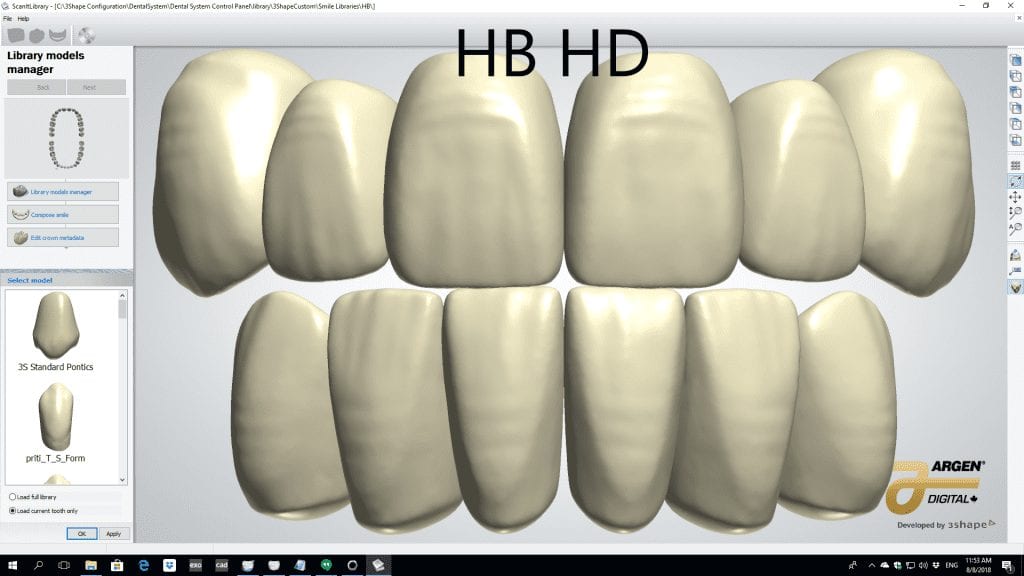
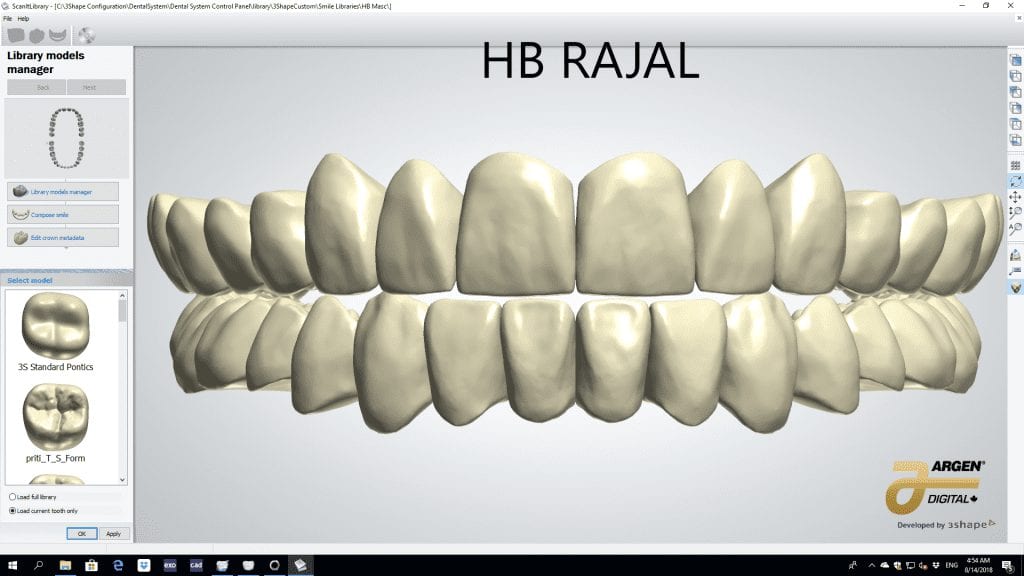
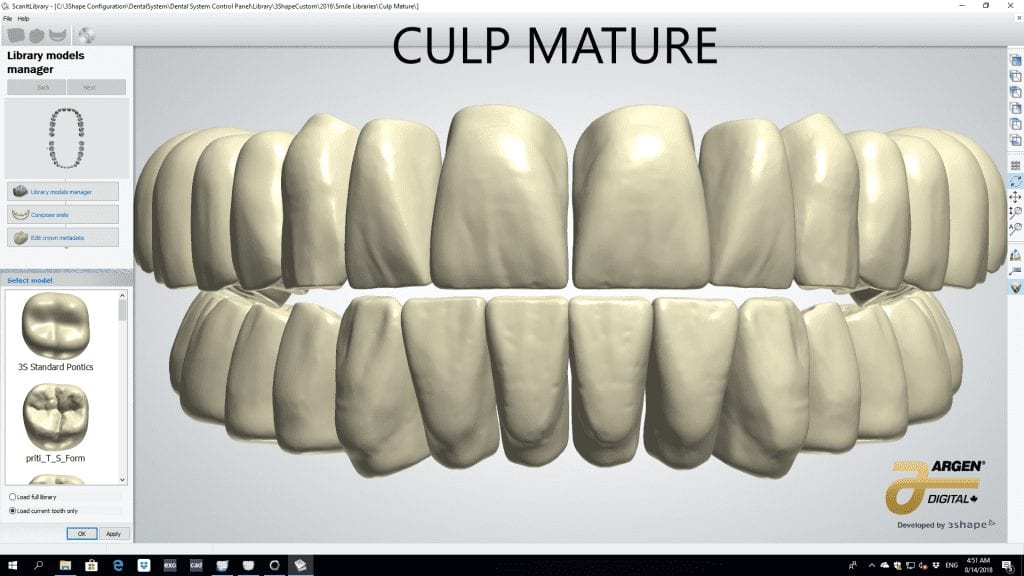
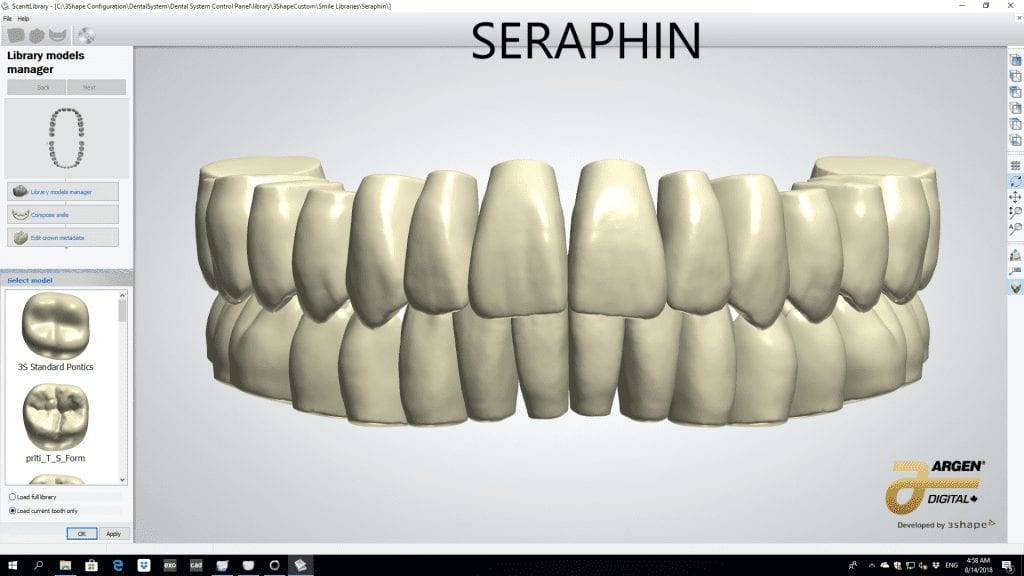
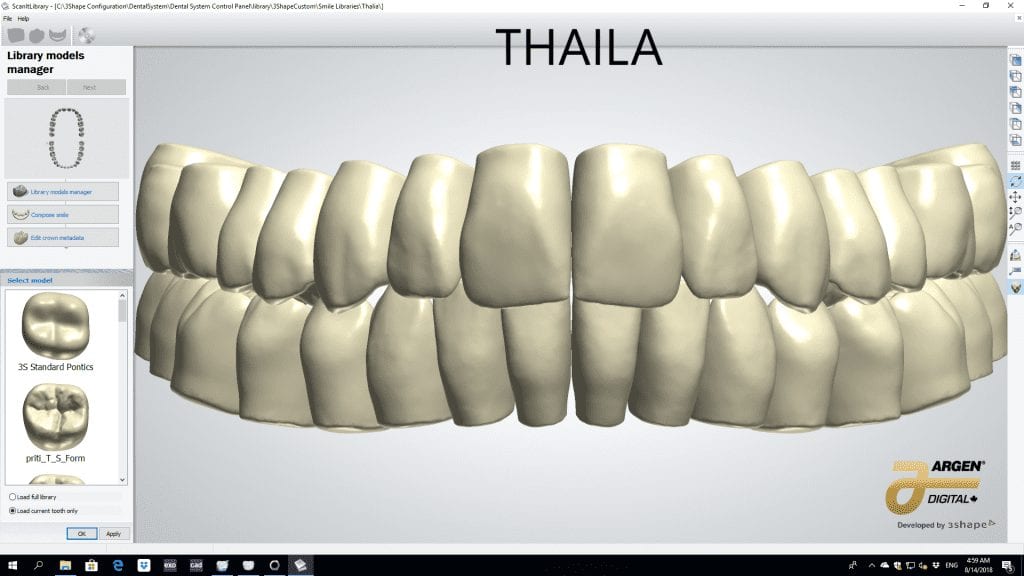

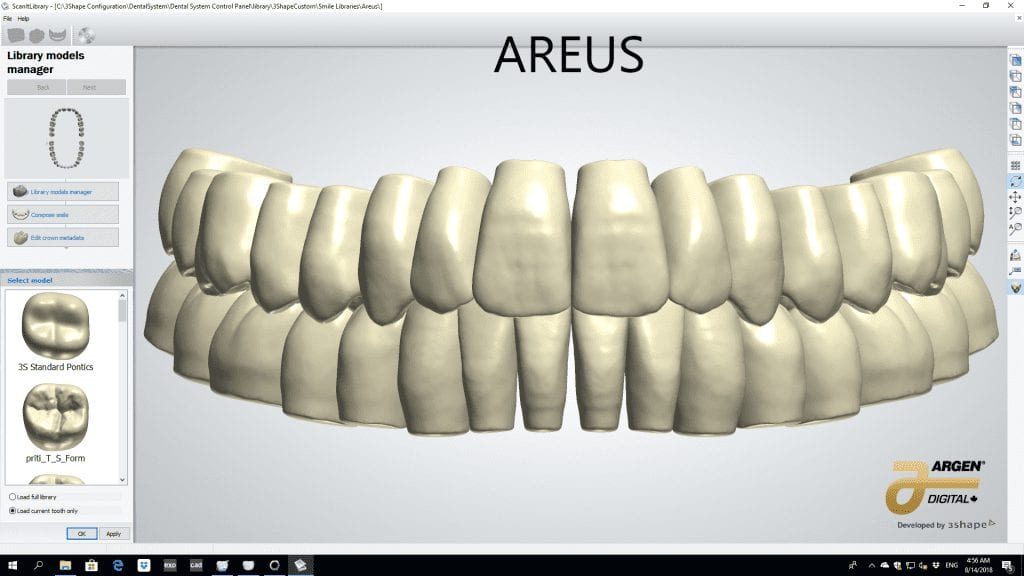


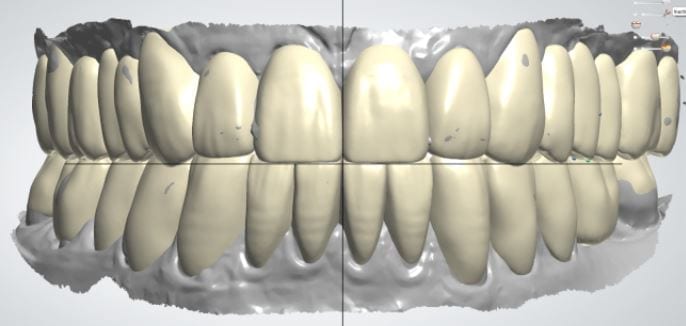
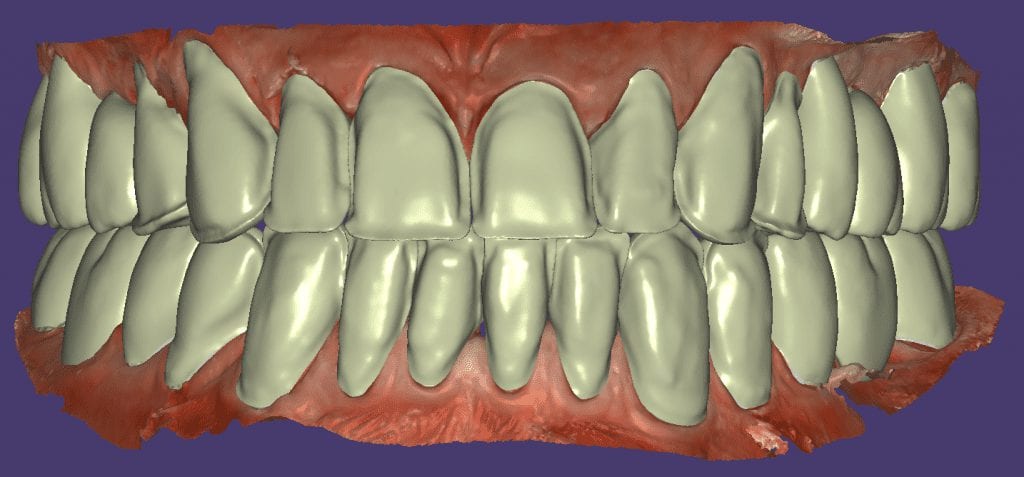
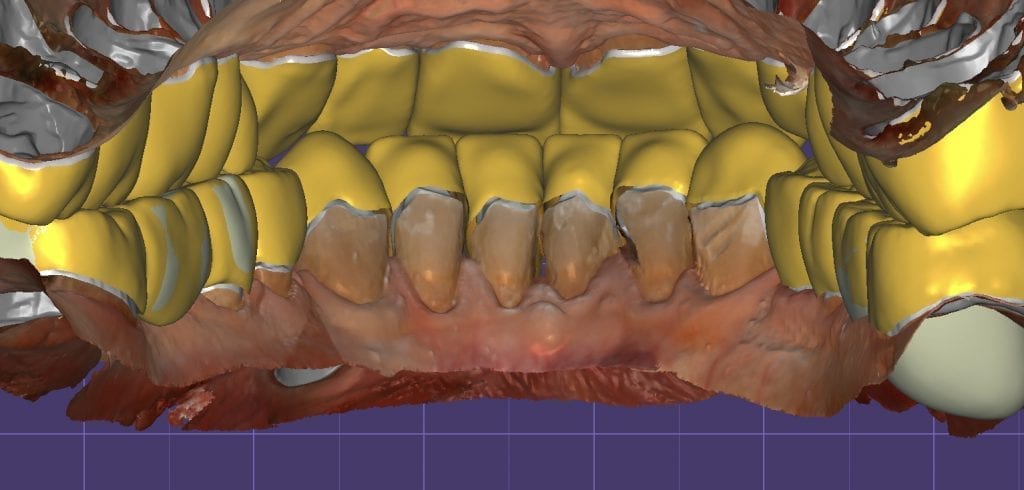
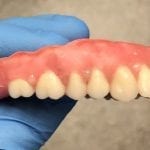
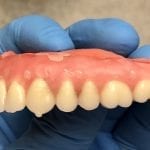
Once the appropriate library is chosen, the digital wax ups are performed. In the subsequent photos you can see the transparent overlay of the wax-ups to the original position of the existing dentition

Once the case is designed to the ideal vertical dimension then multiple shells can be fabricated for treatment. The wax up model can be uniformly reduced by .5mmm’s circumferentially and a temporary shell can be designed. Once the teeth are prepared, these shells can be relined and seated onto the preps.
PREP AND TEMPS
How was this done? Watch this video of how the case was imaged over a 4 hour time span in multiple segments
FIRST VERTICAL DIMENSION
The initial vertical dimension was greater than desired and the tooth shape was too bulky in appearance.
[videopress C0MfqBiS]
ADJUSTED TEMPORARIES AND NEW VERTICAL DIMENSION
Over the course of a few appointments, the vertical dimension was reduced and the temporaries were adjusted to the patient’s desires. The new upper and lower arch were captured with the Medit i500 and the jaws were related to each other.
This was then imported into exocad where the prepped arches from a few weeks prior were force matched to the new bite
[videopress Zj7XsYG4]
After the upper jaw was related to the temps, the same was done with the lower arch. Great care was taken to make sure the arches were properly related to each other throughout the process
[videopress ObPk1CAK]
CASE DESIGNS
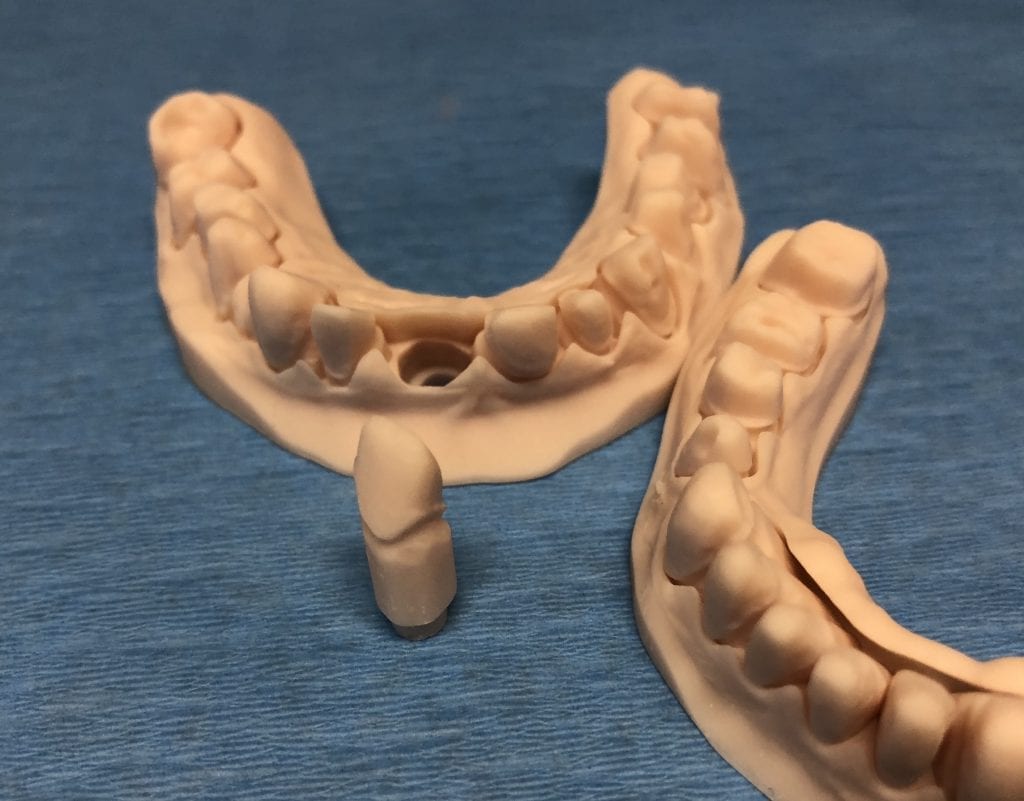
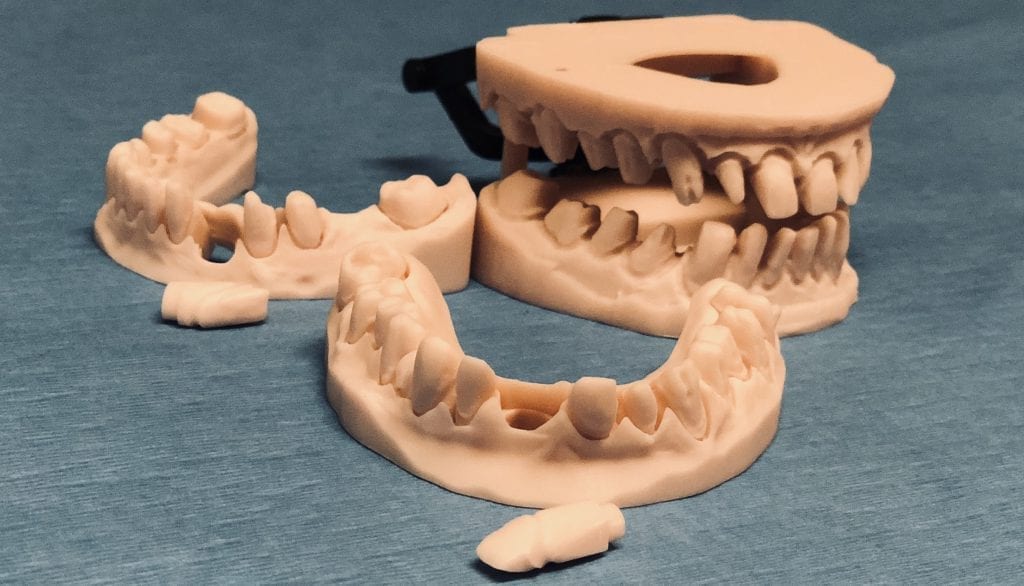
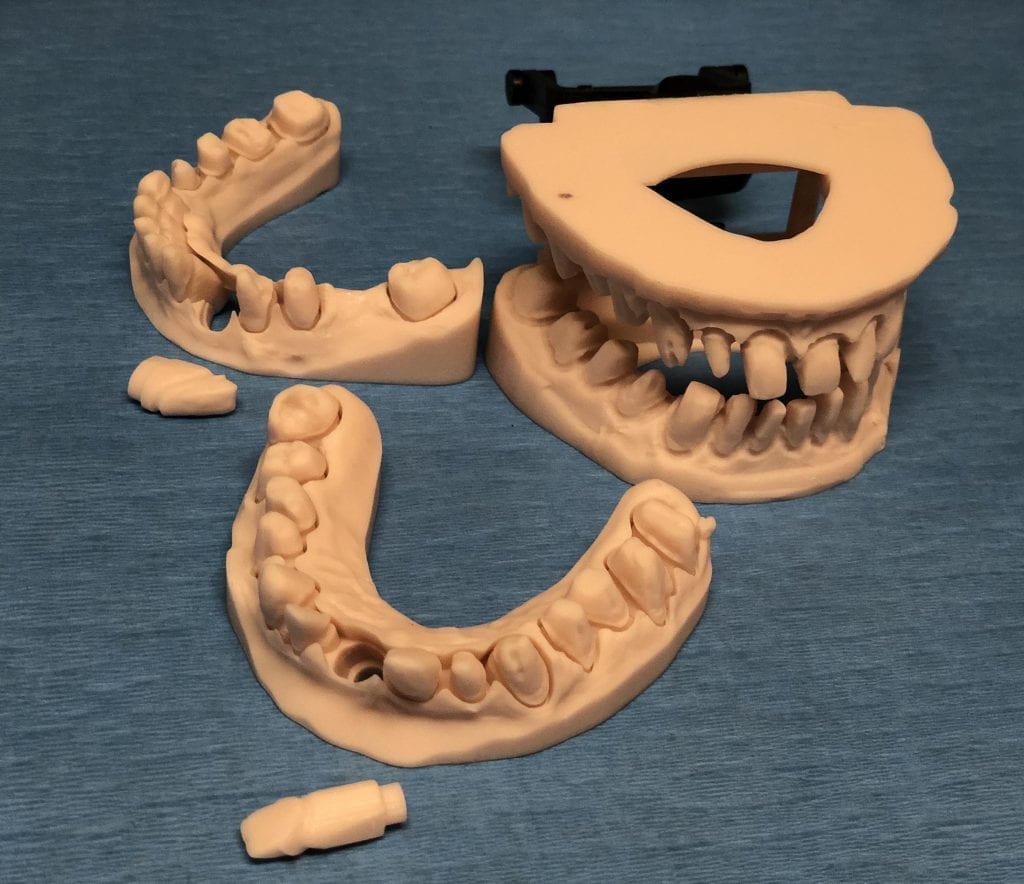
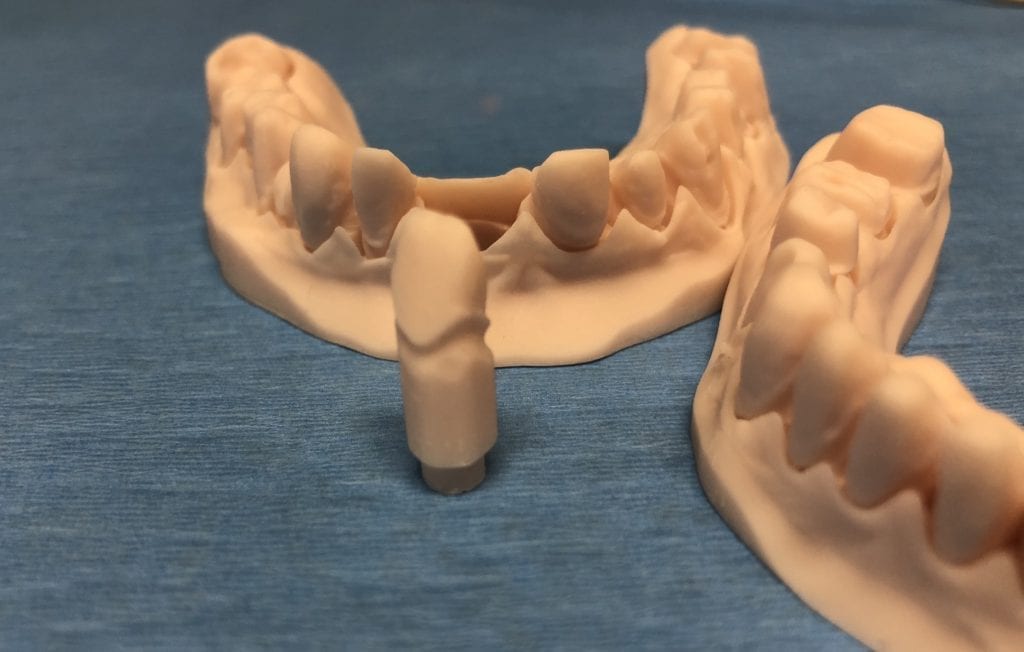
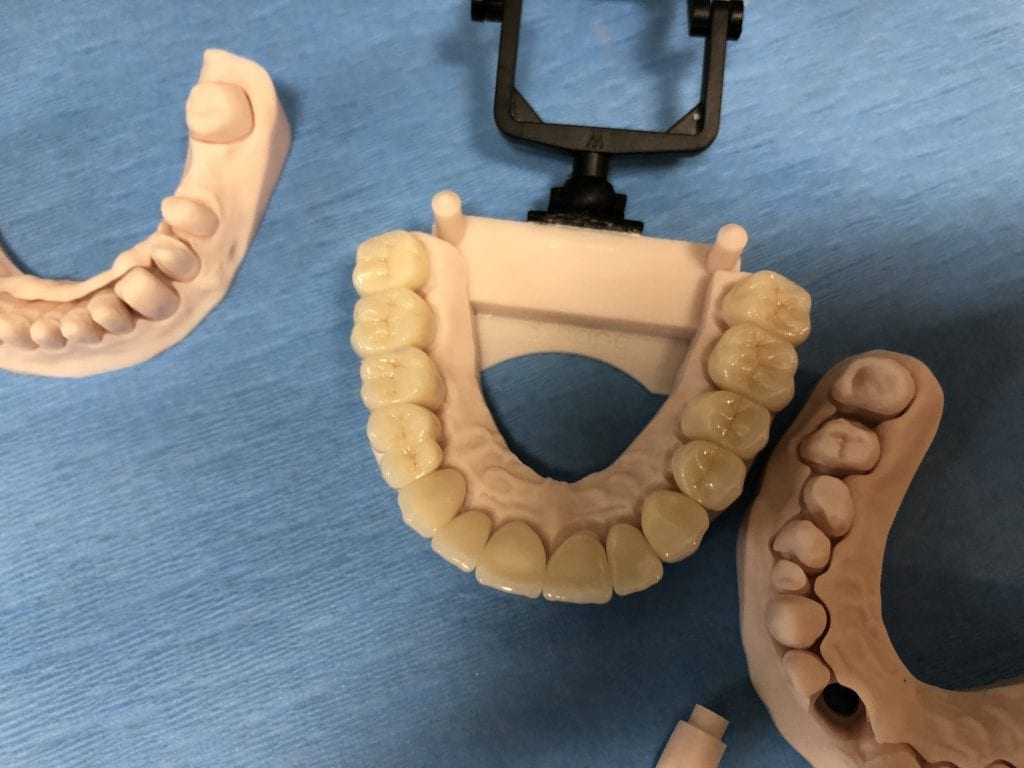
The case was designed by CADENT BESSA, and the models were printed by Burbank Dental Lab with Carbon Printers. There restorations were milled and cut back and layered by Burbank Dental Lab
IMAGES OF PRINTED MODELS
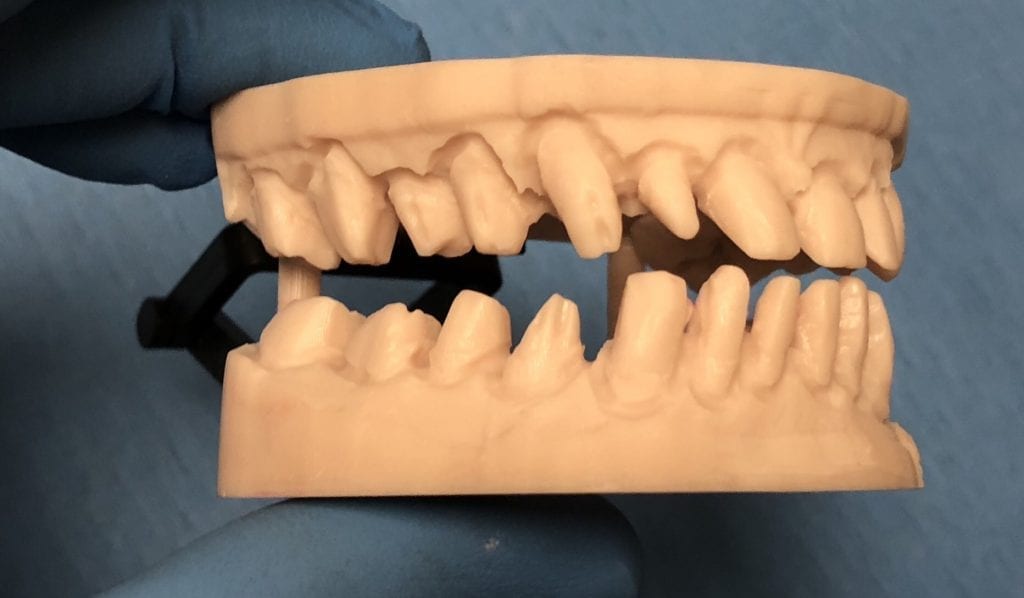
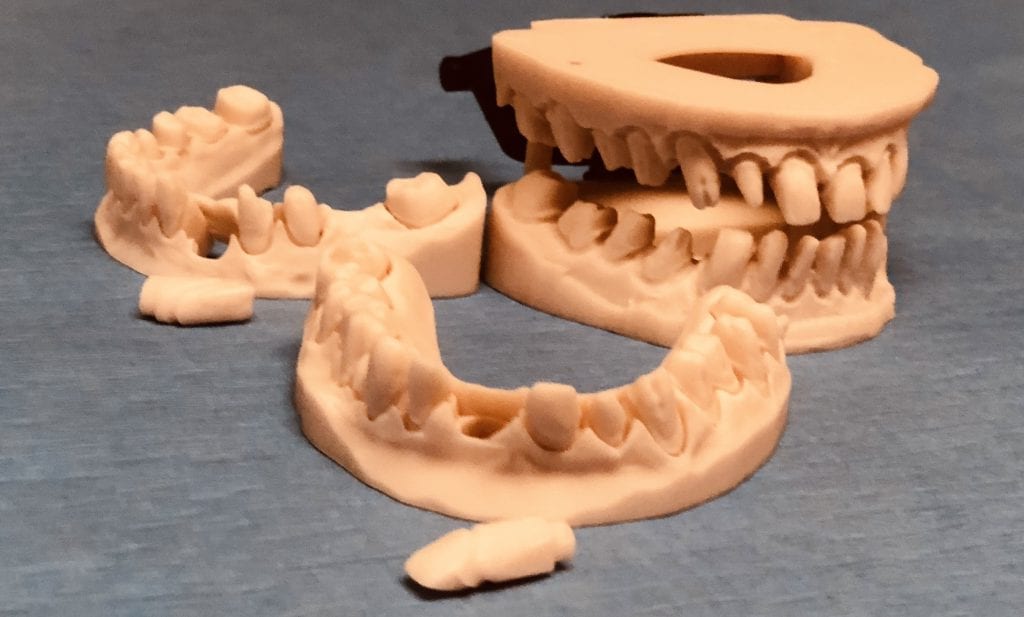
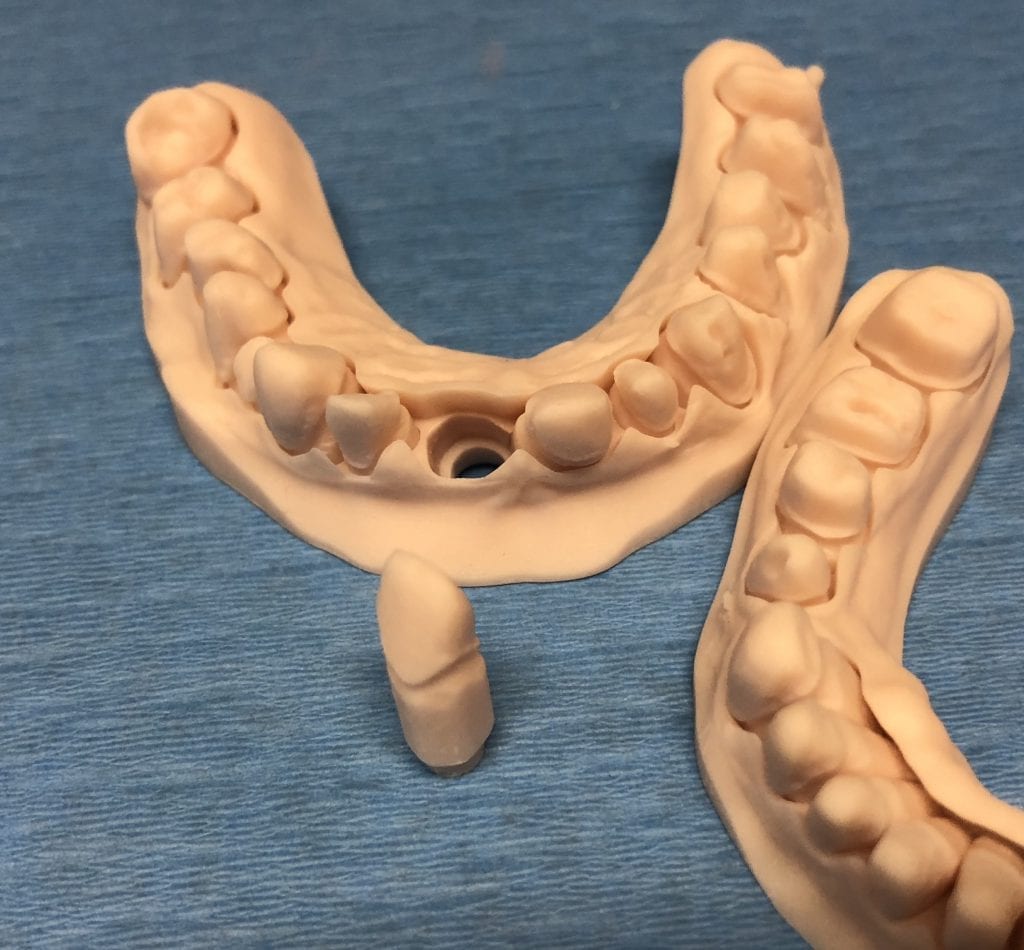
[videopress vWPj7dBI permalink=”false” hd=”true” loop=”true” autoplay=”true”]
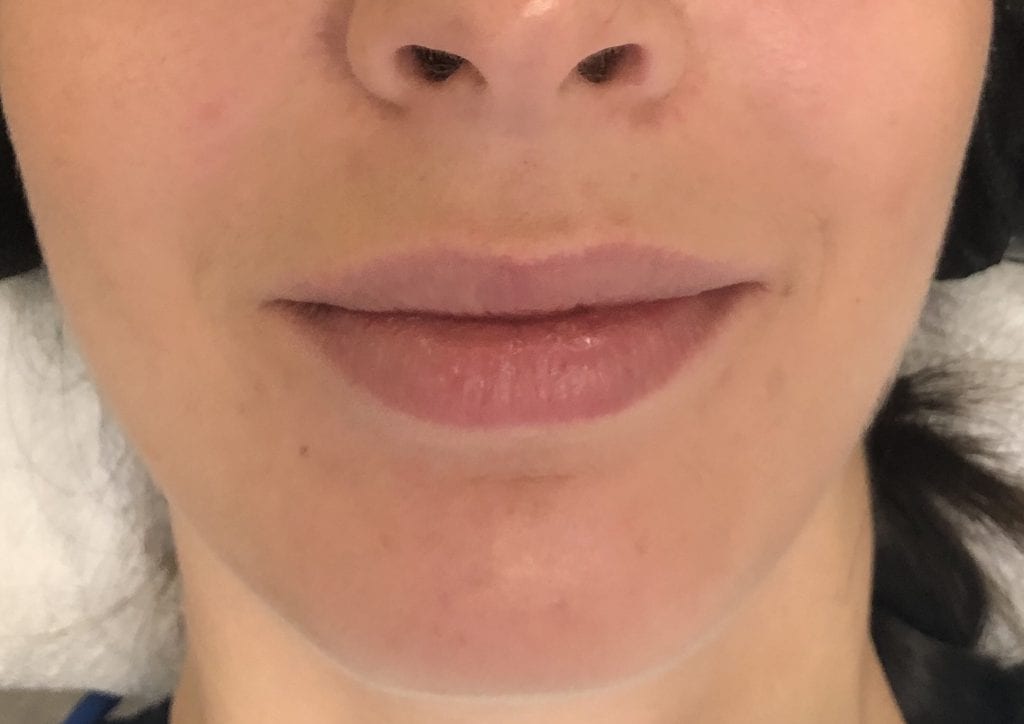
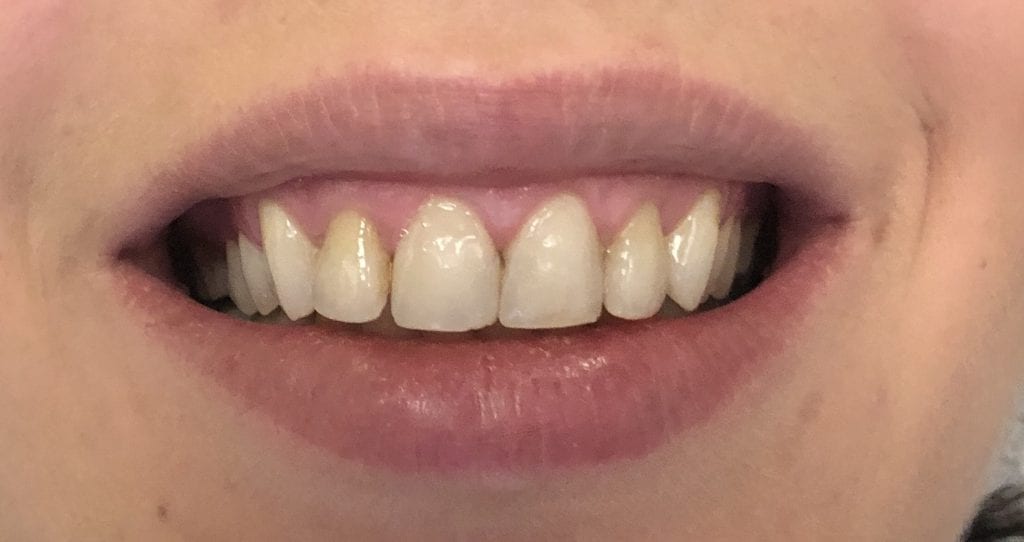
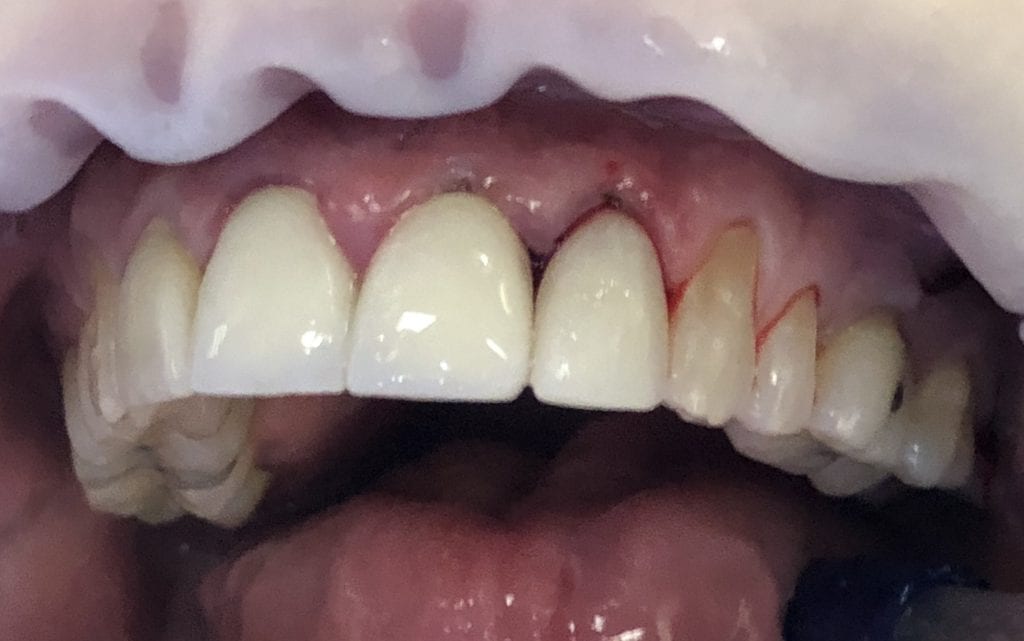
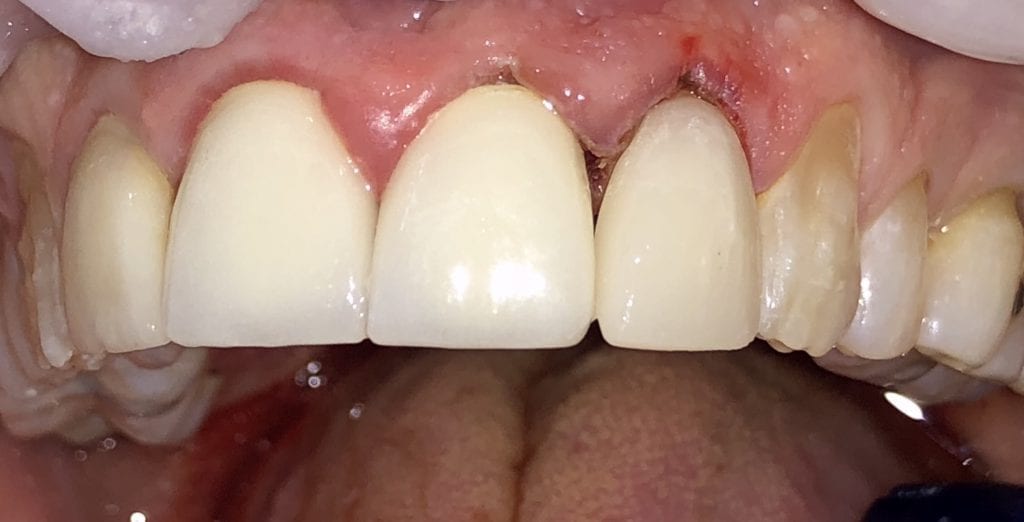
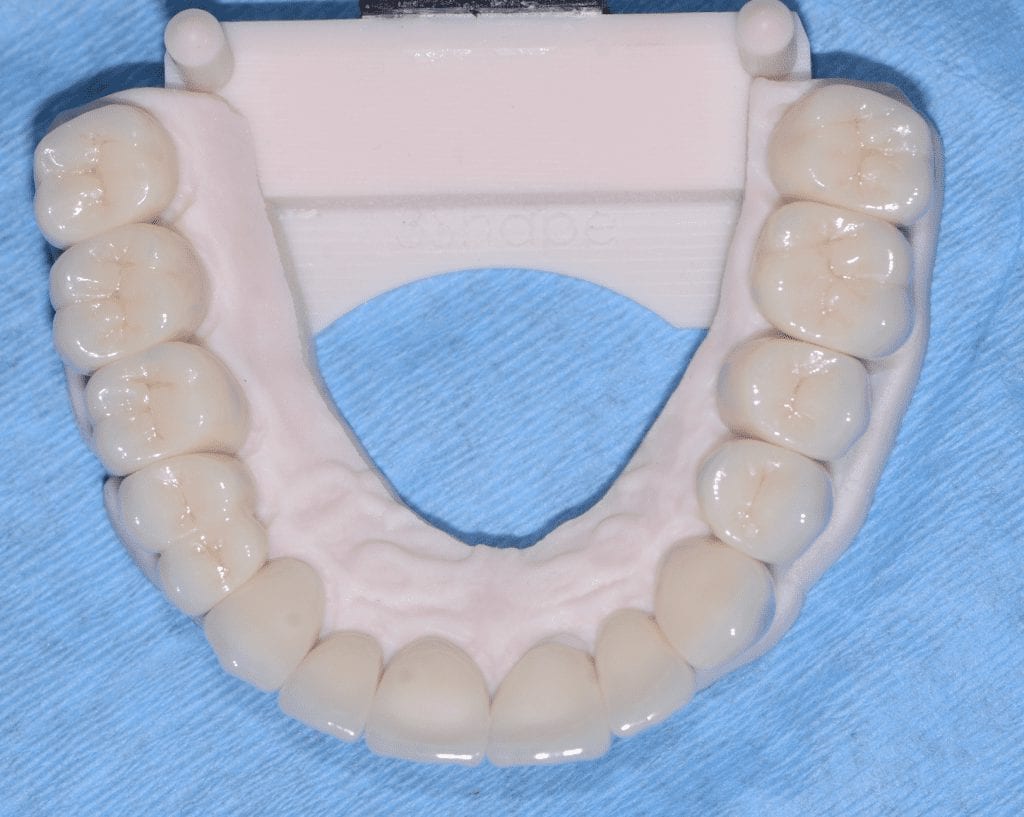
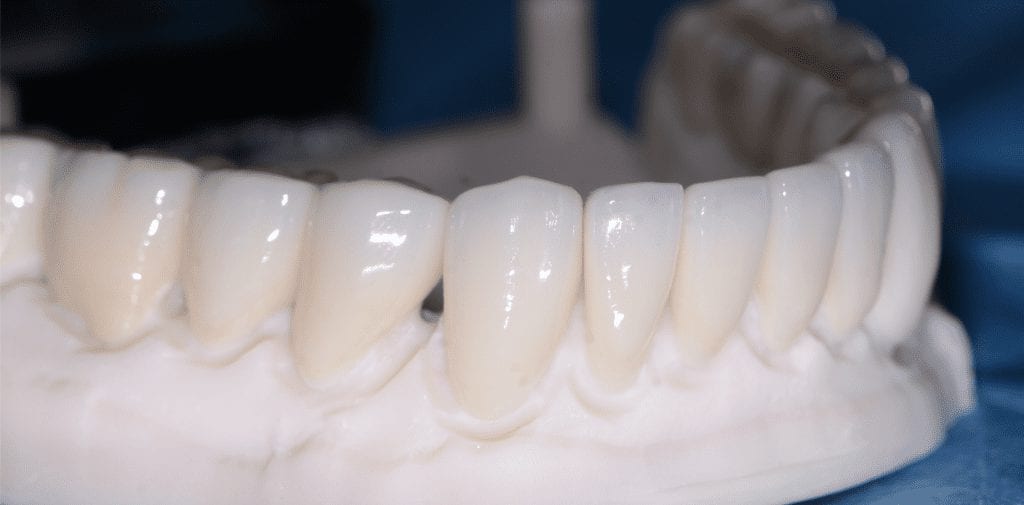
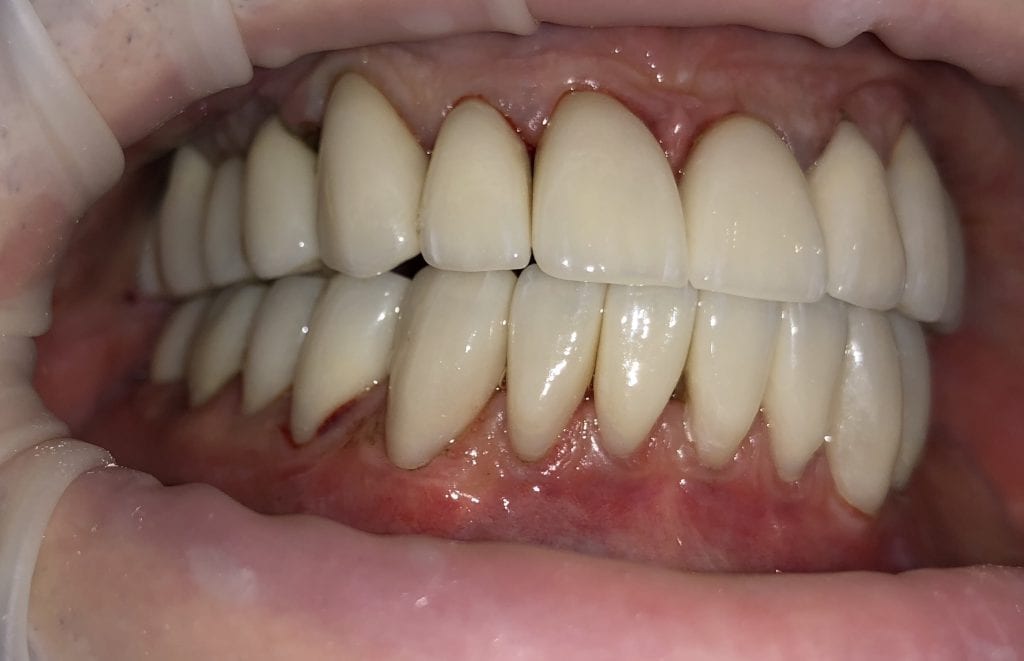
IMMEDIATE POST-OP PHOTOS AND VIDEO WITH IPHONE CAMERA
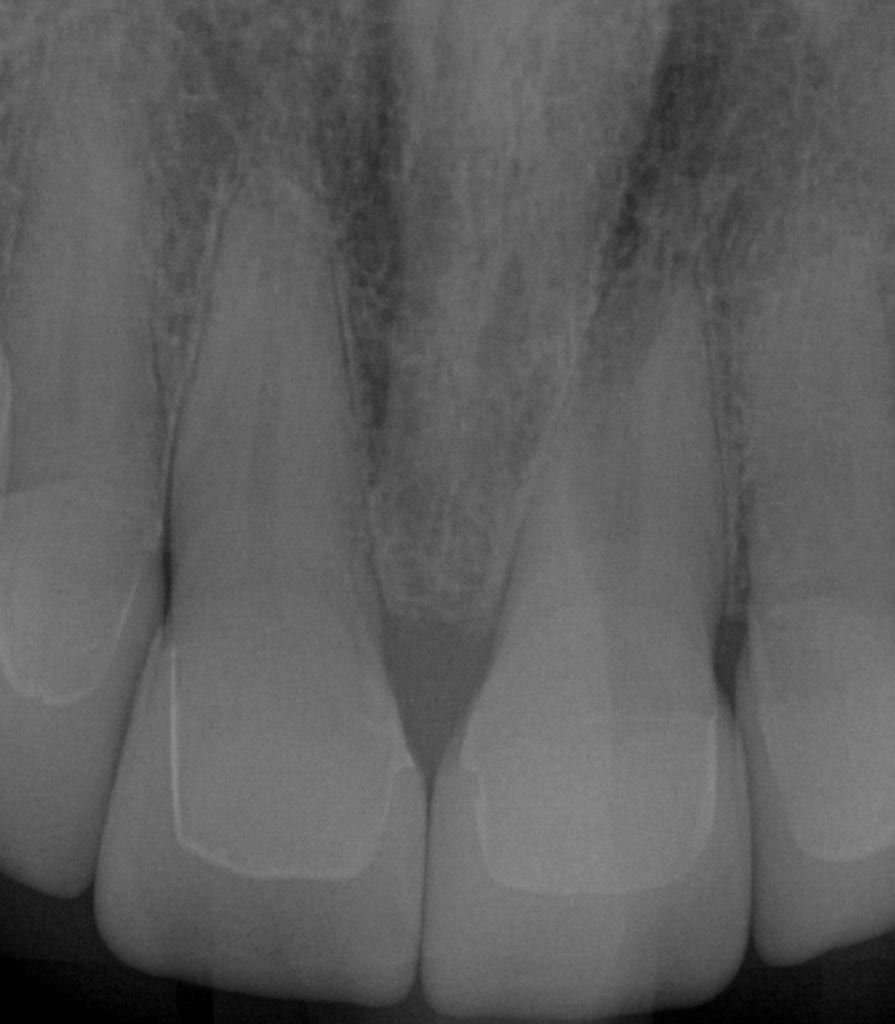
ONE WEEK POST-OP RADIOGRAPHS / CEMENT CHECK

[videopress b4O5j3Pq permalink=”false” hd=”true” loop=”true” autoplay=”true”]

| Video 1 | Video 2 | Video 3 | Video 4 | Video 5 | |
|---|---|---|---|---|---|
| High Resolution Scanning | No | No | No | No | Yes |
| Automatic Noise Filtering | Yes | Yes | No | Yes | Yes |
| Show Unreliable Data | Yes | No | Yes | No | No |
Video 1- Show Unreliable Data and Automatic Noise filtering (High Resolution Scan off)
Video 2- Use Automatic Noise filtering / Do Not Show Unreliable Data and High Resolution Scan off)
Video 3- No Automatic Noise-filtering / Show Unreliable Data
[videopress uOCpT2b2]
Video 4- Do Not Show Unreliable Data and Do Not Use High Resolution Scanning / Use Auto Noise Filtering
[videopress mNyjB3cc]
Video 5- Do Not Show Unreliable Data / Use Automatic Noise Filtering and High Resolution Scan

[wc_product_slider show_type=”featured” number_products=”3″ skin_type=”widget” widget_effect=”fade” card_effect=”fade” slider_auto_scroll=”yes” effect_delay=”1″ effect_timeout=”4″ effect_speed=”2″ image_size=”woocommerce_thumbnail” align=”none” width=”95″ width_type=”%” margin_top=”10″ margin_bottom=”10″ margin_left=”10″ margin_right=”10″]

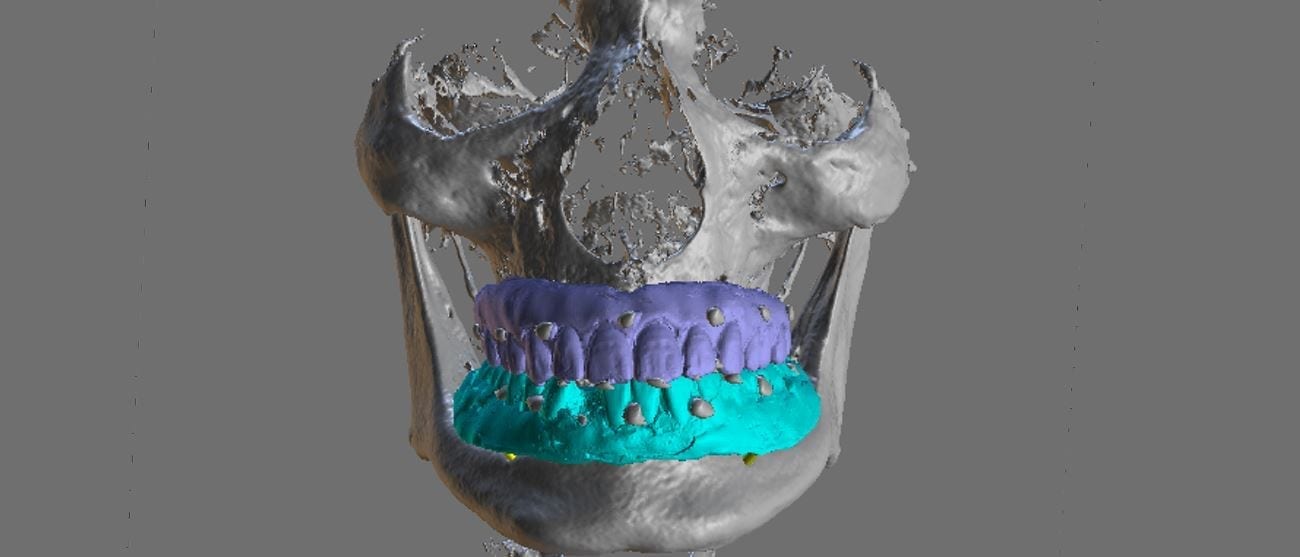
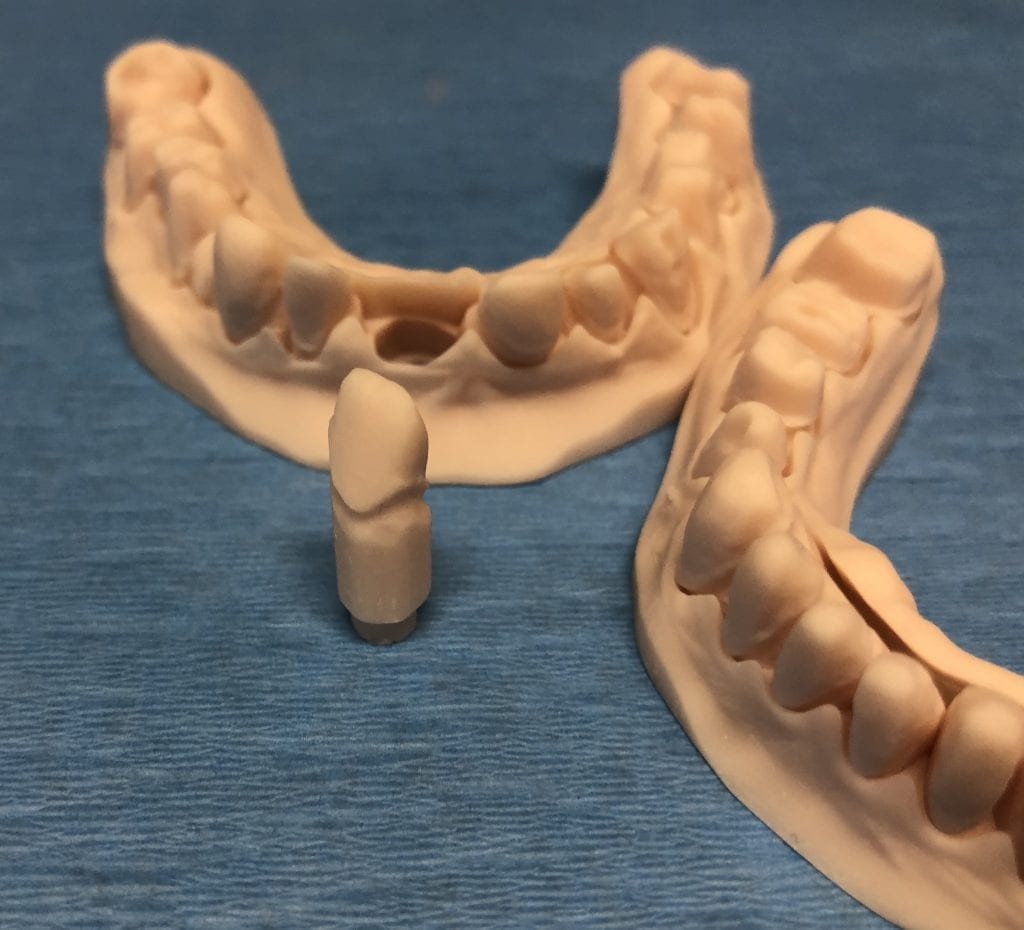
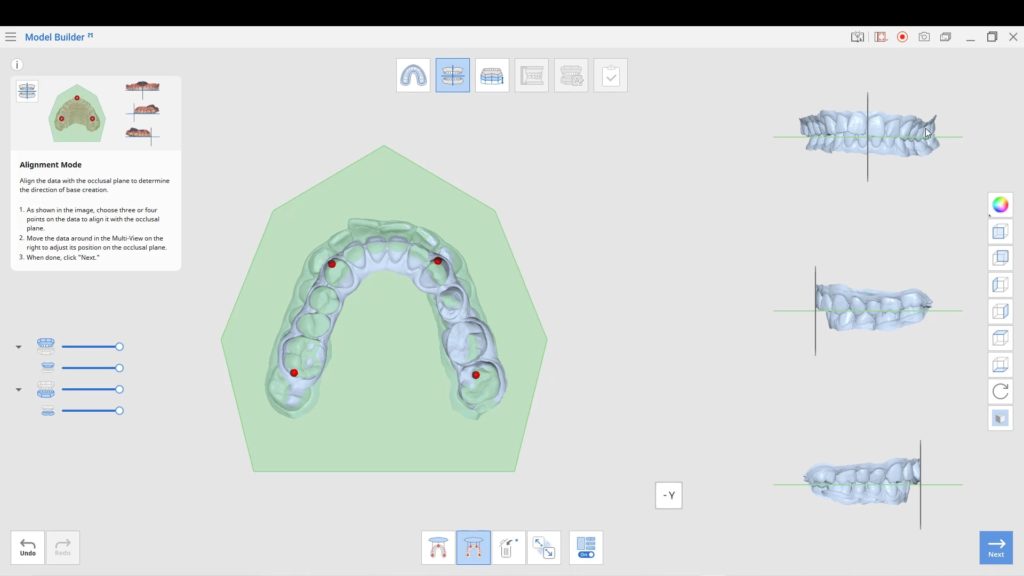
When planning for guided surgery in edentulous patients, it is important to have the final vertical dimension and tooth position determined. Ideally, a denture duplicate should be used with proper radiographic markers.
The traditional way was to embed radio-opaque material in the denture dupe, CT scan the patient with the denture dupes, and then CT scan the denture dupes themselves. Alternatively, you can scan the denture duplicates with a digital impression system. Here we used flowable composite and spread them through the wax set up and take a 3D X-ray of the patient. We then use those landmarks to merge the data sets between the digitize denture and the markers on the CT Scan
An important concept to keep in mind for these edentulous cases is that you actually need 2 models for each arch. One model is used for tooth positioning and implant design, and the other model is used for stent design. Essentially, you design the stent on the ridge, not the denture dupe

One of the biggest hassles in most software is to plan a guided surgery case when the tooth is still present in the arch. Some software will force you to part-take in pylon course handling, gymnastics maneuvers, musical chairs, and multiple imports and exports. The issue revolves around the placement of the sleeve / ring in the design step. Usually you are forced to manipulate the data in 3rd party software and then bring it back with the tooth virtually extracted.
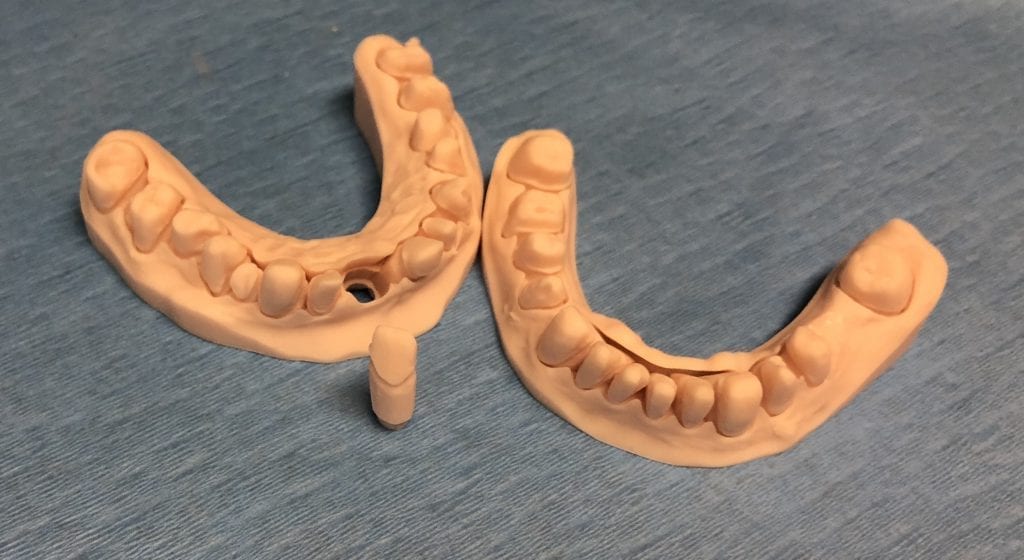
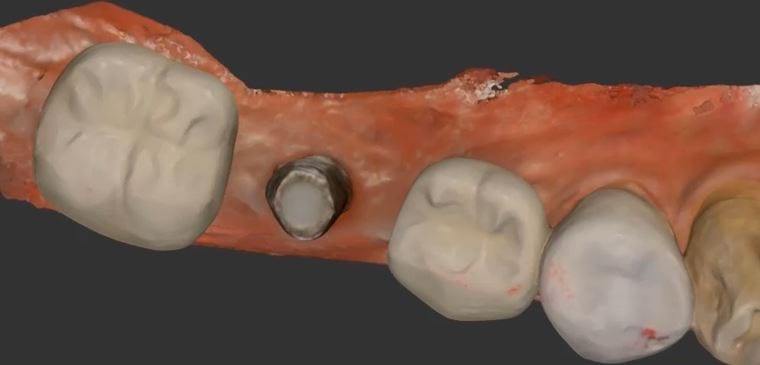
This article is about how you can scan the arches and export the STL, OBJ, or PLY data from the Medit i500 scanner. You can then clone the same case and alter it- namely, you can crop out the tooth that will be extracted in the future. This video shows you how the virtual extraction is performed.
[videopress kcCCj3hu permalink=”false” hd=”true” autoplay=”true”]
The multiple data sets are then imported in BlueSkyBio software where there are no limits to the number of models you can bring in. In the following video, you can see how the complete upper arch, the virtually extracted lateral arch model, and the opposing are brought in an merged with the CT Data.
The implant is planned for fully guided procedure and a surgical stent is manufactured on the model that has the virtual extraction. You cannot design a stent correctly with the tooth present in the equation. Open architecture and speedy results are the name of the game now with CAD/CAM dentistry. As you can see, these steps are super fast and easy with the open licensed Medit Scanner
[videopress 3L8BMPpD permalink=”false” hd=”true”]
Download the STL
Download the OBJ
Download the PLY
Download the BSB file and design along


You must be logged in to post a comment.